10 Jewerly Wire Ring Ideas
Introduction Handcrafted wire rings represent a versatile entry point into modern jewelry design, offering endless creative freedom through structural bending and stone wrapping techniques. Designing handmade wire rings allows makers to construct elegant, custom-fit accessories using minimal specialized equipment. Readers will discover ten unique wire ring concepts specifically developed for jewelry craft enthusiasts, emphasizing structural integrity, aesthetic appeal, and actionable fabrication steps. This guide details how to manipulate copper, silver, and brass wires into artistic bands, gemstone mounts, and sleek geometric shapes. By following these practical DIY strategies, beginners and experienced crafters alike can produce durable, custom jewelry pieces that align with current fashion aesthetics. Learning the fundamentals of wire manipulation transforms simple spool materials into sophisticated, wearable art suited for daily wear or thoughtful gifts.
Why This Idea Is Trending or Useful Wire wrapping has gained immense popularity across Pinterest inspiration boards because it offers an accessible approach to personalized home fashion without requiring expensive metal casting tools. The practical value of wire ring projects lies in their low barrier to entry and quick execution times, making them ideal for weekend creative sessions. From a modern design perspective, wire art blends intricate organic curves with minimalist style geometry, appealing to diverse fashion preferences. The strong DIY appeal encourages makers to upcycle beads, crystals, or discarded craft wire into custom accessories that express individual style. Because basic wire manipulation requires only a few handheld tools and straight forward wrapping methods, this craft remains highly beginner friendly. Designing wire rings provides an immediate sense of accomplishment while developing foundational metalworking skills used in advanced jewelry making.
Materials and Preparation Successful wire ring construction depends on proper material selection, accurate sizing, and careful preparation before starting any shaping process. Essential materials include round dead-soft or half-hard craft wire in various gauges, ranging from sturdy 18-gauge for structural shanks to fine 26-gauge for delicate wrapping. Crucial tools for this project consist of a steel ring mandrel, flush cutters, chain-nose pliers, round-nose pliers, nylon-jaw pliers, and a polishing cloth. Preparation begins by measuring finger dimensions accurately with a sizing sizer to determine the required wire length before cutting. Crafters must straighten raw wire using nylon-jaw pliers to eliminate kinks and ensure smooth wrapping around the mandrel. Planning out the wrap sequence and selecting complementary gemstone beads ensures a seamless fabrication workflow without wasting precious metal materials during construction.
Whimsical Rose Knot Ring Step-by-Step Guide Constructing a rose knot wire ring involves twisting multiple strands around a central point to mimic the natural spiral of flower petals. Begin by cutting a twelve-inch piece of 20-gauge dead-soft wire, folding it evenly in half to create a centered loop around a steel ring mandrel at your target size. Wrap the two loose wire ends around the mandrel base twice to form a solid, two-strand band foundation. Take the remaining tail ends and tightly coil them around each other directly over the center of the band, working in a flat clockwise spiral. Keep the wire taut against the mandrel surface while building the circular blossom shape to maintain structural tightness. Once the spiral reaches a half-inch diameter, tuck the loose wire ends beneath the rosette cluster using chain-nose pliers, pressing them flat against the inner band. Smooth all cut edges thoroughly with a fine jewelry file to prevent snagging on clothing during daily wear.
Raw Crystal Prong Wire Wrapped Band Execution Process Creating a raw crystal prong setting requires fashioning a secure wire cage that highlights the natural geometric facets of an uncut gemstone. Cut an eighteen-inch length of 20-gauge square wire and fold it into a narrow U-shape around a ring mandrel. Place a small, raw point crystal centrally between the parallel wires at the top of the mandrel curve. Using fine round-nose pliers, bend four vertical wire prongs upward around the corners of the stone, ensuring the base sits flush against the wire band foundation. Wrap a secondary piece of 26-gauge binding wire around the base joint to lock the vertical prongs securely into position. Carefully press each prong over the shoulders of the raw crystal using nylon-jaw pliers until the stone remains perfectly motionless within the custom frame. Trim any excess binding wire closely with flush cutters and file the ends smooth for a sleek, professional finish.
Interlocking Dual Wave Stacking Ring How to Create Building an interlocking dual wave stacking ring relies on forming two complementary serpentine curves that nest tightly against one another on the finger. Measure and cut two eight-inch lengths of 18-gauge half-hard wire, straightening both pieces with nylon-jaw pliers to remove any factory curvature. Place the first wire onto a steel ring mandrel and use round-nose pliers to create three gentle, alternating wave crests across the front profile. Wrap the wire ends around the back of the mandrel to complete a circular band, looping the tails around the side shanks to secure the size. Repeat this exact bending process on the second wire piece, ensuring the peak amplitudes mirror the first ring’s trough depth. File all terminal ends flat so the two individual rings slide together seamlessly without gaps. This elegant project creates a modern, layered visual effect that can be worn together or split across different fingers.
Minimalist Geometric Hexagon Ring Setup Method Forming a minimalist hexagon wire ring requires precise angular bends on a structural piece of wire to achieve a clean architectural shape. Cut a six-inch segment of 18-gauge square brass or sterling silver wire, marking six equal three-millimeter segments along the middle section using a fine-point permanent marker. Hold the wire firmly with flat-nose pliers at the first mark and create a sharp sixty-degree bend. Continue making precise sixty-degree interior bends at each subsequent mark until a complete six-sided hexagonal frame forms in the center of the wire strand. Wrap the two remaining straight ends around a ring mandrel in opposite directions to form the bottom half of the ring shank. Secure the ends by coiling them neatly around the base corners of the hexagon profile, trimming excess length with flush cutters. The resulting geometric piece showcases a modern design aesthetic with sharp lines and high structural stability.
Adjustable Spiral Swirl Thumb Ring How to Make An adjustable spiral swirl ring utilizes open-ended wire terminals that wrap around the finger, allowing easy size adjustments while delivering a vintage aesthetic. Cut a ten-inch piece of 16-gauge dead-soft copper wire, using round-nose pliers to grip one terminal tip firmly. Roll the tip inward to create a tight, flat two-tiered spiral disc, ensuring the coils lie perfectly flush against one another. Repeat this spiral rolling process on the opposite wire end, turning it in the reverse direction to create a balanced S-shaped wire preform. Center the straight middle section of the wire on a ring mandrel, shaping the shank into a smooth curve until the two decorative spirals overlap on top. Adjust the tension of the overlapping spirals so they sit comfortably flat against the upper finger surface. Lightly hammer the curved shank with a chasing hammer to harden the copper metal for long-lasting durability.
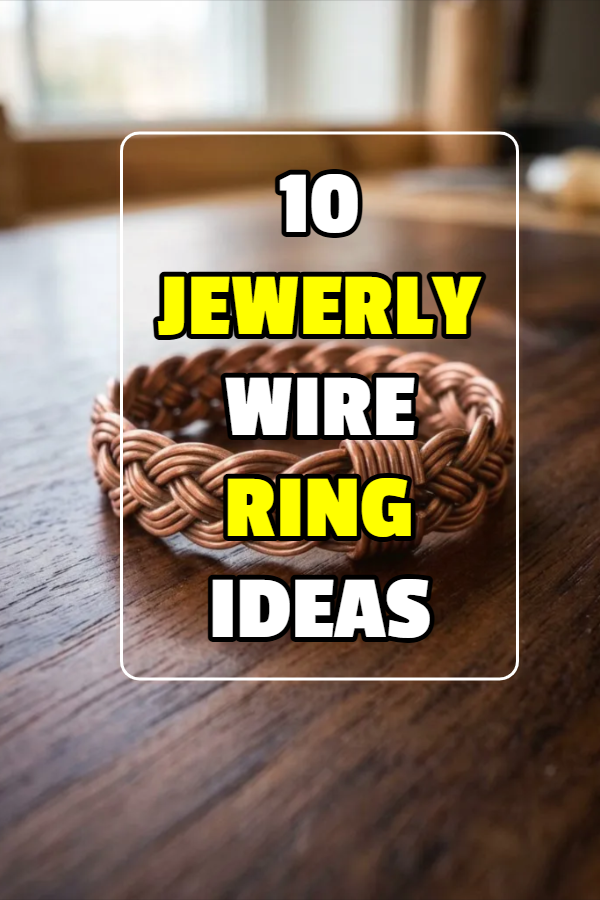
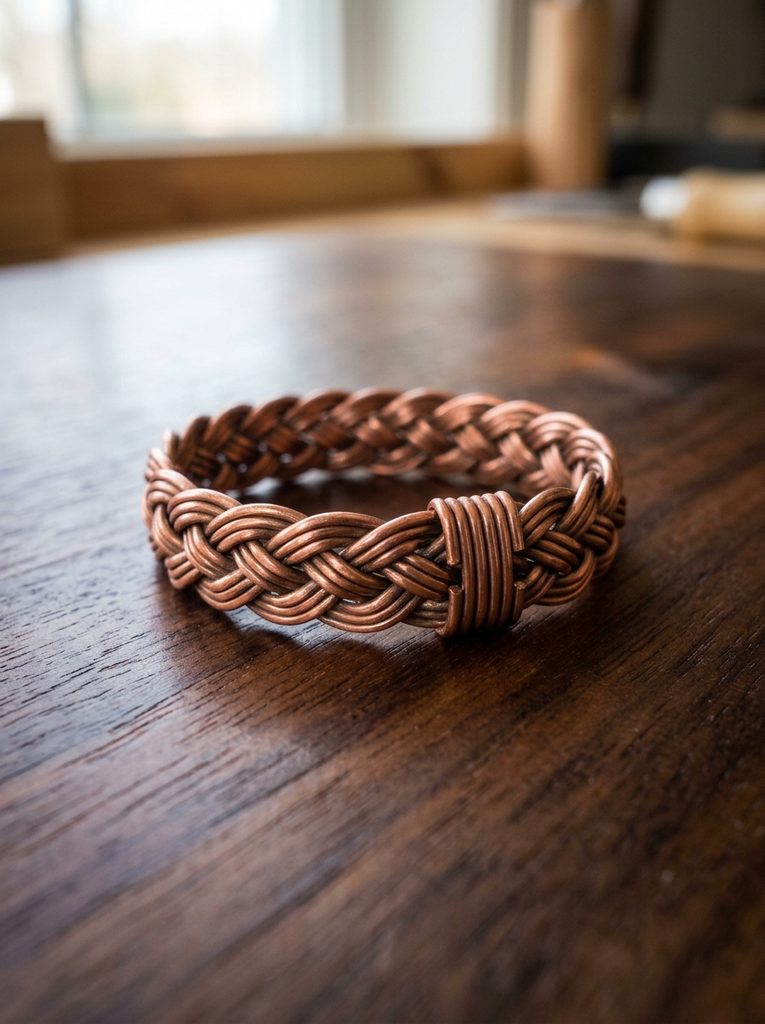
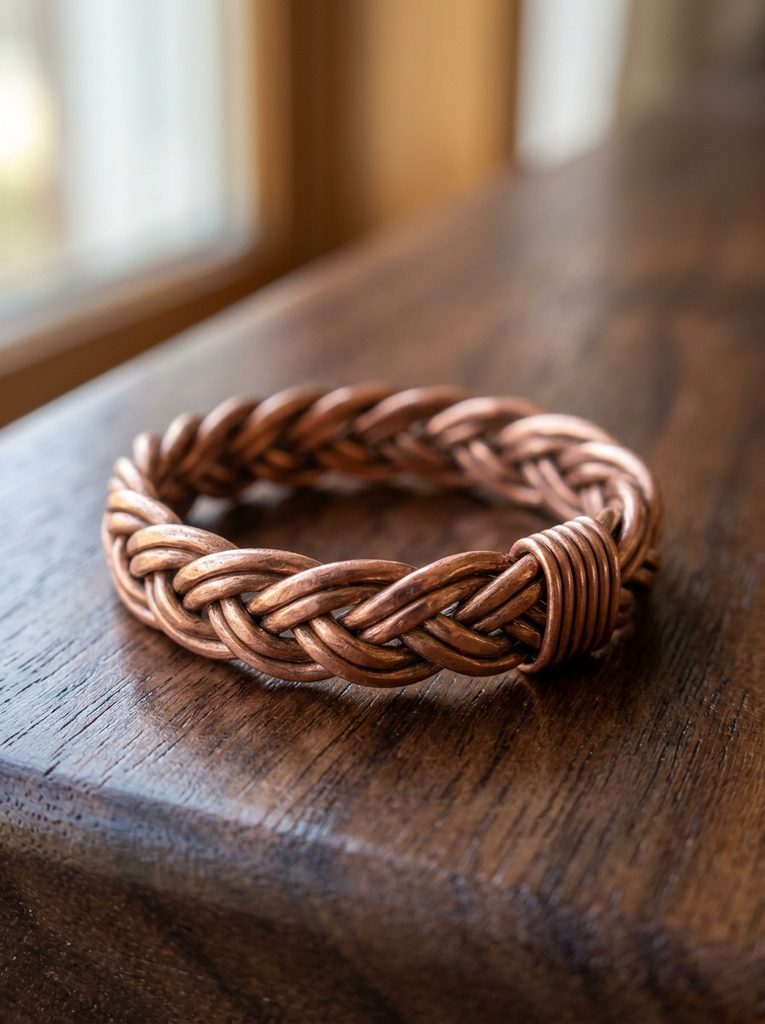
Braided Triple Strand Copper Band Execution Process Fabricating a braided triple strand band involves weaving three fine wires together to construct a textured, high-strength ring shank. Cut three eight-inch lengths of 20-gauge round copper wire and bind one end tightly inside a hand vise or clamping tool. Plait the three strands into a tight, uniform hair braid pattern, maintaining consistent tension across every crossover fold to ensure an even width throughout. Once the braided length matches your measured finger circumference, wrap the woven strip around a steel mandrel to shape the circular band profile. Secure the loose braid ends by wrapping a four-inch piece of 24-gauge wire tightly around both joint terminals, creating a solid wire band bridge. Trim all loose braid tips flat with flush cutters and press the binding coils smooth against the interior band using chain-nose pliers. The final braided band provides exceptional tactile texture and classic artisanal appeal.
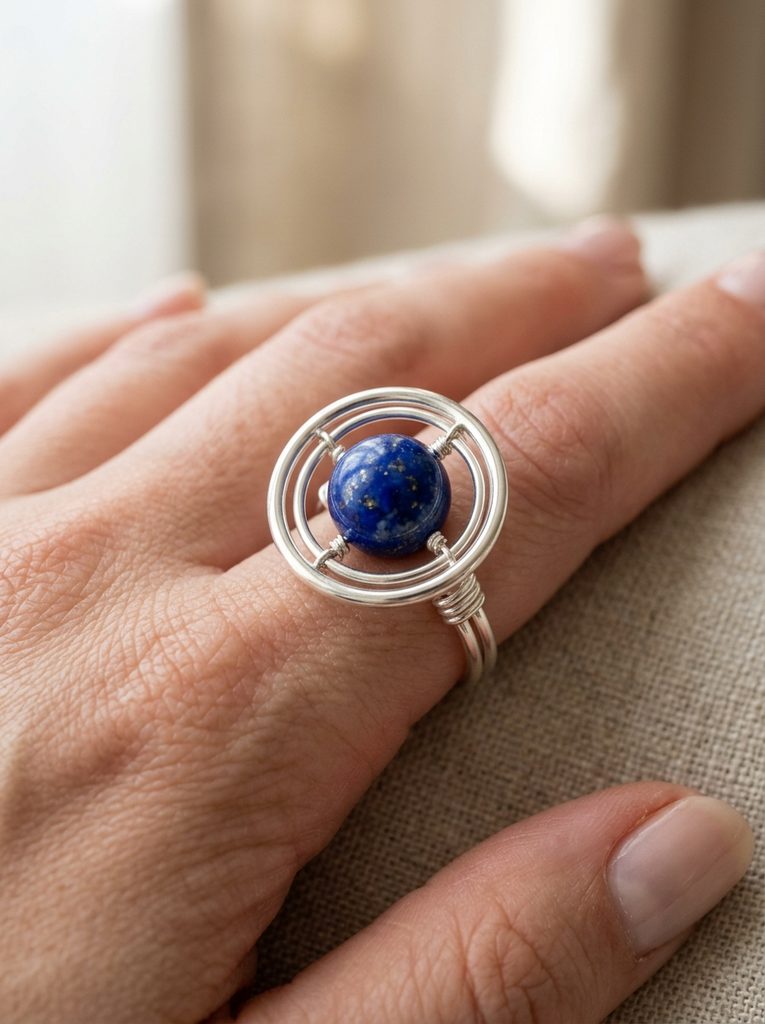
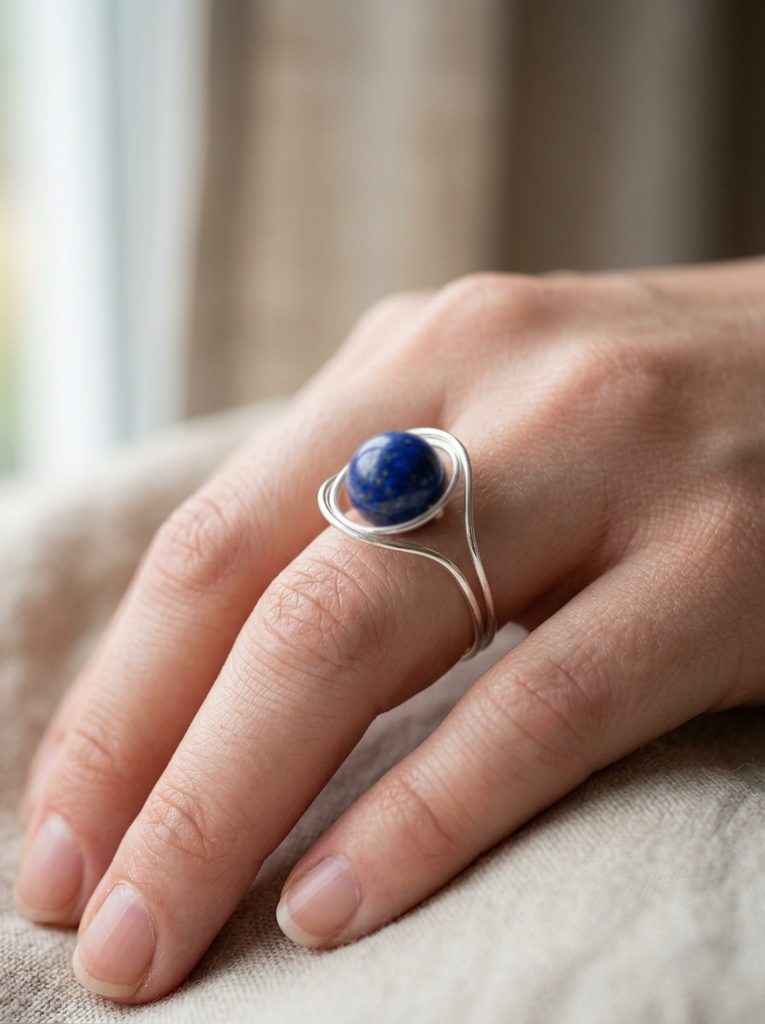
Floating Gemstone Bead Wire Ring Step-by-Step Guide Constructing a floating gemstone ring involves suspending a single pierced focal bead centrally within a structural wire frame without visible solder joints. Cut a twelve-inch length of 20-gauge wire and slide an eight-millimeter spherical gemstone bead onto the middle of the strand. Position the bead against the top mark of a ring mandrel and bend both wire tails downward around the mandrel to form a double-wire band. Cross the wire ends behind the mandrel, bring them back up to the front, and wrap them tightly around the wire base on either side of the gemstone. Create three tight security coils on the left and right sides of the bead anchor points using chain-nose pliers to hold the stone stationary. Trim any remaining wire tails flush against the outer band edges, filing them smooth to prevent skin irritation. This easy project highlights the natural beauty of the central bead within a clean, frame-like enclosure.
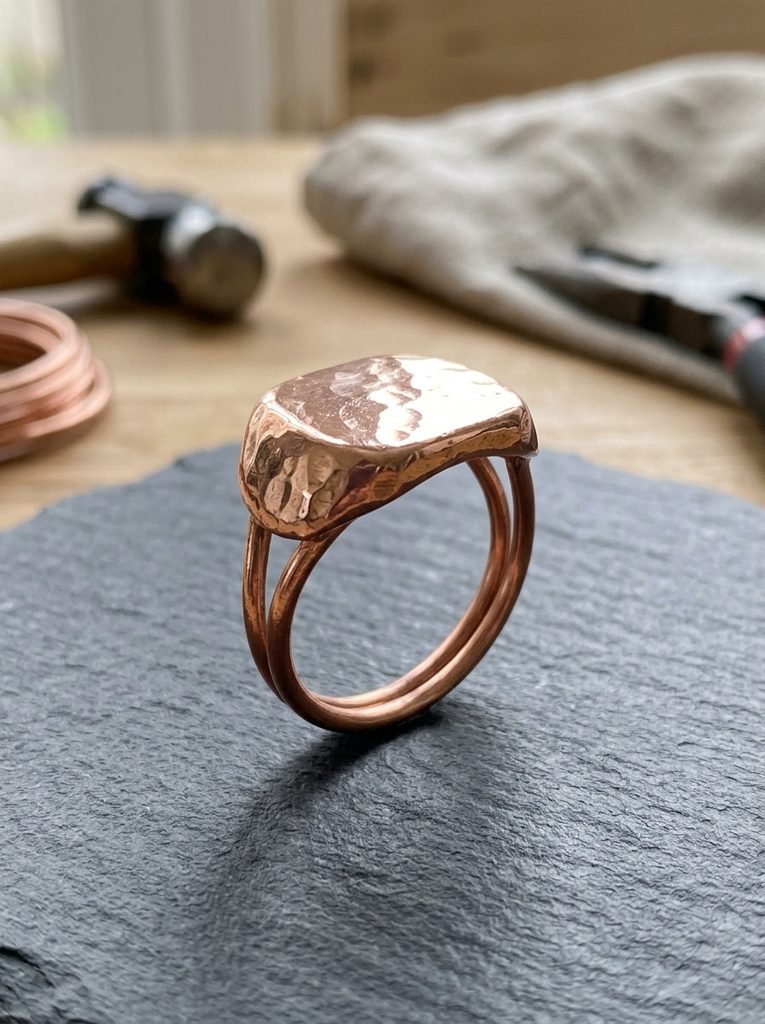
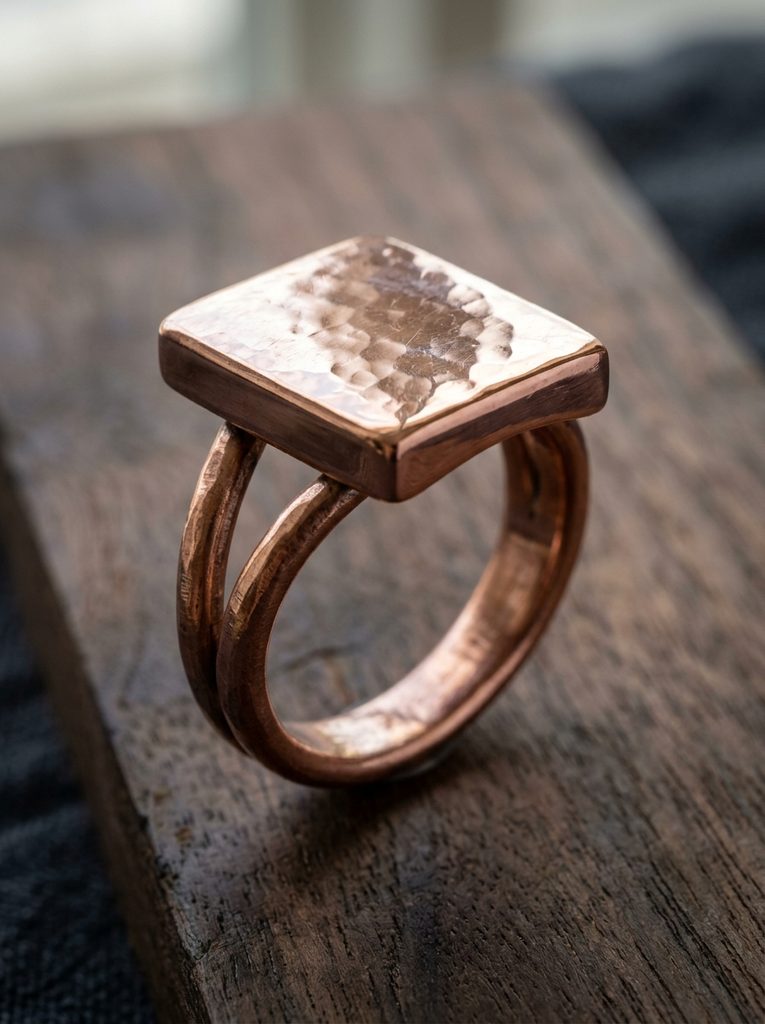
Hammered Flat Top Signet Style Ring Setup Method Creating a wire signet style ring combines wire shaping with cold-forging techniques to produce a flat, light-reflecting focal surface. Cut a seven-inch piece of heavy 14-gauge round aluminum or copper wire, placing the center portion onto a smooth steel bench block. Using the flat face of a planishing hammer, strike the central one-inch section of the wire repeatedly until it flattens into a wide, uniform rectangular platform. Bend the rounded tail ends of the wire downward around a ring mandrel to shape the lower finger loop. Cross the rounded ends at the bottom base of the ring, coiling them tightly back over the lower shank to lock the structure at your desired ring size. Sand the flattened top platform with fine-grit emery paper to remove surface marks, finishing with a polishing pad to produce a mirror-like sheen.
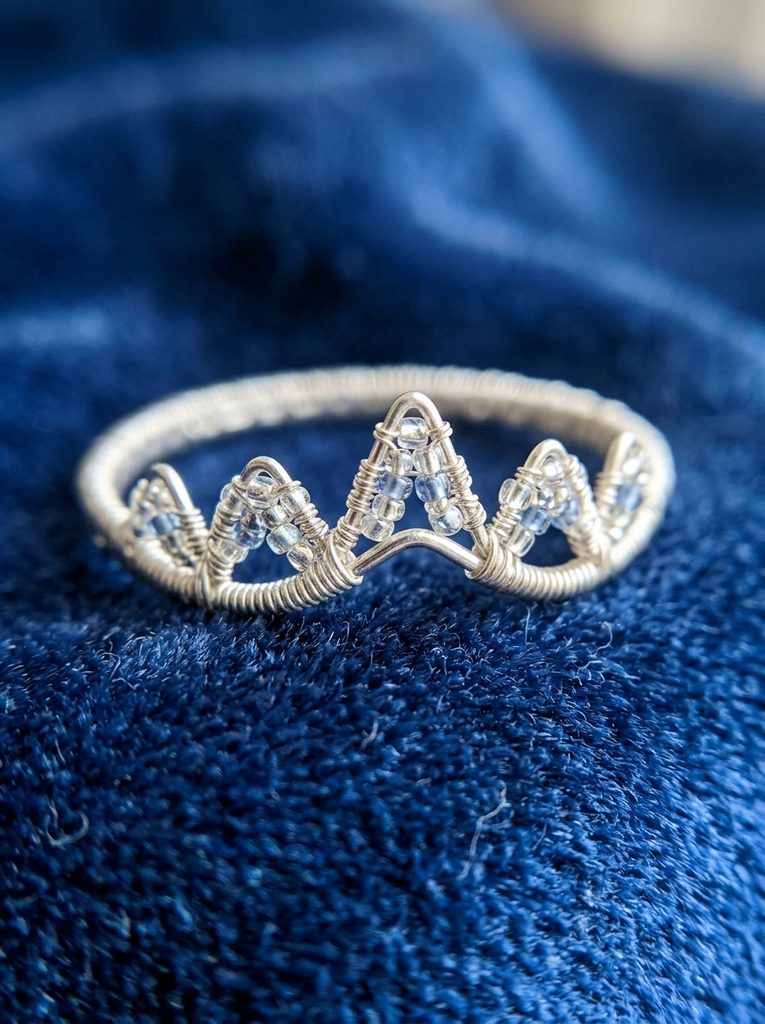
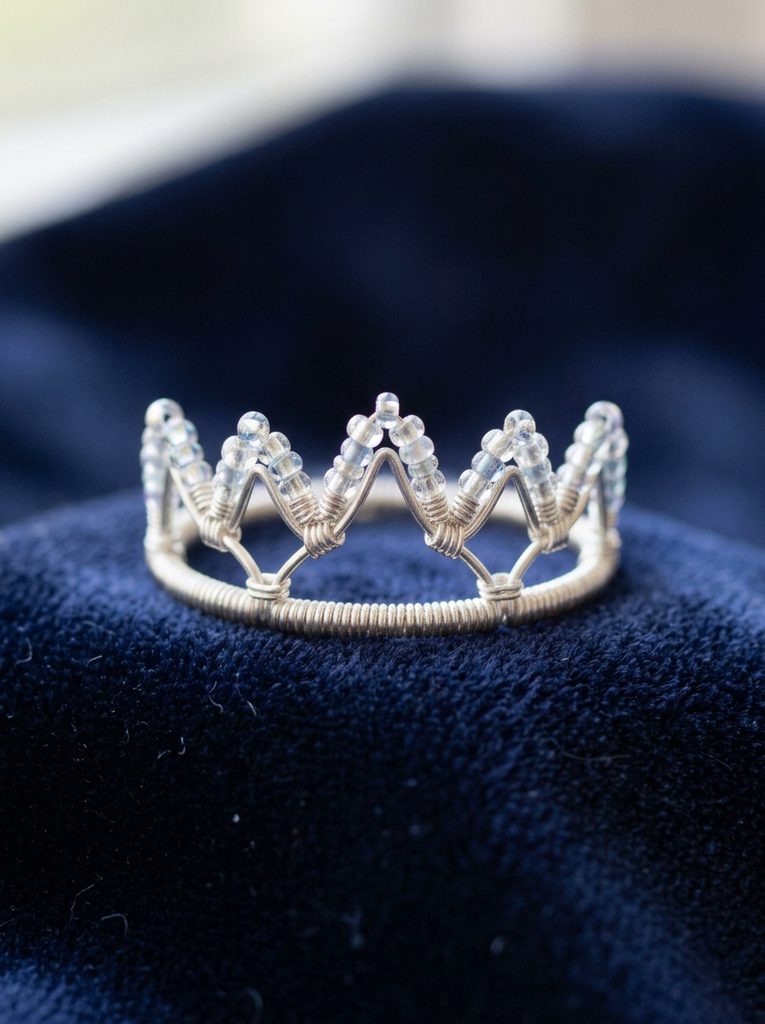
Delicate Wrapped Crown Tiara Ring How to Create Crafting a delicate crown tiara ring involves forming pointed wire loops that resemble tiny tiara peaks along the upper edge of the band. Cut a ten-inch piece of 20-gauge wire as the main frame and a two-foot length of 26-gauge wire for detailing. Bend the thicker frame wire around a ring mandrel to form a sturdy double-loop base band. Using round-nose pliers, bend five small, consecutive V-shaped peaks along the front arch of the outer band loop, making the central peak slightly taller than the rest. Anchor the thin 26-gauge wrapping wire to the base band and weave it under and over the tiara peaks, placing a small three-millimeter seed bead at the apex of each peak during the weave. Wrap the remaining thin wire tightly around the back shank to bind the double frame together permanently before trimming and filing the ends.
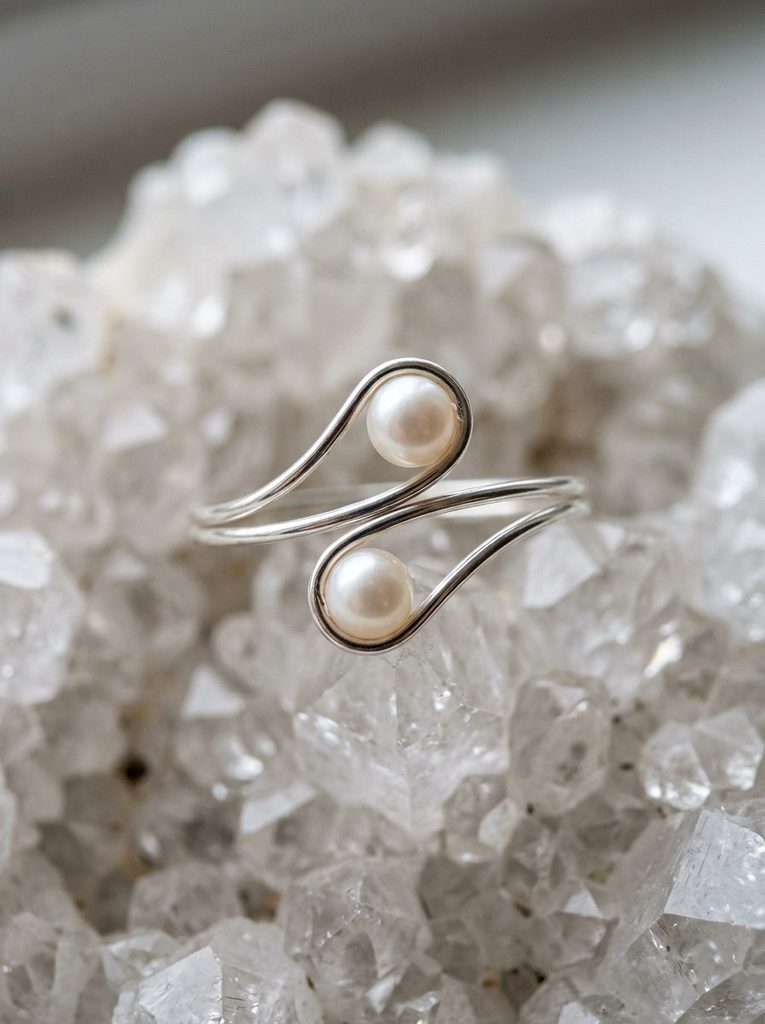
Double Loop Bypass Pearl Ring How to Make A double loop bypass ring features an open-top architecture where two ends of the wire cross past each other, holding offset pearl accents. Cut an eight-inch piece of 18-gauge wire and thread a small drilled freshwater pearl onto each terminal end. Use chain-nose pliers to make a tiny ninety-degree bend at the tip of each wire end, preventing the pearls from sliding off the frame. Center the wire against a ring mandrel and shape it into a circle, allowing the two pearl-adorned ends to pass one another on top of the finger without touching. Bend the offset ends into subtle, sweeping curves so one pearl rests slightly higher and further right than the other. Hammer the lower shank portion lightly on the mandrel to add structural rigidity while keeping the decorative bypass ends flexible enough for minor sizing adjustments.
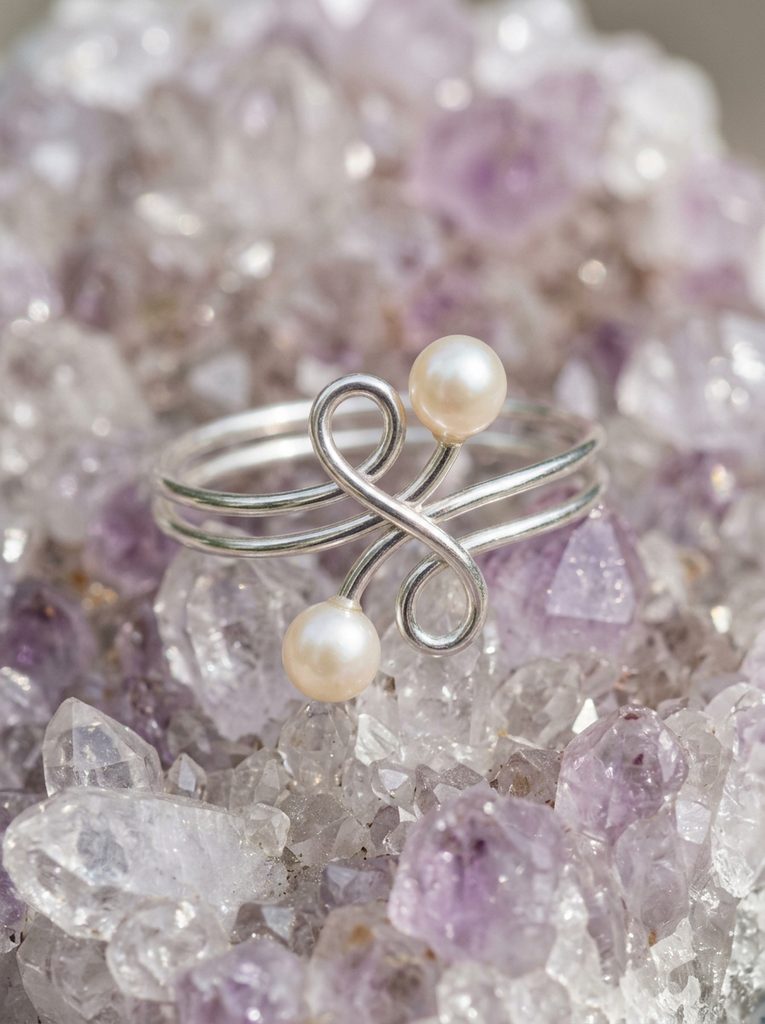
Common Beginner Mistakes and How to Avoid Them A frequent mistake when making wire rings is choosing the incorrect wire hardness or gauge for structural components. Using wire that is too soft causes the ring to bend out of shape during daily wear, while overly stiff wire makes precise shaping difficult. To prevent deformation, use half-hard wire for basic bands or work-harden soft wire by hammering or twisting it lightly. Another common error is failing to file cut wire ends, leaving sharp burrs that scratch skin or snag fabrics. Always inspect every cut edge using your fingertips and smooth rough points with a fine jewelry file or cup burr tool. Additionally, wrapping wire too tightly around a mandrel without accounting for wire thickness often results in rings that fit smaller than intended. Always size your base wire one half-size larger on the mandrel to guarantee an accurate final fit on the finger.
Practical Tips for Better Results Achieving professional results in wire ring fabrication requires mastering tool control and material handling techniques. Always use nylon-jaw pliers when straightening or bending visible wire sections to prevent leaving unsightly metallic tool marks on your craft project. When coiling fine wrapping wire around structural shanks, push the coils tightly together using flat-nose pliers to eliminate gaps and achieve a solid, uniform appearance. Apply a tiny drop of clear jewelry sealer or metal lacquer over finished copper and brass rings to prevent metal oxidation and skin discoloration. Keep your wire working area clean and work over a felt mat so small dropped beads or cut wire scraps do not get lost. Practicing basic loops and wraps on inexpensive copper wire before transitioning to sterling silver or gold-filled materials builds muscle memory and minimizes material waste.
Styling, Presentation, or Organization Ideas Organizing wire ring collections effectively protects delicate handiwork from crushing while presenting finished pieces attractively. Store individual wire rings inside soft velvet pouches or slotted ring display trays lined with acid-free fabric to prevent moisture exposure and tarnish. Group rings by metal type, gemstone style, or band thickness to simplify daily accessory coordination and project planning. For Pinterest-style photography or retail presentation, display wire rings on natural wooden ring cones, raw crystal clusters, or textured linen hands to highlight hand-crafted details. Label your storage slots with wire gauge and ring size information for quick identification during wear or sale packing. Implementing systematic jewelry organization keeps delicate custom wirework free from tangles, preserves metal shine, and extends the overall lifespan of every handmade creation.
Budget or Time Planning Managing resources for wire ring crafting involves selecting versatile supplies that maximize creative options without high initial costs. Allocate your initial budget toward high-use tools like quality flush cutters and smooth chain-nose pliers, which directly influence finished craftsmanship. Spools of copper or brass craft wire offer cost-effective options for practicing tutorials and testing new designs before purchasing silver wires. Most single wire ring projects require only fifteen to thirty minutes to execute once basic techniques are mastered, making them ideal for quick creative sessions. Plan project workflows by cutting and measuring multiple wire lengths simultaneously when creating stacked ring sets to save time. Setting aside structured practice blocks helps crafters refine wire wrapping speeds, reduce material waste, and build a diverse inventory of custom handmade rings efficiently.
Creative Expansion and Advanced Inspiration Once foundational wire ring techniques are mastered, crafters can expand their creative projects by incorporating complex mixed-metal combinations and advanced stone setting methods. Experiment with twisting contrasting wires—such as copper and sterling silver—together before shaping bands to produce striking two-tone pattern effects. Explore cold-connection techniques like riveting or intricate wire-weaving patterns borrowed from wire sculpture art to build elaborate focal statements. Integrate faceted cabochons using wire bezel cups, or combine wire wrapping with metal clay components to construct hybrid jewelry art. Evolving your technical skill set allows you to adapt trending ideas into personalized, high-end jewelry collections. Pushing creative boundaries through experimental wire manipulation ensures your handmade accessory designs remain unique, functional, and visually compelling across every new project.