10 Filet Crochet Patterns Beginner Ideas
Filet crochet offers an accessible entry point into decorative fiber arts by using basic stitches to construct intricate visual patterns. This technique relies primarily on double crochet stitches and chain spaces to create a grid of solid blocks and open mesh windows. By carefully placing these filled and open squares according to a simple chart, crafters can work up detailed pictorial designs ranging from floral motifs to geometric borders. In this guide, you will learn the fundamental mechanics of reading grid charts, selecting proper materials, and executing ten unique beginner friendly filet crochet patterns step by step. Mastering this vintage craft allows makers to craft custom home decor, delicate window treatments, and personalized gifts using low-cost supplies. Understanding how grid-based yarn work functions provides a practical foundation that builds confidence, improves stitch consistency, and expands overall crafting skills through straightforward, manageable creative project designs.
Why This Idea Is Trending or Useful
Grid-based yarn work continues to gain massive popularity across online design spaces due to its clean aesthetic and highly structured execution process. Modern home decor trends favor minimalist style accents, subtle texture, and handmade lace elements that add warmth without cluttering a living space. Filet crochet fits this design movement perfectly because it uses uniform geometric grids to render clear, graphic motifs. Crafters appreciate the technique because it requires only basic foundational stitches, making it an exceptionally beginner friendly DIY project. The straightforward nature of reading a chart allows makers to focus on rhythm and tension rather than complex stitch counting. Additionally, the low cost of cotton thread and standard hooks makes this an affordable art form with high visual impact. Whether creating small coasters or larger wall hangings, this versatile method offers timeless creative ideas that suit contemporary interiors effortlessly.
Materials and Preparation
Proper preparation ensures clean stitch definition and accurate proportions when executing grid-based lace work. Select smooth, non-fuzzy cotton thread or lightweight yarn, as textured fibers obscure the crisp boundaries between solid blocks and open mesh spaces. Pair your chosen thread with an appropriately sized steel or aluminum crochet hook, typically ranging from 1.5 mm to 3.5 mm depending on yarn weight. Gather basic notions including measuring tape, sharp scissors, a blunt tapestry needle for weaving ends, and blocking boards with stainless steel pins. Before beginning any pattern, calculate the starting chain length using the formula provided in the tutorial to ensure correct row alignment. Prepare a printed copy of your grid chart alongside a straight edge or row marker to keep place during execution. Proper initial planning prevents uneven edges and guarantees that the finished project lays completely flat.
1. Geometric Diamond Table Runner
Step-by-Step Guide
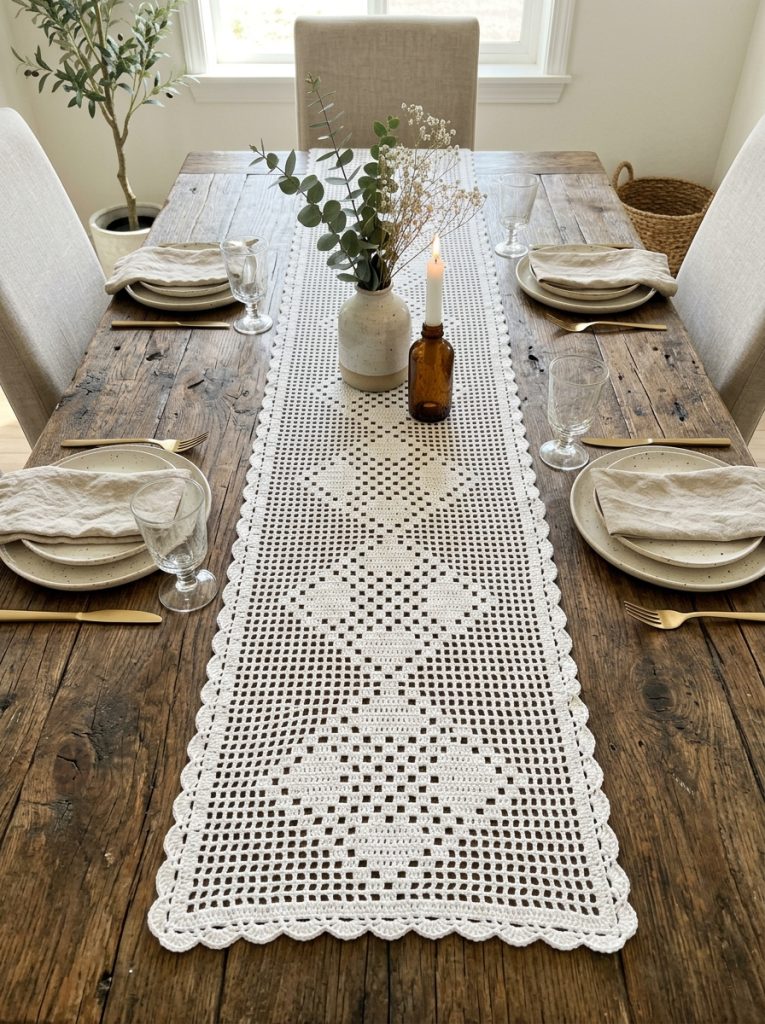
The geometric diamond table runner uses alternating solid and open mesh blocks to form a symmetrical center motif framed by crisp borders. Begin by making a foundational chain in multiples of three plus four additional chains to establish the first row offset. Work your first row by creating solid double crochet blocks along the edges while leaving open chain-two spaces across the middle section to set up the diamond base. As you progress row by row according to the chart, gradually increase the solid blocks toward the center to expand the diamond shape, then reverse the pattern to decrease it back to a single point. Maintain uniform thread tension throughout execution to prevent the open mesh squares from warping or slanting sideways. Once the full length is complete, finish the perimeter with a single row of compact single crochet stitches to stabilize the outer borders before washing and blocking the runner flat.
2. Minimalist Botanical Leaf Coaster Set
How to Create
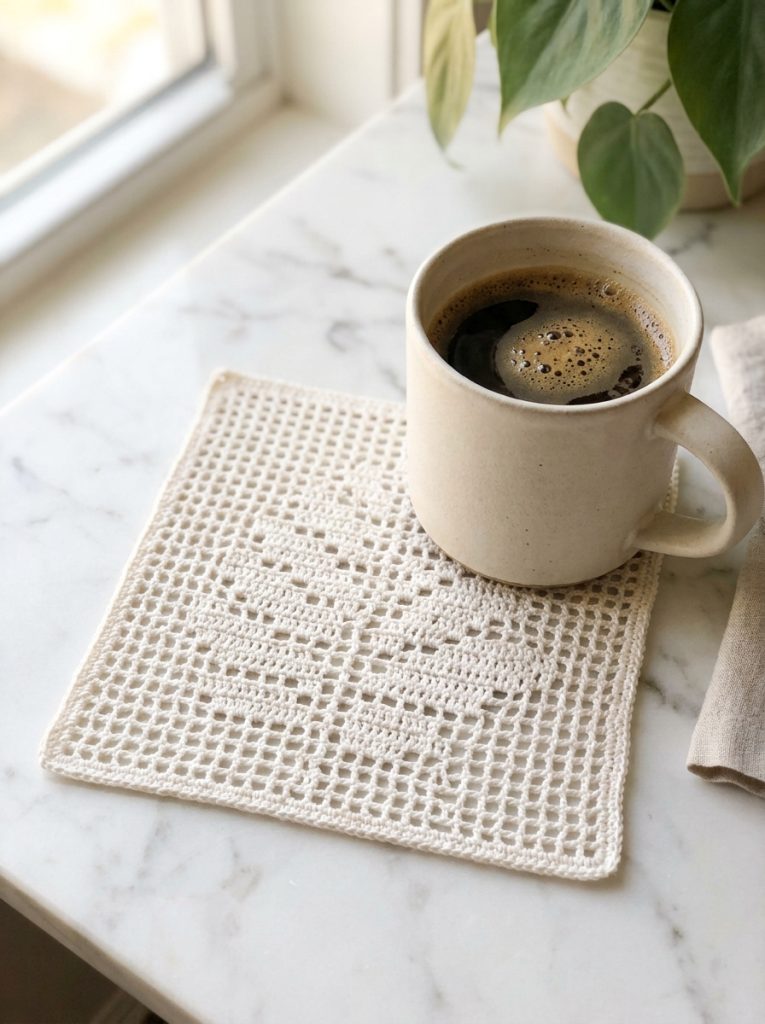
Creating a botanical leaf coaster set involves working small square grids featuring a simple stylized leaf silhouette in solid stitching against an open lace background. Start by chaining twenty-two stitches using lightweight size ten cotton thread and a 1.75 mm steel hook, establishing a base row of seven total grid blocks. Work the first two rows in plain open mesh by alternating double crochet stitches and chain-two spaces to form a clean bottom border. On row three, introduce the leaf stem by replacing the middle open space with a solid block composed of three consecutive double crochets. Continue following the grid chart up through the middle rows, expanding the solid blocks outward to shape the leaf body before tapering the stitches back to form the top point. Finish each coaster with a neat picot edging along all four sides to add structural stability and refined visual detail to your table setup.
3. Classic Heart Framed Wall Hanging
Execution Process
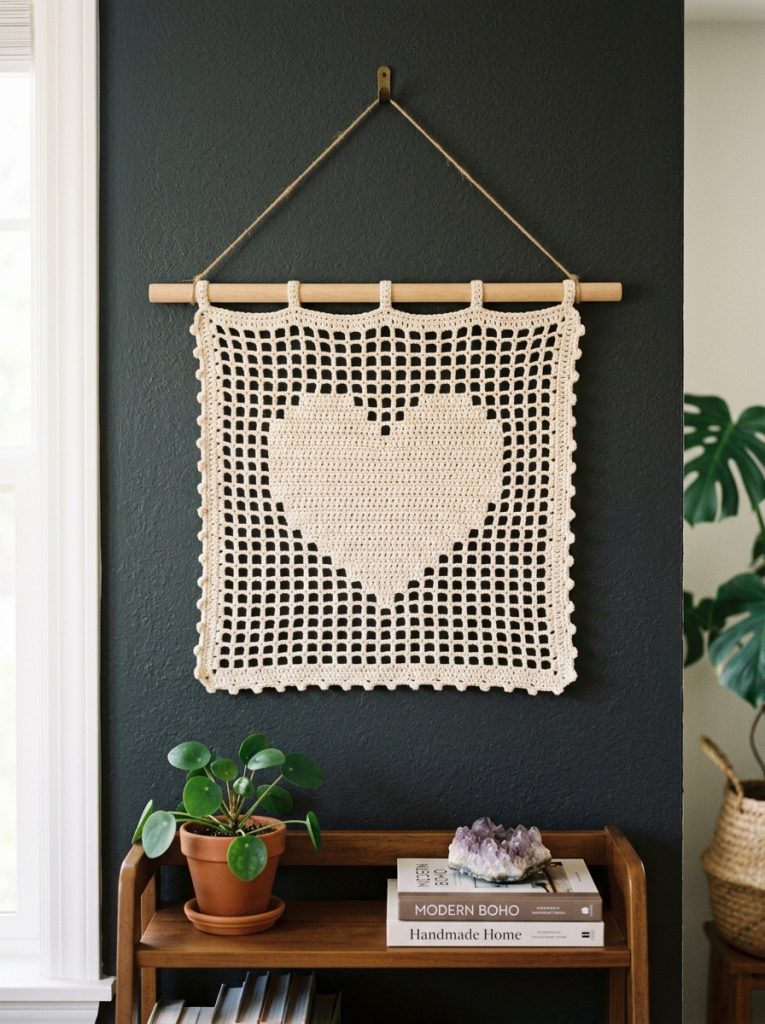
The classic heart wall hanging centers a bold solid heart graphic inside a airy frame made of open mesh squares. Construct this piece from the bottom up by forming a foundation chain of thirty-four stitches, which yields eleven grid spaces across the width. Work three complete rows of open mesh to establish a sturdy lower border before initiating the base point of the heart pattern in row four. Build the heart shape symmetrically by filling adjacent open spaces with double crochet stitches on subsequent rows, carefully monitoring stitch count to keep the lobes perfectly proportioned. Once the upper curves of the heart are finalized, execute three additional rows of plain open mesh to match the bottom border. Slotted wood dowels can be inserted through the top row of mesh spaces to create a functional hanging rod, providing an easy method for displaying the finished cotton lace panel on any wall space.
4. Vintage Honeycomb Kitchen Towel Border
Setup Method
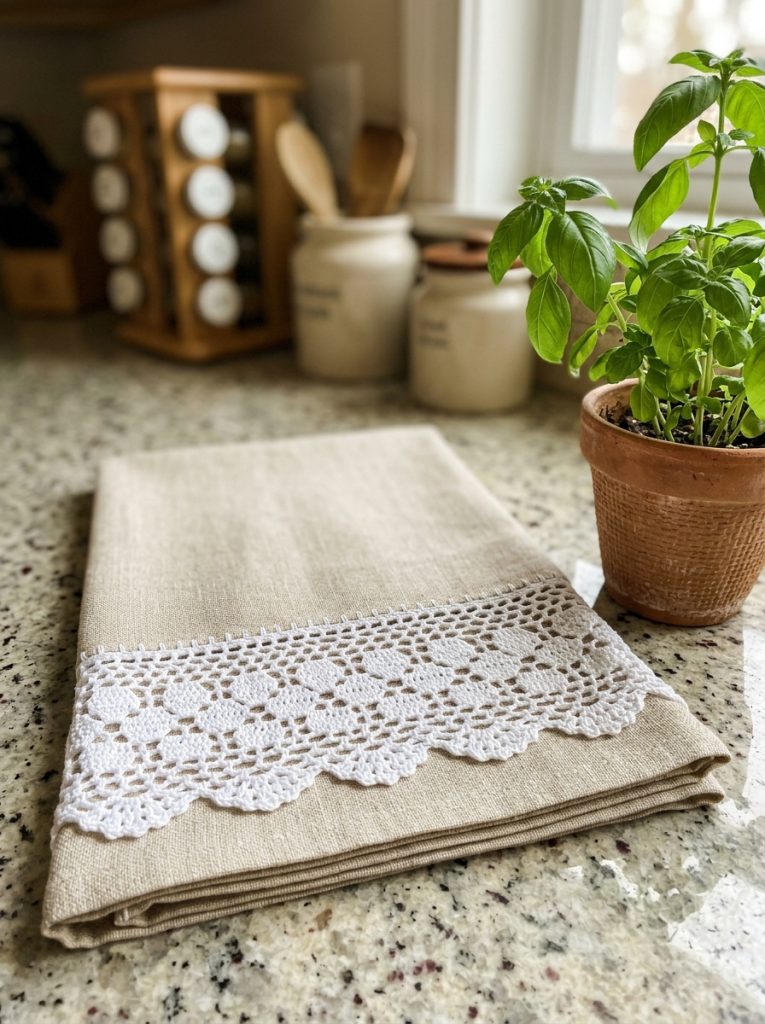
Adding a filet honeycomb border to plain linen kitchen towels elevates basic household items into customized decorative pieces. Begin by crocheting a foundation chain equal to the total width of your towel, ensuring the total chain count divides evenly by three plus one stitch for turning. Work the first row in solid double crochet to anchor the edging securely to the fabric seam. The second row introduces the honeycomb motif by alternating two open mesh spaces with one solid block across the entire width. On the subsequent row, offset the solid blocks by one grid space to create the staggered, hexagonal appearance characteristic of natural honeycomb patterns. Repeat this two-row grid rotation until the lace border reaches your desired depth, usually between two to three inches. Finish the piece with a slip stitch join along the top edge, then neatly stitch the crocheted band to the towel hem using a tapestry needle.
5. Architectural Monogram Window Valance
How to Make
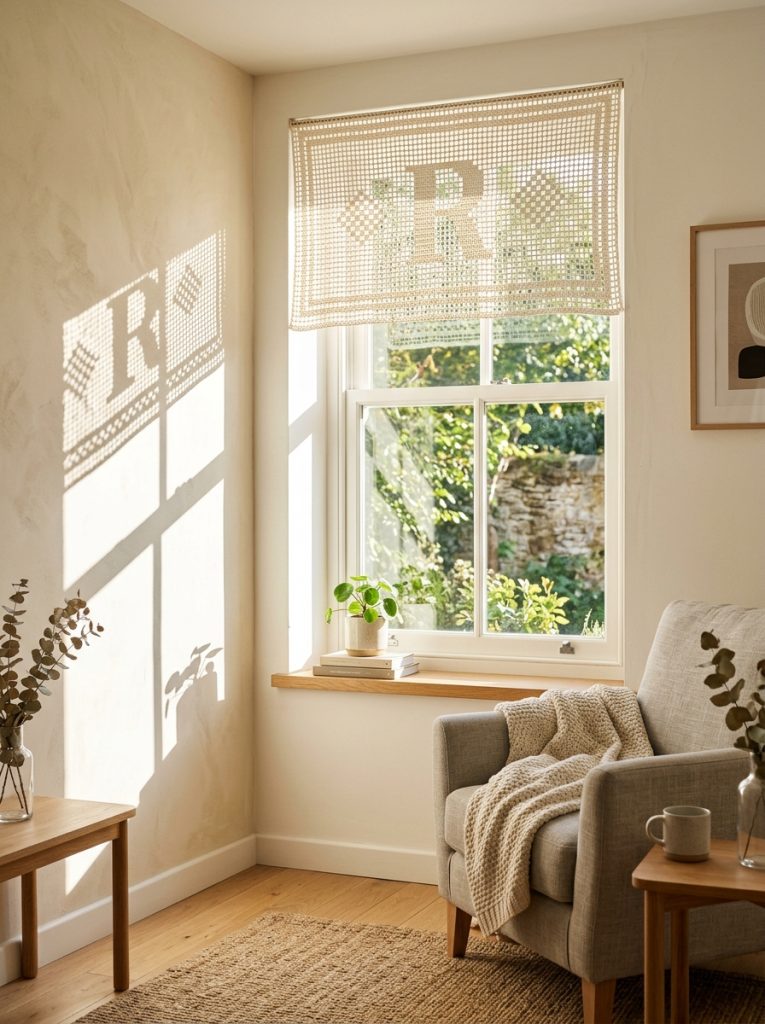
An architectural monogram valance uses custom letter grids to create personalized window treatments that diffuse natural sunlight beautifully. Plan your design on graph paper beforehand, converting your chosen initial into a grid layout of solid blocks surrounded by transparent mesh windows. Calculate your starting chain by multiplying your planned grid columns by three, adding five chains for the first turning double crochet space. Work the entire width in continuous horizontal rows, keeping your double crochet stitches exceptionally tall and straight to maintain square grid proportion throughout the panel. Fill in the letter section systematically using three solid double crochets per chart block while keeping the surrounding background completely open. Upon reaching the top row, create reinforced loop spaces by chaining six and anchoring back into every third block, forming integrated casing loops that slide directly onto standard curtain rods without requiring extra hardware installation.
6. Abstract Sunrise Decorative Pillow Cover
Setup Method
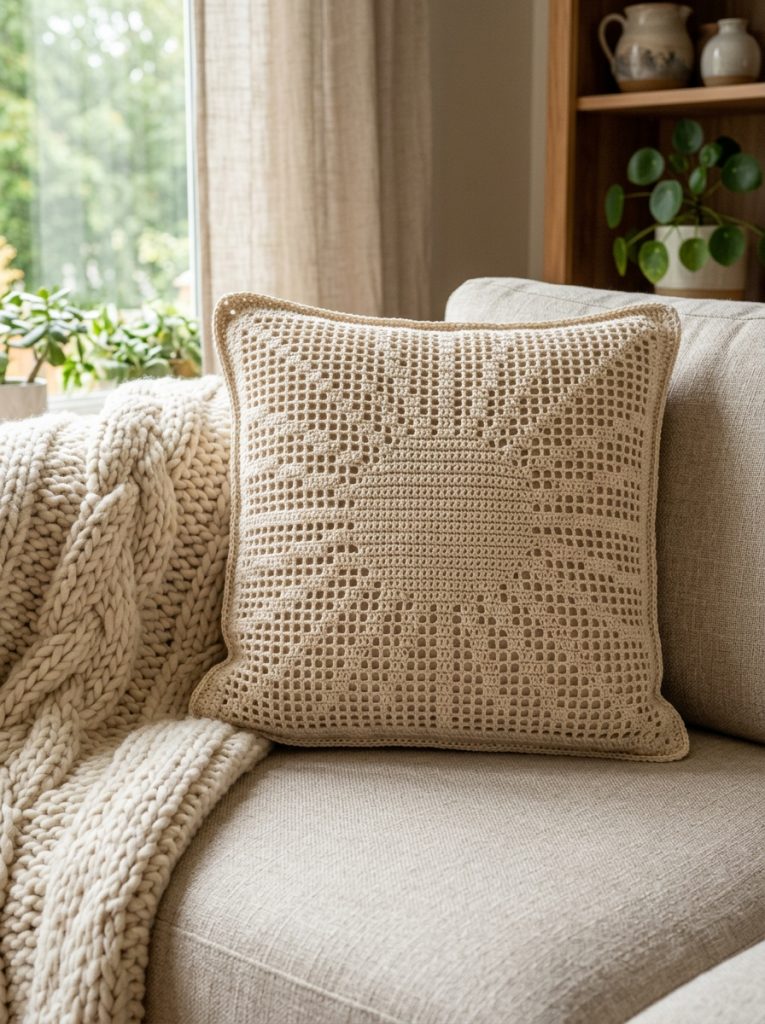
This abstract sunrise pillow cover relies on expanding semicircular rows of solid stitches to mimic rays radiating across an open mesh canvas. Begin the project with a foundational chain long enough to match the width of a standard square pillow form, typically around forty-five chains for a twelve-inch cover. Work the base rows in dense, solid double crochet blocks to represent the horizon line across the lower third of the pattern chart. Transition into the sunrise graphic by working open mesh spaces on the outer edges while clustering solid double crochet blocks toward the center to build the sun dome. Extend narrow lines of solid blocks outward in diagonal steps across upper rows to represent clean, stylized light rays breaking through the open background mesh. Once both front and back panels are completed, align the edges together and join them using a sturdy single crochet seam around three sides before inserting the cushion insert.
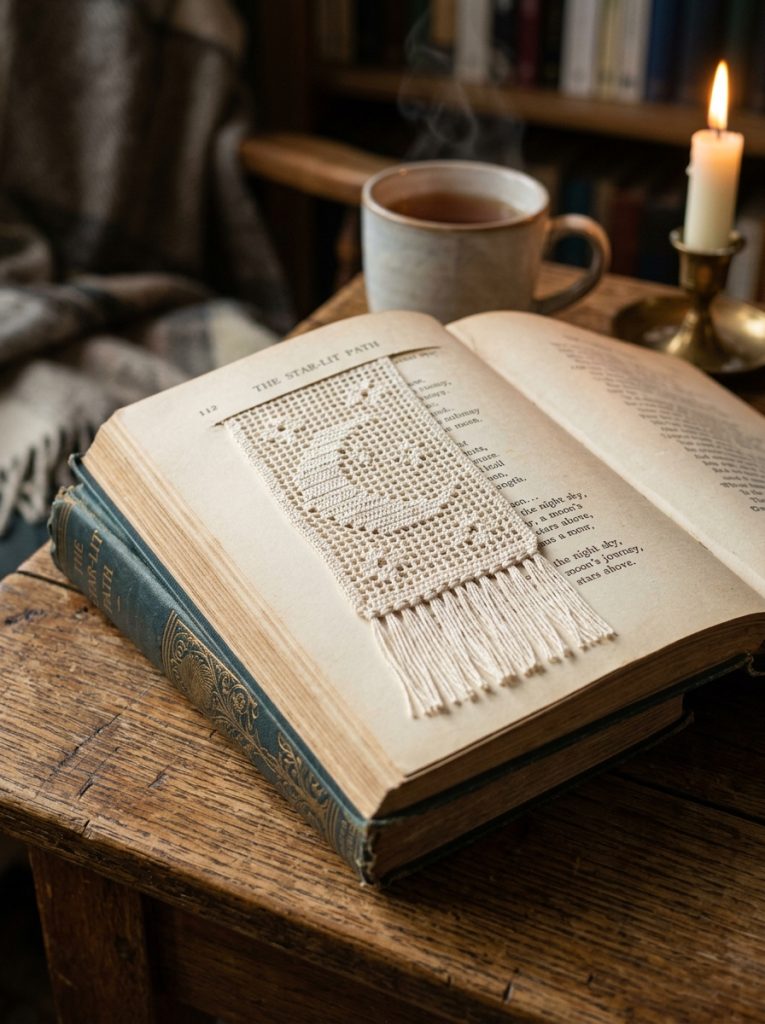
7. Crescent Moon Bookmarks with Fringe
Step-by-Step Guide
Filet crochet crescent moon bookmarks are fast, functional projects ideal for practicing chart reading on a small, manageable scale. Using fine lace weight thread and a small steel hook, chain sixteen stitches to create a compact foundation containing exactly five grid blocks across. Begin row one with open mesh spaces, then introduce the inner curve of the crescent moon on row two by placing a single solid block on the far right edge. Shift the placement of solid blocks progressively toward the middle rows to form the smooth sweeping arc of the moon silhouette before tapering back down at the top. The surrounding open mesh allows book pages to show through the delicate thread work while keeping the finished marker thin enough not to damage book bindings. Complete the bookmark by securing the top thread, then attach several four-inch strands of matching thread to the bottom mesh row, brushing them flat to form a tidy fringe.
8. Modern Lattice Candle Sleeve
How to Create
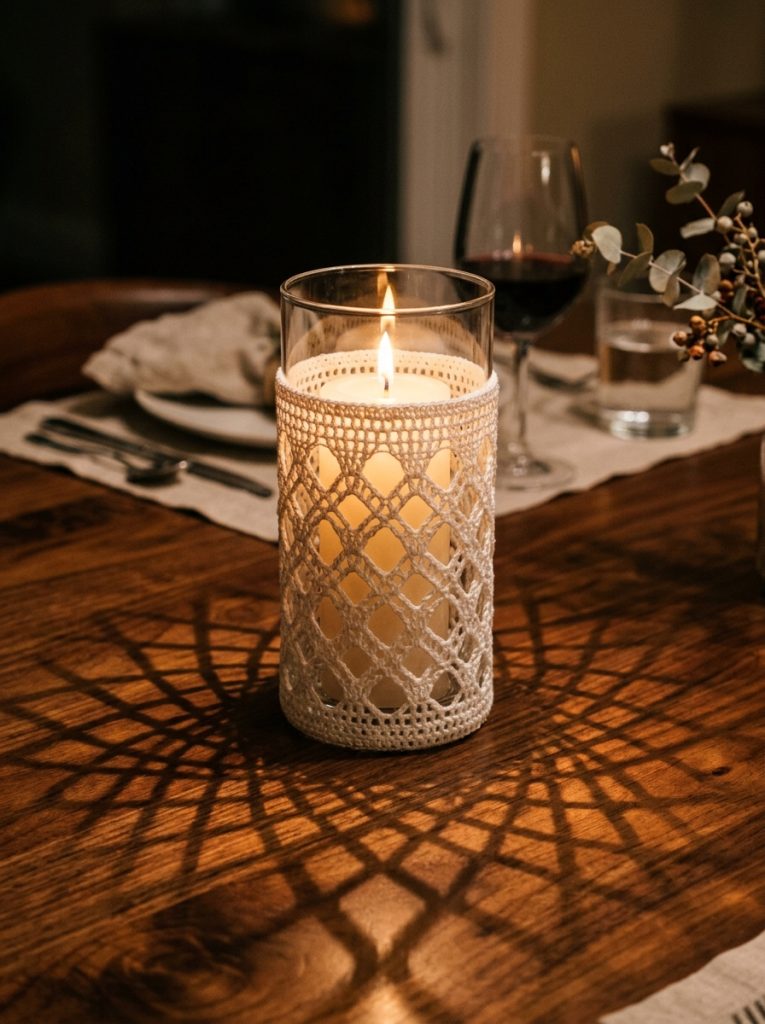
A modern lattice candle sleeve wraps plain glass cylinder vases in structured geometric lace that casts intricate shadow patterns when lit. Measure the circumference of your glass vessel precisely and crochet a foundation chain that fits snug around the glass without overstretching the thread. Join the foundation chain into a continuous ring with a slip stitch, taking care not to twist the chain before starting the first row. Work in continuous spiral rounds or joined rows, creating an alternating pattern of two solid blocks and two open mesh spaces to build a repeating diamond lattice grid. Maintain firm stitch tension so the sleeve stays securely fitted around the glass surface without sliding down over time. Continue working the grid pattern upward until the crochet sleeve matches the height of the cylinder vase. Fasten off your thread, weave in all loose ends thoroughly along the interior side, and slide the finished sleeve onto the glass.
9. Chevron Edge Dining Placemats
Execution Process
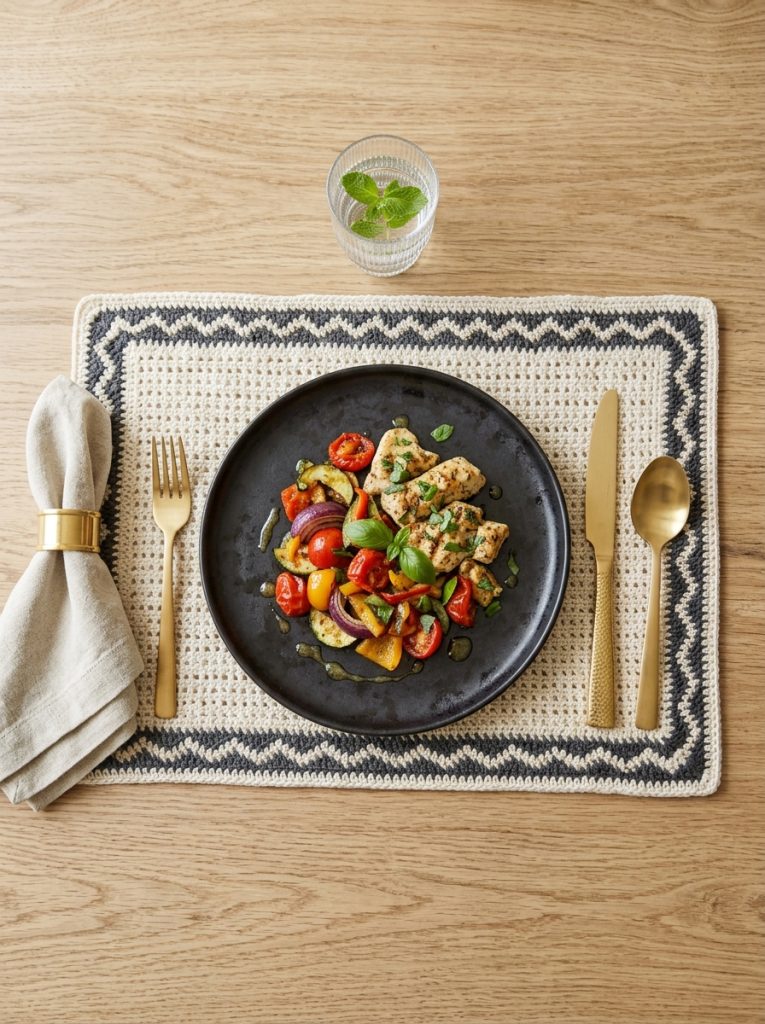
Chevron edge dining placemats combine angled solid zigzag lines with airy mesh panels to form durable, washable table settings. Start by creating a wide foundation chain of sixty-seven stitches using medium weight size five crochet cotton to provide adequate thickness and structure for dining use. The lower edge begins with a solid chevron border created by working increases and decreases at regular five-block intervals across the row length. As you work upward, alternate rows of open mesh with thin two-block chevron bands made of solid double crochet stitches to form an eye-catching geometric rhythm. The structured cotton thread protects wood tabletops from heat while providing an attractive textured base for dinnerware. Complete the top edge by mirroring the initial chevron angles worked at the bottom, ensuring the placemat remains completely symmetrical. Block the finished placemats thoroughly using steam or wet blocking methods to sharpen the outer points and edges.
10. Starburst Motif Square Potholder
How to Make
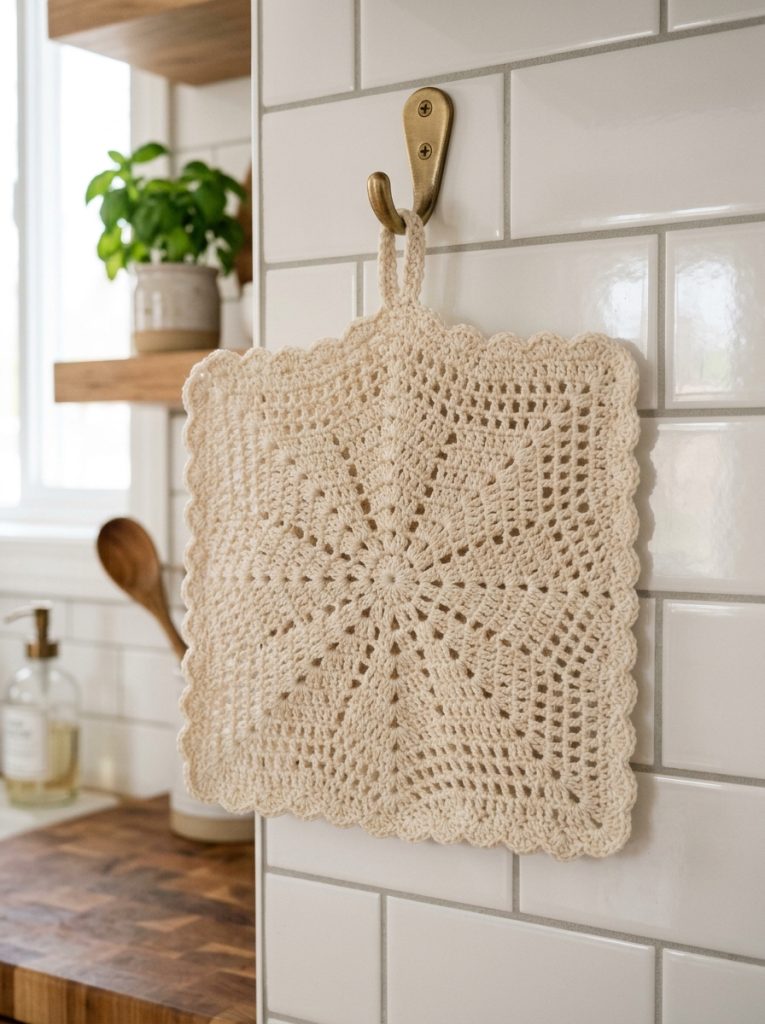
The starburst motif square potholder uses a thick double-layered filet grid construction to create a practical, heat-resistant kitchen accessory. Begin by crocheting two identical square panels featuring a stylized eight-point star built from solid blocks situated inside an open mesh framework. Work each panel using thick, unmercerized natural cotton yarn and a 3.5 mm hook to ensure optimal thermal insulation and flexibility. The central star graphic expands outward from a single center block on row four, branching diagonally across subsequent rows using step-down block placement techniques. Once both star panels are complete, stack them with their wrong sides facing inward to create a double-thick layer that traps air between the mesh spaces. Single crochet around the outer perimeter through both layers simultaneously to bind them together securely, adding a small chain-ten loop at one corner before finishing to allow easy hanging on kitchen wall hooks.
Common Beginner Mistakes and How to Avoid Them
Uneven grid proportions represent the most frequent challenge for beginners attempting filet crochet patterns. Standard double crochet stitches are often slightly taller than the width of two chain stitches, causing square grid designs to appear stretched vertically. To solve this problem, focus on pulling up shorter loops during the first phase of each double crochet stitch, or test an alternative extended stitch if your natural tension runs tight. Another common mistake involves miscounting chain spaces between solid blocks, which shifts the entire chart alignment sideways and ruins the intended graphic shape. Always count your stitches at the end of every row, using stitch markers or a physical ruler placed across your printed paper chart to track progress accurately. Finally, avoid using overly soft or elastic yarns that lack structural memory, as they cause open mesh windows to collapse and lose their crisp geometric definition after handling.
Practical Tips for Better Results
Achieving professional results in filet yarn work requires attention to technical details before, during, and after stitching. Select mercerized cotton thread whenever possible, as its tight twist and smooth finish enhance stitch clarity while resisting splitting during rapid hook movement. Keep a consistent rhythm when working chain spaces, making sure not to make turning chains excessively loose, which creates unsightly bulges along the outer edges of your work. When transitioning from an open mesh space to a solid block, insert your hook directly into the top loops of the double crochet below rather than around the entire chain space to keep vertical grid lines perfectly straight. Always block your finished pieces upon completion by pinning them firmly onto a grid board, dampening the fibers with a fine mist water spray, and allowing them to dry completely to set the final shape permanently.
Styling, Presentation, or Organization Ideas
Integrating handmade filet lace pieces into modern home environments requires thoughtful visual balance and styling techniques. Display delicate wall hangings against dark or brightly painted accent walls where the contrasting backdrop highlights the open mesh work and precise graphic lines. Frame smaller pieces like monogram initials or intricate motif squares inside glass floating frames, allowing light to pass through the transparent lace construction. On wood tables or sideboard cabinets, layer geometric runners over plain linen tablecloths to combine tactile textures while keeping the table layout sophisticated and uncluttered. Group smaller matching items, such as botanical coasters or candle sleeves, into coordinated sets tied together with neutral cotton cord for gifting or neat shelf storage. Rotating seasonal motifs throughout the year offers an easy way to refresh room decor using compact, handmade cotton accents that take up minimal storage space when folded.
Budget or Time Planning
Filet crochet stands out as an exceptionally budget friendly craft, requiring minimal financial investment to produce striking home accents. A single standard ball of size ten crochet cotton provides several thousand yards of thread, which is sufficient to complete multiple coasters, bookmarks, or small wall hangings for just a few dollars. Larger items such as table runners or window valances consume slightly more material but remain highly economical compared to store-bought lace decor. From a time perspective, small beginner projects like bookmarks or square coasters require only one to two hours of focused work from start to finish. Medium-sized panels generally take four to six hours, making them manageable weekend creative ideas. Planning your time by working a set number of chart rows each day prevents wrist strain and keeps complex projects progressing smoothly toward completion without feeling overwhelming for novice crafters.
Creative Expansion and Advanced Inspiration
Once you feel comfortable executing basic grid designs, numerous paths exist for expanding your skills into complex fiber art. Experiment with combining traditional filet technique with colored thread, using distinct shades for solid motif blocks while keeping background mesh spaces neutral. You can also explore curved filet charts that incorporate angled half-mesh spaces, allowing for smooth circular shapes and organic fluid lines rather than strict geometric steps. Try scaling small grid patterns up into larger functional items by swapping thin lace thread for bulky cotton cord or ribbon, transforming delicate motifs into heavy-duty rug patterns or large wall tapestries. Alternatively, design your own original charts using basic graph paper, converting personal drawings, family crests, or typography into custom stitch guides. The fundamental principles of light and shadow grid work provide endless opportunities for creative exploration in contemporary handmade decor.