10 Plastic Bottle Flowers Design Ideas

Creating handmade home decor through upcycling plastic containers has become one of the most effective ways to combine environmental sustainability with creative interior accenting. In this comprehensive guide, you will explore step-by-step methods for turning everyday polyethylene terephthalate bottles into durable, visually striking floral arrangements. Learning this process allows home decorators to reduce household plastic waste while developing practical crafting skills. Upcycled floral crafting serves as an accessible introduction to decorative design, enabling creators of all skill levels to construct customized botanical sculptures using simple household equipment. Through detailed structural techniques, heat manipulation, and paint application strategies, this tutorial provides actionable guidance to help you craft refined, aesthetic plant representations that maintain their color and form over long periods without requiring maintenance.
Why This Idea Is Trending or Useful
Upcycled floral projects consistently stand out among trending ideas on popular inspiration boards due to their exceptional versatility, low cost, and strong environmental value. Modern interior styling increasingly incorporates eco-friendly elements that transform discarded packaging into sophisticated, minimalist style art objects. From a practical standpoint, plastic bottle flower crafting offers complete accessibility for beginners because it relies entirely on common household tools rather than specialized equipment. Craft enthusiasts appreciate the high DIY appeal of working with thermoplastic materials, which can be easily cut, painted, and shaped with controlled heat. This easy project format allows couples, families, and solo crafters to experiment with architectural textures, vibrant color schemes, and varied stem arrangements while keeping total decoration expenses minimal.
Materials and Preparation
Proper preparation ensures a smooth execution process when crafting plastic bottle flowers. Before starting your creative project, gather clear and colored plastic bottles, sharp craft scissors, utility knives, fine-grit sandpaper, a low-temperature heat gun or standard candle, floral wire, metal pliers, and acrylic or glass paint formulations. Begin by thoroughly washing all plastic containers in warm, soapy water to remove internal residues, glue deposits, and paper labels. Allow the bottles to dry completely, then use a marker to draft symmetrical petal guides directly onto the plastic curved surfaces. Establishing a clean, well-ventilated workspace with flame-resistant surfaces provides a safe environment for heat shaping and paint application, ensuring that each structural layer aligns correctly during final assembly.
Idea 1: Layered Cherry Blossom Sprigs
Execution Process
To create structural cherry blossoms, begin by cutting the bottom bases off five clear 500-milliliter plastic water bottles using a sharp utility knife. Trace a five-petal template onto each base section using a permanent marker, then trim around the outlined edges with precision scissors. Lightly sand the smooth plastic surfaces with fine-grit sandpaper to create a textured key for paint adhesion. Apply a layer of translucent pink glass paint across the petals, keeping the center slightly darker for natural visual depth. Once dry, pass the plastic edge quickly near a candle flame to gently curl the petal tips inward. Punch a small hole through the central hub of each flower using a heated needle. Thread flexible brown floral wire through the central hole, securing a cluster of yellow glass beads at the tip to represent natural stamens, then twist the wire downward to construct realistic, rigid branches.
Idea 2: Sculpted Calla Lily Stems
Step-by-Step Guide
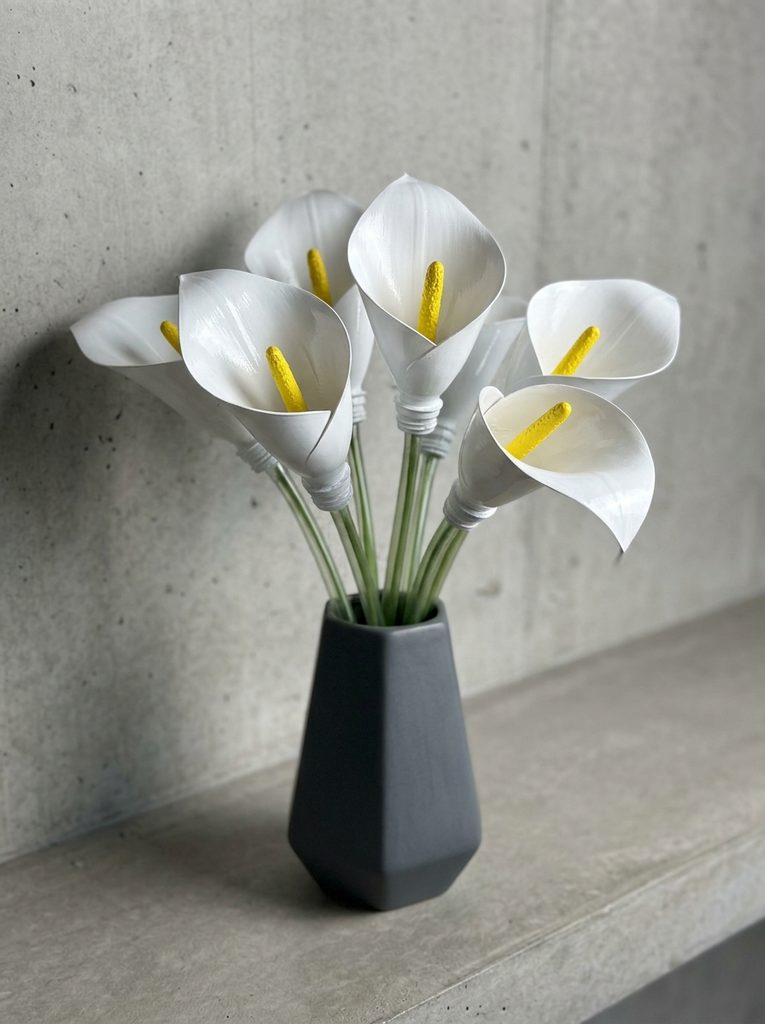
Constructing a minimalist calla lily requires the upper tapered neck section of a clear two-liter plastic bottle. Cut along the curved neck to isolate a smooth, single-spathe petal shape that tapers to a fine point at the top and narrows near the original bottleneck opening. Lightly sand both sides of the plastic, then paint the interior face with opaque matte white acrylic paint. For the central spadix, wrap a 4-inch piece of thick floral wire in yellow masking tape or roll a strip of yellow craft foam into a tight cylinder. Insert this yellow rod down into the narrow base of the white plastic spathe. Secure the assembly by wrapping green floral tape tightly around the bottle neck and down the extending metal support stem, creating a smooth transition that mimics a natural calla lily structure.
Idea 3: Geometric Succulent Rosettes
Setup Method
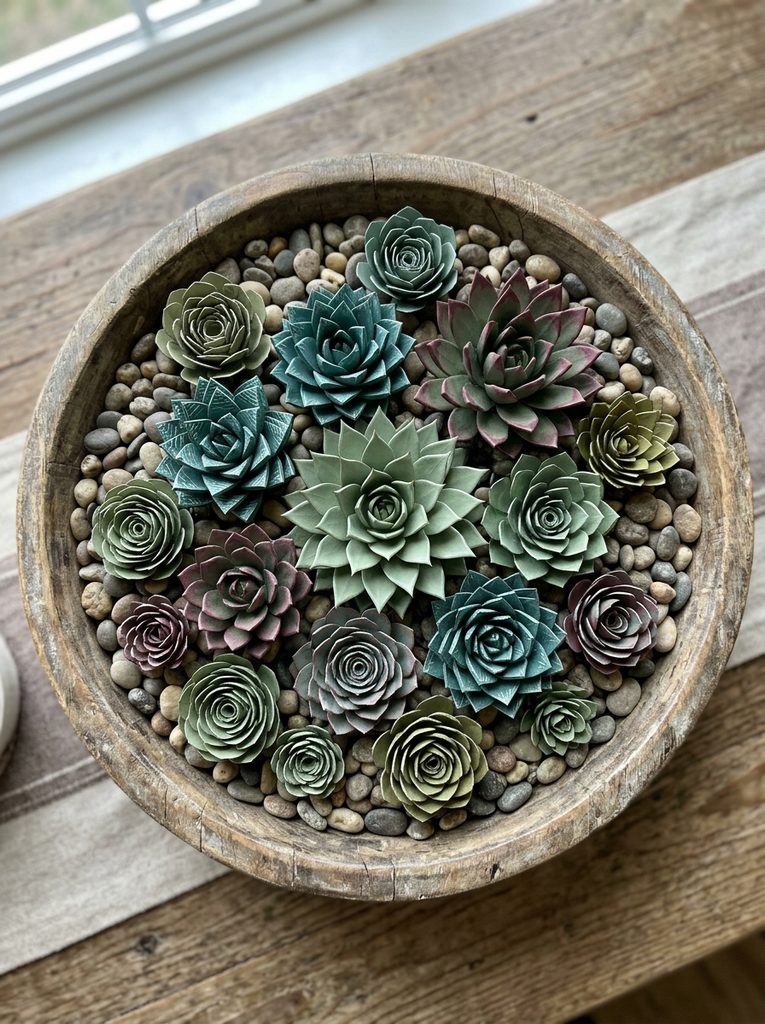
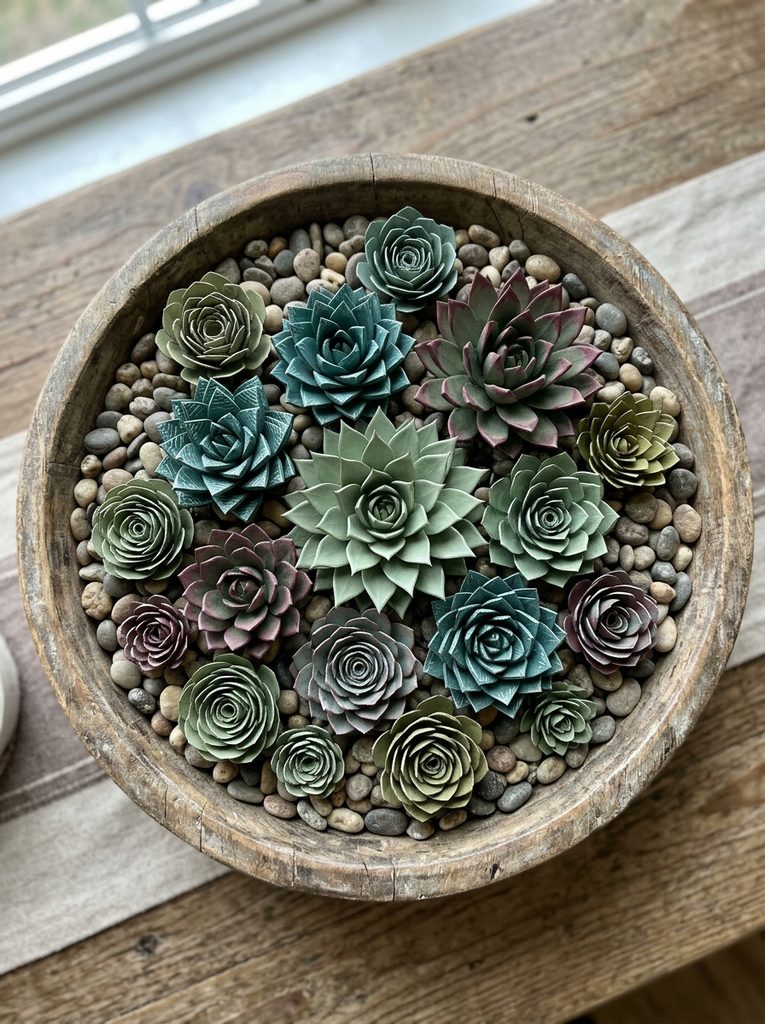
Building a layered geometric succulent rosette uses the bottom concave sections of multiple smaller plastic soda bottles. Cut out four distinct bottle bottoms, trimming each into a symmetrical, thick-petaled star configuration, with each successive star sized slightly smaller than the previous piece. Use a craft knife to score light vertical lines down the middle of each petal to produce a crisp central ridge. Paint all layers using a mix of dusty sage green and muted teal acrylic paint, adding subtle burgundy brushstrokes along the outer tips for real succulent realism. Stack the green plastic stars sequentially from largest to smallest, rotating the angles so the petals alternate evenly. Fasten the central core using a single metal fastener or heavy-duty outdoor adhesive, producing a compact, low-profile succulent accent suitable for decorative bowls.
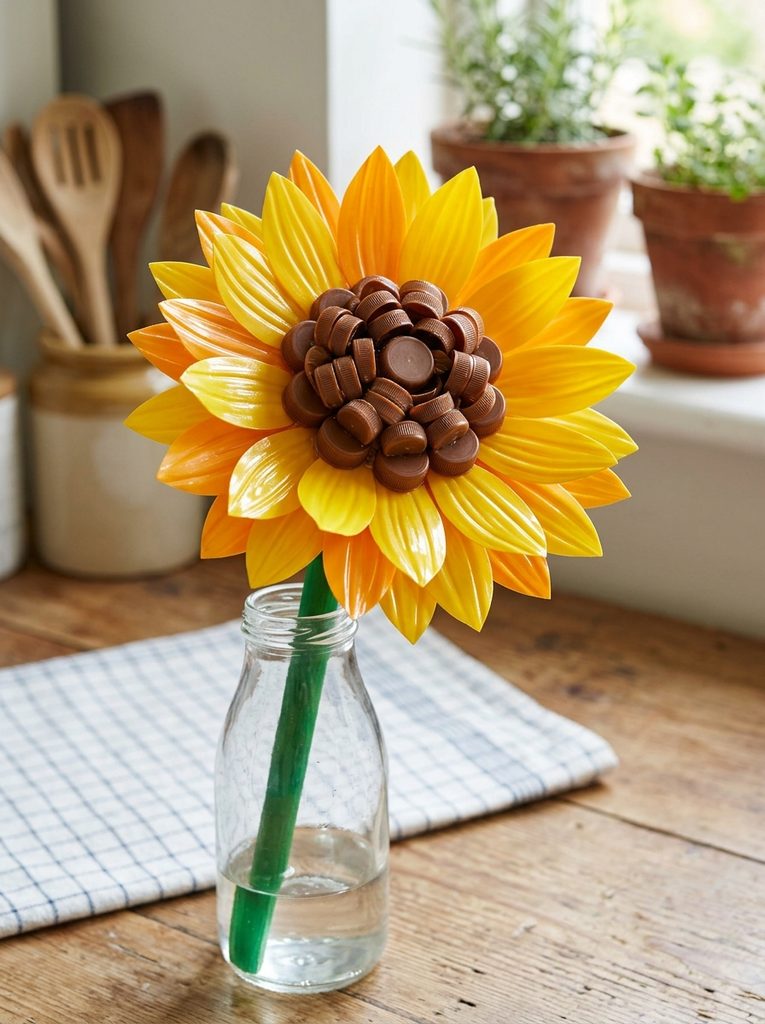
Idea 4: Ribbed Sunflowers with Textured Cores
How to Make
For vibrant sunflowers, utilize the flat midsections of three large amber or clear plastic juice bottles. Cut the cylindrical plastic into flat sheets, then trim out numerous individual tear-drop petals measuring roughly 3 inches in length. Paint each petal with two coats of bright yellow-orange acrylic paint, allowing complete drying between coats. To craft the dense center, cut a 2-inch circle from heavy cardboard and cover it with small brown plastic bottle caps glued tightly together in a spiral layout. Alternatively, cut small slits along a strip of dark brown plastic and roll it into a tight fringe cylinder. Glue the yellow petals evenly around the outer rear perimeter of the brown core in staggered overlapping layers. Attach a sturdy green painted wooden dowel or thick wire stem to the back using clear adhesive to complete the arrangement.
Idea 5: Cascading Wisteria Clusters
How to Create
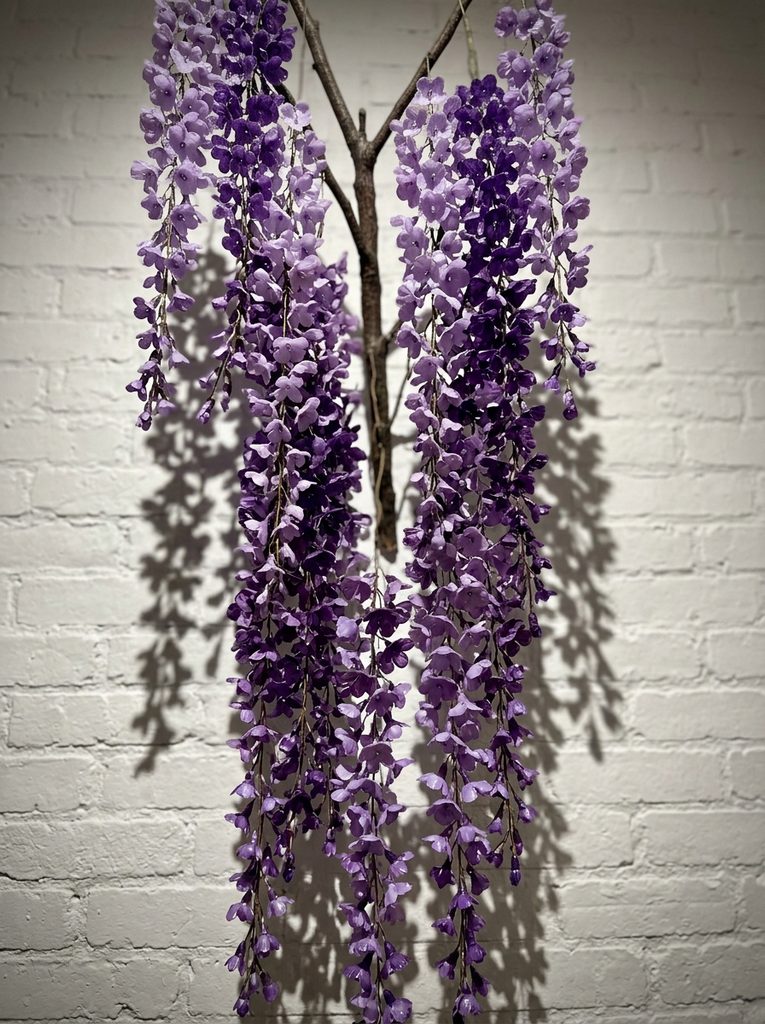
Cascading wisteria requires multiple small four-petal flower units cut from clear or violet-tinted plastic water bottles. Trace and cut dozens of tiny 1-inch flower shapes, punching a small hole through the middle of each individual piece. Dip each mini flower into a mixture of lavender and deep purple acrylic paint to create a soft gradient appearance across the surface. Once dry, hold each piece briefly over a heat gun to warp the petals into soft, irregular bell shapes. String these curved purple pieces vertically onto long segments of transparent nylon line or thin green floral wire, placing a small glass seed bead below each flower to hold its position along the vertical drop. Suspend multiple completed strands of varying lengths from a single main wire branch to establish a full hanging floral display.
Idea 6: Fluted Stargazer Lilies
Execution Process
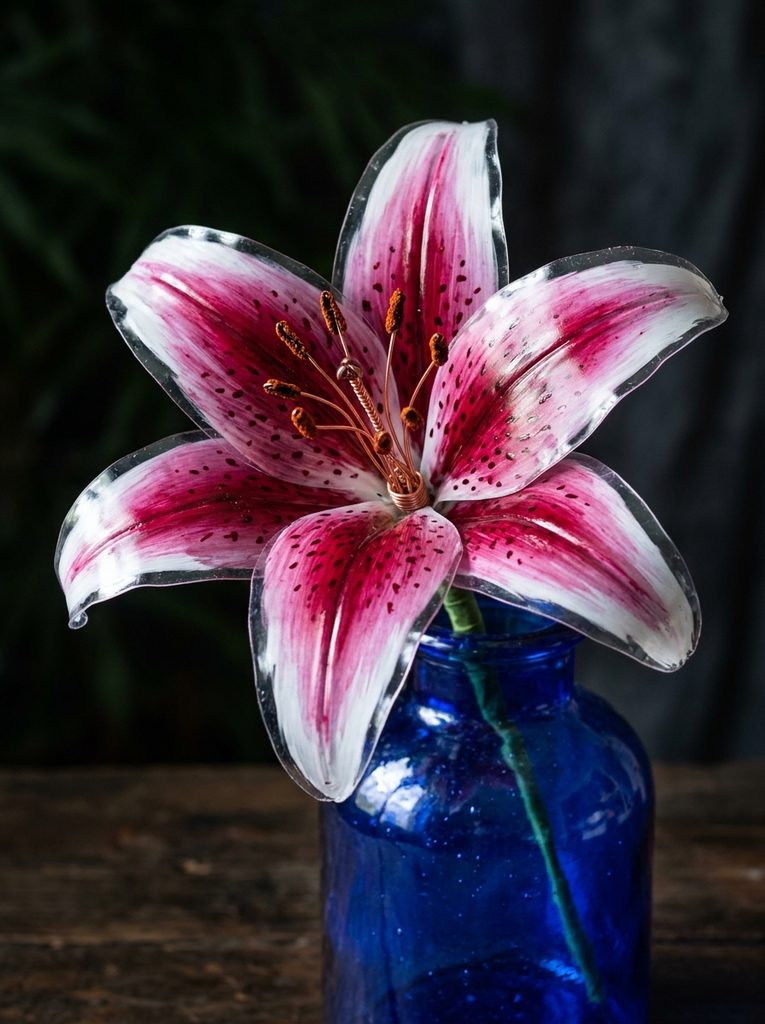
Constructing a bold stargazer lily demands the wide midsection of a clear two-liter bottle. Cut six large, pointed petals with prominent central taper cuts near their mounting bases. Use a low-temperature heat tool to create a subtle outward recurve along the upper half of each individual petal, mimicking the open bloom of an exotic lily. Coat the petals with white acrylic paint, blending deep magenta streaks from the inner base outward through the center line. Paint fine dark crimson dots across the inner lower third of each petal using a detail brush. Join the six petal bases together around a central cluster of wire stamens capped with brown clay tips. Wrap the joint tightly with green floral wire, establishing a wide, open-faced flower head designed for tall vase presentations.
Idea 7: Delicate Wild Anemones
Step-by-Step Guide
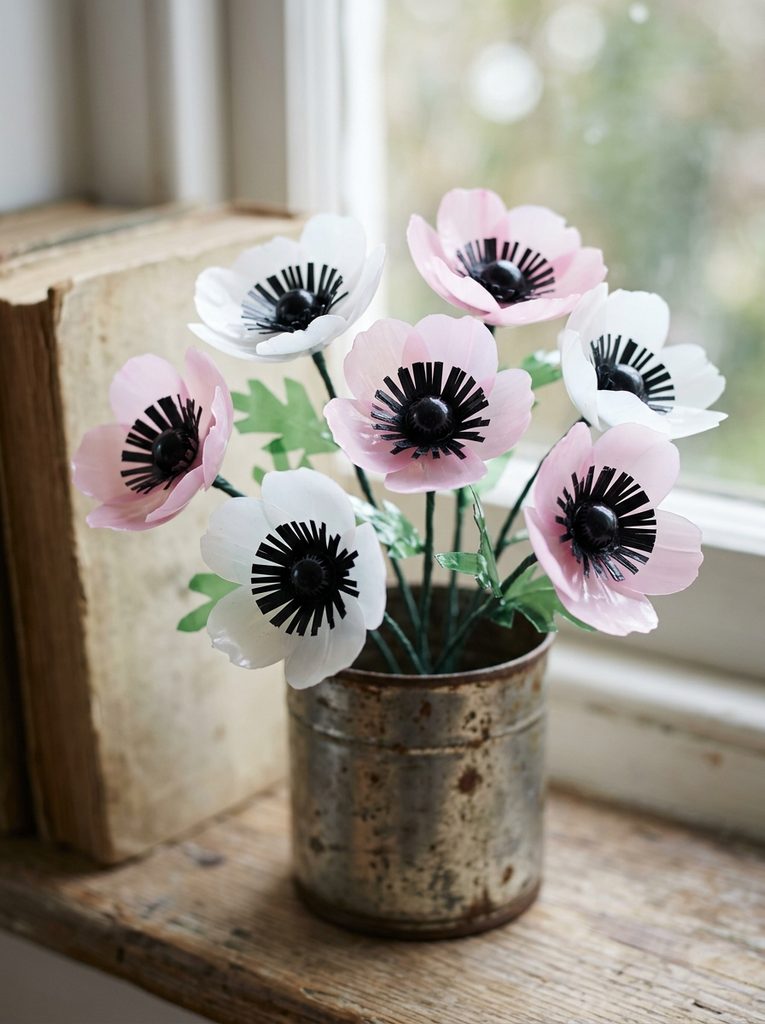
Wild anemones feature simple, flat petal structures paired with dark, highly contrasting centers. Cut two five-petal shapes from the smooth wall of a clear plastic container, sizing one slightly smaller than the other. Paint both layers with a translucent coat of soft white or pale blush pink glass paint, keeping the texture lightweight and uniform. For the distinct anemone center, cut a small circle of black plastic from a dark beverage container, making thin radial cuts around its edge to form a fine fringe ring. Glue a small black bead or smooth dark button directly into the middle of the black fringe. Layer the small white petal shape over the larger one, offset the points, and glue the dark center assembly into the middle to complete a clean, contrast-heavy aesthetic flower head.
Idea 8: Flame-Tipped Modern Poppies
Setup Method
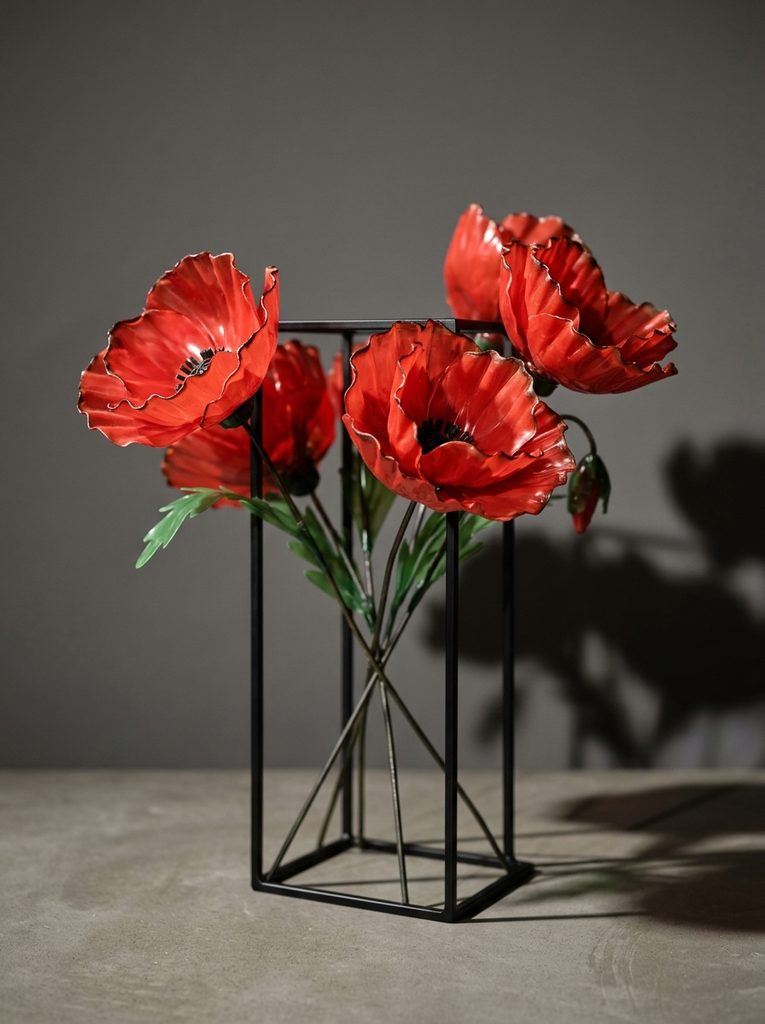
Creating modern poppies relies on heat deformation to form organic, ruffled edges. Cut four round, somewhat irregular petal shapes from a clear plastic bottle. Apply bright scarlet red paint to both sides of each petal using smooth, sweeping brushstrokes, leaving the lower mounting tab unpainted for easier assembly. Using tweezers, hold the outer rim of each painted petal approximately 2 inches above a candle flame for a few seconds until the plastic softens and curls naturally. Avoid direct contact with the flame to prevent soot buildup. Once cool, overlap the four ruffled petals at their bases, securing them with a central black rivet or small wire loop. Add a small patch of green paint at the absolute core to achieve an authentic poppy appearance.
Idea 9: Spiral Cut Carnations
How to Make
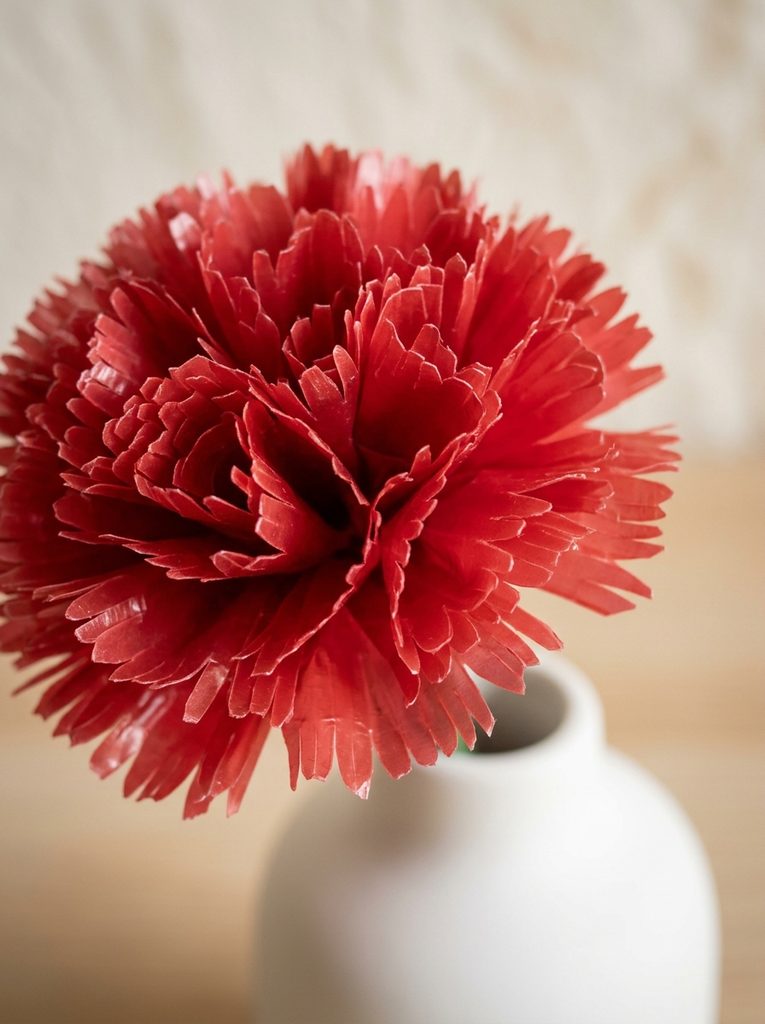
Dense carnation blooms are created by manipulating continuous ribbons of cut plastic. Cut out the flat central section of a clear plastic bottle, then trim it into a long strip roughly 2 inches wide and 12 inches long. Use sharp craft scissors to cut fine, vertical fringe slits along the entire top edge of the strip, cutting down roughly three-quarters of the total width. Paint the fringed plastic strip with deep red or soft pastel pink acrylic paint. Once dry, roll the strip tightly along its bottom uncut edge, allowing the fringed top to fan outward into a dense, ruffled sphere. Wrap the bottom rolled base tightly with green floral tape to lock the shape in place, creating a full, compact flower head suitable for dense bouquet arrangements.
Idea 10: Contemporary Translucent Orchids
How to Create
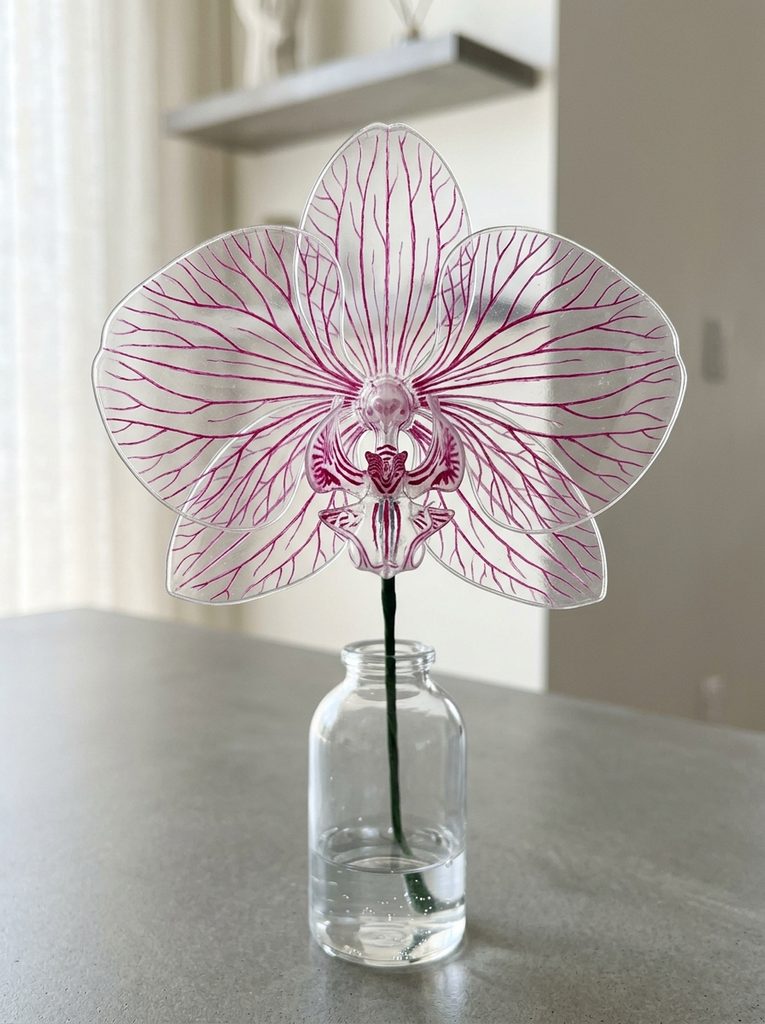
Crafting modern translucent orchids requires precise cutting to match the asymmetrical petal structure of real Phalaenopsis blooms. Cut three broad rounded outer sepals and two wider side petals from clear, untextured plastic sheets. Cut one distinct three-lobed center lip shape featuring small pointed side projections. Leave the plastic unpainted, or apply a very faint tint of sheer violet stained-glass paint to maintain full light transparency. Use a fine-tip paintbrush to draw delicate magenta vein patterns running from the central hub outward across the petals. Assemble the pieces by bonding the three rear sepals first, followed by the two main side petals, and place the lip shape directly in the center foreground. Mount the completed head onto a slender dark wire stem to produce a refined minimalist installation.
Common Beginner Mistakes and How to Avoid Them
A frequent mistake when completing this creative project is applying direct flame heat for too long, which scorches the plastic and creates dark soot marks or uneven melting. To avoid damaging the material, hold the plastic at least 2 to 3 inches away from heat sources and move the piece continuously. Another common error is applying thick coats of standard acrylic paint directly onto smooth, untreated plastic surfaces, leading to peeling and chipping over time. Always scuff the plastic surface with fine sandpaper before painting, or apply a dedicated plastic primer layer first. Additionally, cutting thick plastic bottle bases with dull scissors can lead to jagged edges and hand fatigue. Using sharp utility shears or heating the cutting blade slightly ensures clean, smooth edges across all petal components.
Practical Tips for Better Results
To achieve professional decorative results, combine different plastic thicknesses within a single floral arrangement. Thicker bottle bottoms provide structural stability for core support joints, while thin sidewalls work best for delicate, heat-curled interior petals. When applying paint, use thin, layered coats of glass paint or acrylic mediums mixed with a clear gloss binder to retain light transparency, allowing sunlight to pass through the petals for a stained-glass visual effect. When assembling multi-tiered flower heads, drill or punch precise central alignment holes using a warm metal awl or craft needle rather than forcing sharp wire through cold plastic. Finally, apply a final coat of clear spray sealant over finished blooms to protect painted surfaces from dust, moisture, and ultraviolet fading.
Styling, Presentation, or Organization Ideas
Arranging handmade plastic flowers effectively enhances their overall visual appeal within home decor setups. Grouping stems of varying heights in monochrome ceramic vases highlights the structural shapes of the plastic while maintaining a clean, modern design aesthetic. For wall displays, mount completed floral stems onto salvaged wooden panels or framed wire mesh to create dynamic three-dimensional wall art installations. Incorporating LED string lights within transparent or lightly tinted plastic arrangements causes the petal edges to catch and reflect light, turning the bouquet into an effective ambient light feature. Grouping small succulent rosettes together inside shallow glass terrariums filled with natural sand and river pebbles provides a durable, zero-maintenance centerpiece suitable for dining tables or office desks.
Budget or Time Planning
Upcycled plastic bottle crafting represents an exceptionally cost-effective home decor project. Collecting household plastic containers eliminates material sourcing costs, while basic supplies like floral wire, acrylic paint, craft scissors, and adhesive remain inexpensive. A standard project involving three to five detailed floral stems typically requires two to three hours of active crafting time, broken down into washing, cutting, painting, heat-forming, and final assembly phases. To optimize your time, complete structural processing in batches: cut and sand all petal components during one session, execute all painting steps together to allow uniform drying time, and perform heat shaping and assembly sequentially. This systematic approach reduces tool swapping and ensures consistent production quality across all finished blooms.
Creative Expansion and Advanced Inspiration
Once you master basic cutting and shaping techniques, you can expand your creative project into advanced sculptural applications. Combine upcycled plastic flower stems with natural preserved elements like dried eucalyptus, willow branches, or driftwood to blend synthetic and organic textures seamlessly. Experiment with advanced surface finishing techniques, such as applying metallic leafing, iridescent mica powders, or matte stone-texture sprays to transform the appearance of the underlying plastic entirely. Scale up individual component dimensions to create large-statement floral installations for event backdrops or outdoor garden sculptures. By continually testing new combinations of heat manipulation, joinery, and surface finishing, you can continue transforming simple recyclable materials into lasting architectural artwork.