10 Fold-Out Wall Desk Sewing Room Ideas
Designing a dedicated sewing studio within limited square footage demands innovative spatial management and adaptable home decor solutions. Standard stationary desks often consume valuable floor space in dual-purpose rooms, creating visual clutter and restricting movement when active sewing projects conclude. Fold-out wall desks offer a sleek, space-saving alternative by combining robust working surfaces with concealed vertical storage. This practical guide explores how wall-mounted drop-leaf units, floating cabinets, and fold-down tables transform compact living areas into fully functional craft hubs. Readers will learn how to select proper mounting hardware, optimize internal notion storage, and establish ergonomic work stations that retract seamlessly against the wall face. Implementing these structured concepts allows crafters to maximize spatial utility, protect sewing equipment from environmental dust, and maintain a clean modern design aesthetic tailored to flexible everyday living.
The Growing Appeal of Space-Saving Fold-Down Workstations
Fold-out wall desks have gained immense popularity across modern Pinterest inspiration boards because they address the challenges of small-space home design without compromising functionality. A fold-down desk offers high practical value by instantly creating a broad, stable platform for sewing machines and pattern drafting, then collapsing into a slim vertical profile when work finishes. This dual functionality appeals strongly to home decorators who require multifunctional spaces, such as guest bedrooms, home offices, or living room alcoves. The DIY nature of these installations makes them exceptionally beginner friendly, requiring basic measuring skills and standard household hand tools rather than extensive carpentry experience. By utilizing vertical wall real estate, crafters eliminate floor clutter, improve room flow, and establish a quiet, organized creative space that harmonizes effortlessness with aesthetic sophistication.
Required Hardware, Tools, and Pre-Installation Planning
Successfully mounting a heavy-duty fold-out sewing desk requires meticulous spatial planning and appropriate structural preparation. Begin by measuring the targeted wall area, ensuring sufficient swing clearance for both the desktop panel and a comfortable task chair. Crucial structural components include solid hardwood or thick composite wood panels, heavy-duty folding shelf brackets rated for high weight capacities, continuous piano hinges, and locking cabinet latches. Necessary tools for assembly include a digital stud finder, spirit level, measuring tape, cordless drill, and heavy-duty wall anchors. Planning considerations must center on locating solid timber wall studs to support the downward vibration and weight of an active sewing machine. Additionally, ensure nearby electrical wall outlets are accessible to power sewing equipment, task lamps, and pressing tools cleanly without running hazardous extension cords across floor walkways.
Creative Fold-Out Wall Desk Designs and Layout Concepts
Floating Picture Frame Drop-Leaf Sewing Bench
Setup Method
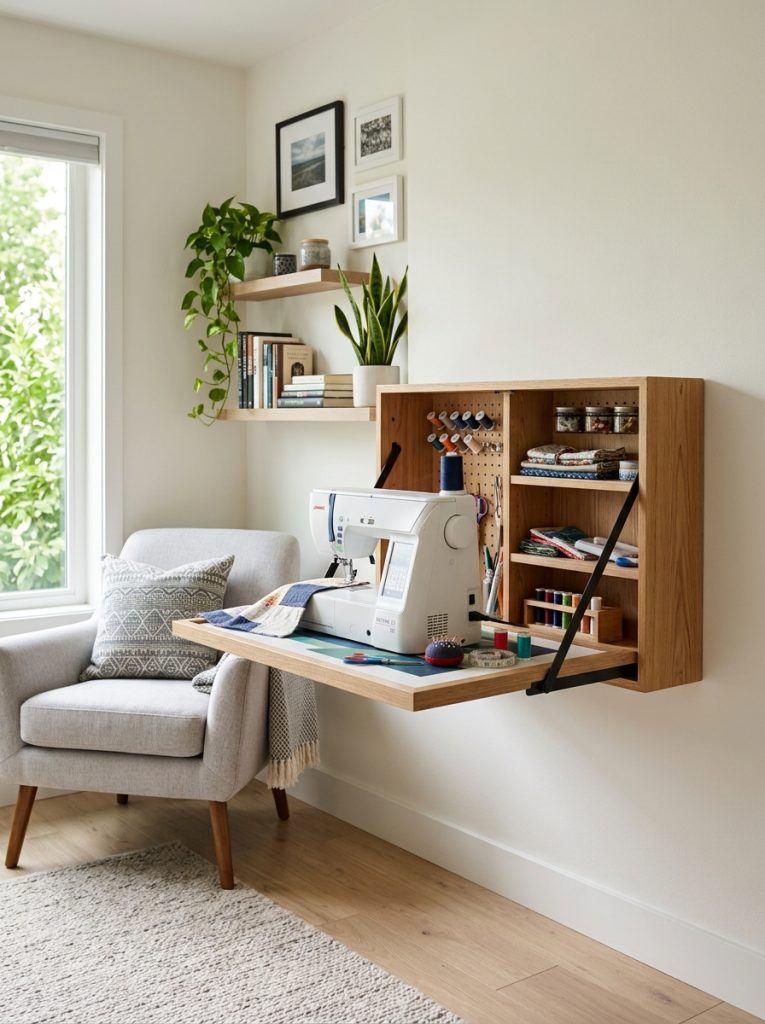
Mount a shallow wooden cabinet frame directly onto structural wall studs at standard desk height using heavy-duty lag screws. Construct the front drop-down panel with a thick interior core surrounded by a raised picture frame lip on the exterior face, inserting a decorative canvas art print inside the framing trim. When closed, the unit presents as a framed wall artwork that completely conceals the interior compartment. Releasing side tension latches lowers the panel ninety degrees to reveal a wide, reinforced working desktop supported by folding metal side stays. The interior cabinet features shallow wood slots to hold thread spools, bobbins, and tape measures flat against the back wall, creating an instant sewing station that transforms into elegant wall art when closed.
Dual-Wing Folding Cutting and Machine Console
Step-by-Step Guide
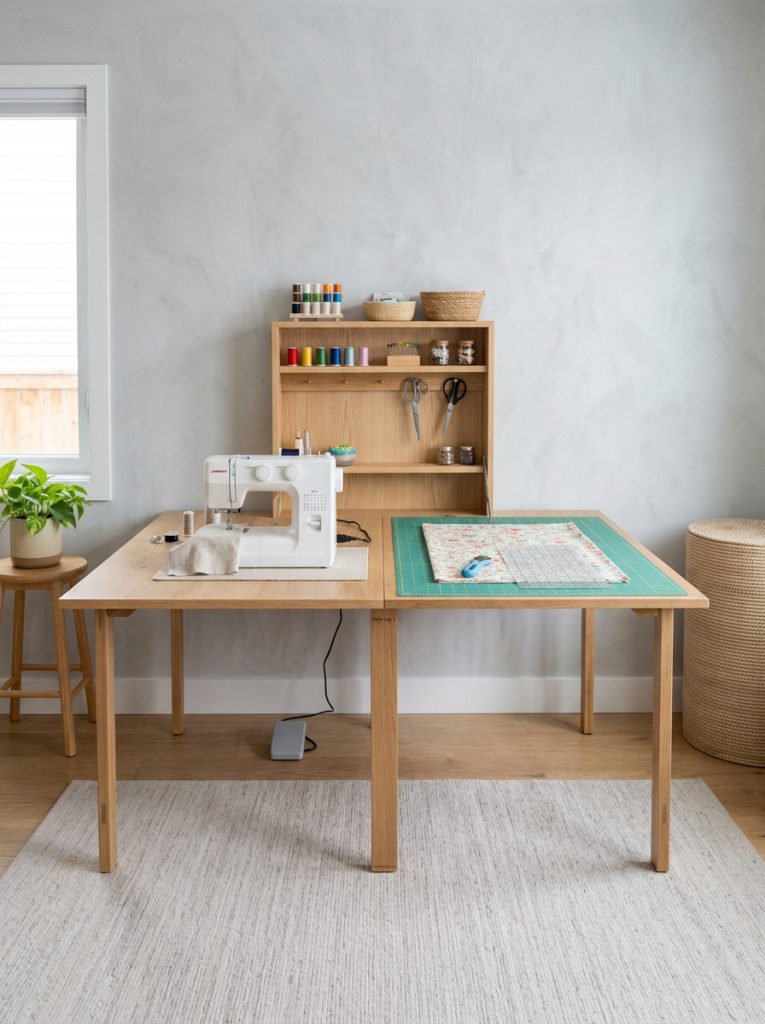
Install a slim central wall console flanked by two independent side-hinged table leaves anchored with continuous piano hinges along the console edges. Opening the left wing provides a sturdy platform elevated specifically for a sewing machine, while extending the right wing creates an expansive horizontal cutting plane for fabric layout. Fold-out triangular wooden gate legs swing outward from the central cabinet base to support both extended leaves securely against heavy downward cutting pressure. The fixed central cabinet remains mounted to the wall, offering permanent internal shelves for heavy pressing equipment and iron pads. Closing both wings collapses the entire unit into a narrow, vertical wall column that occupies less than six inches of floor depth.
Murphy-Style Wall Cabinet with Built-In Pegboard Backing
How to Create
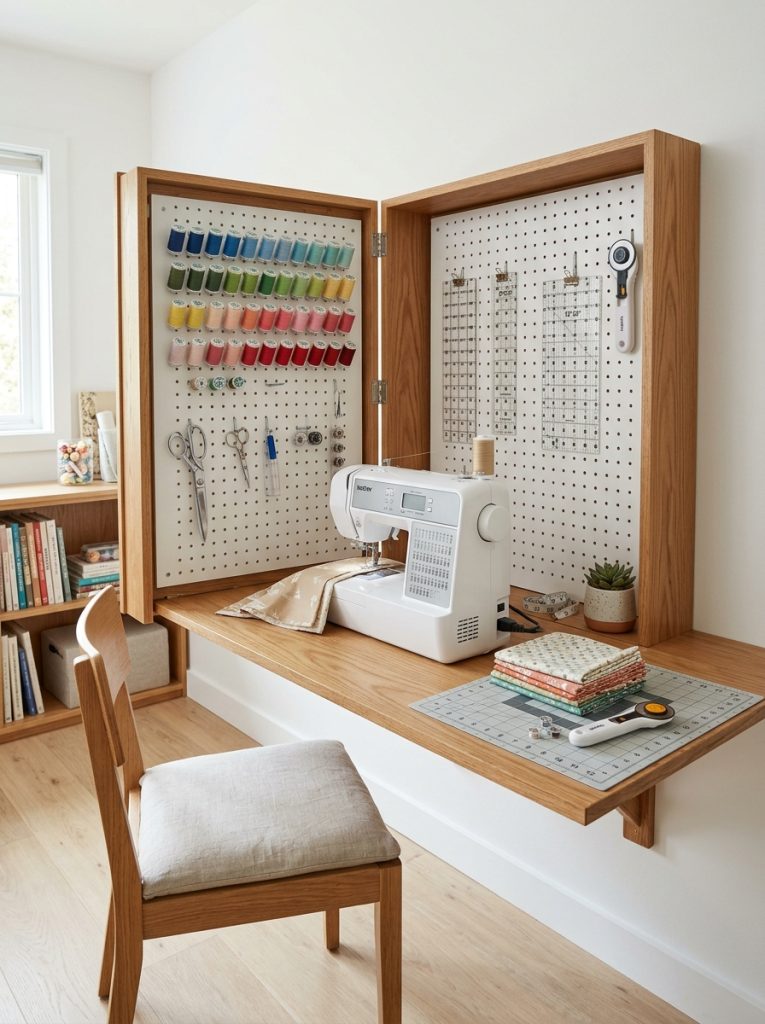
Construct a deep wooden Murphy cabinet frame anchored securely to wall studs using structural mounting cleats positioned thirty inches above the floor. Attach a heavy-duty front panel using bottom-mounted piano hinges and gas-strut lift supports that regulate the opening speed safely. Line the internal back wall of the upper cabinet with a custom-cut wooden pegboard sheet fitted with metal hooks to hold fabric shears, rotary cutters, acrylic rulers, and thread racks. Lowering the cabinet face exposes a vast desktop while keeping all primary drafting and cutting tools organized at eye level directly above the work plane. The pneumatic gas struts assist in lifting the heavy table surface smoothly back into its upright, locked position.
Recessed Wall Cavity Fold-Down Craft Desk
Execution Process
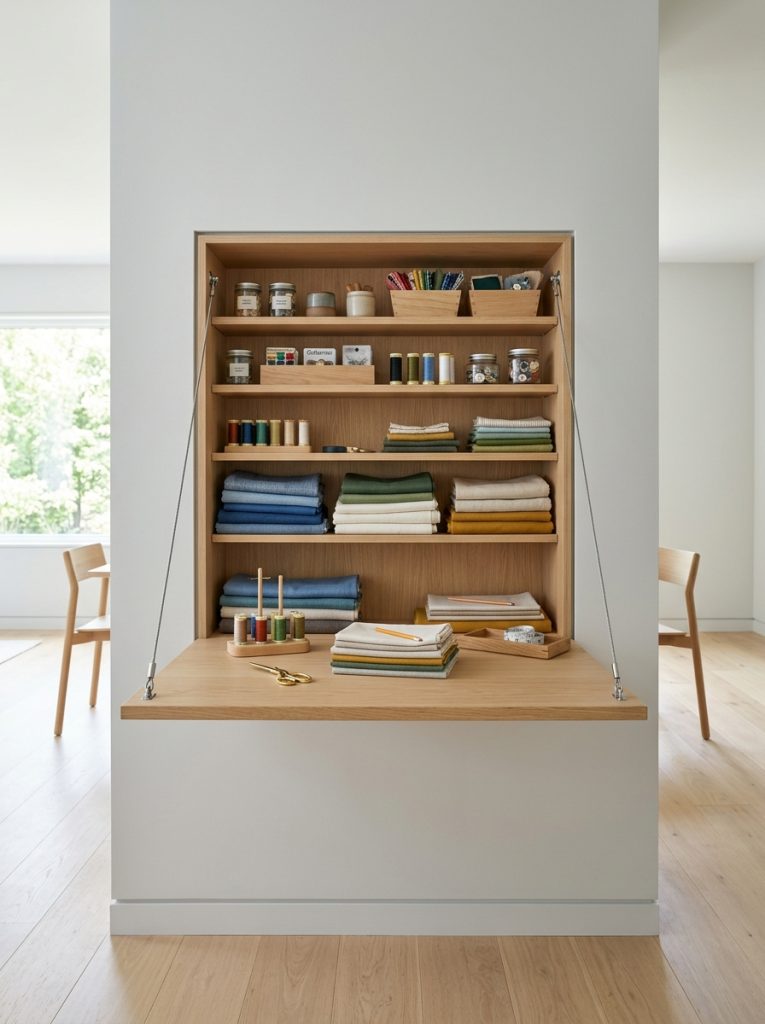
Utilize the unused interior cavity between standard interior wall studs by cutting a precise rectangular opening into the drywall frame. Install a custom-fit wooden box insert flush within the wall studs, securing the frame with long wood screws driven sideways through the stud faces. Attach a flush-mount exterior door panel using bottom hinges, enabling the door to drop down horizontal to the floor supported by adjustable wire cables. Because the internal storage shelves sit recessed behind the drywall plane, the closed desk remains completely flush with the surrounding wall face. This architectural layout maximizes floor space, hides sewing notions inside the wall structure, and delivers a ultra-minimalist appearance ideal for contemporary homes.
Bi-Fold Sliding Door Sewing Cabinet with Fold-Out Table
Setup Method
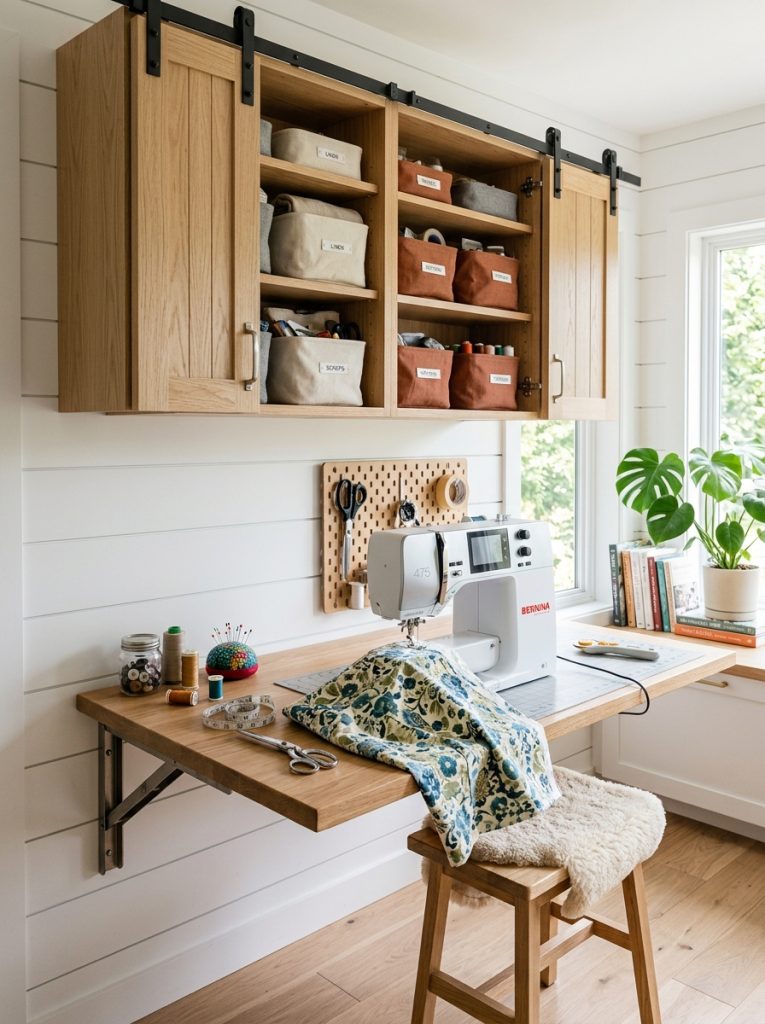
Mount an upper wall cabinet equipped with smooth bi-folding barn door tracks along the top edge to conceal vertical notion storage cleanly. Attach a separate heavy-duty fold-down table leaf directly beneath the cabinet frame using heavy-duty locking folding brackets anchored to the wall. Sliding the upper bi-fold doors open provides immediate access to tiered shelves holding organized fabric bins, pressing tools, and thread cases without blocking room walkways. Unlocking the lower table leaf extends a wide, stable sewing desk that accommodates large garment pieces effortlessly. After finishing your project, collapse the desk leaf flat against the wall and slide the bi-fold doors shut to restore a clean, minimalist room facade.
Corner-Mounted Drop-Leaf L-Shaped Workstation
How to Make
Capitalize on underutilized corner space by installing two intersecting fold-down table panels mounted at right angles along adjacent walls. Connect the meeting corner edges of both panels using a removable locking alignment pin to form a continuous L-shaped craft desk when extended. Mount heavy-duty folding support brackets underneath both panels, ensuring equal weight distribution across both wall faces. The L-shaped configuration establishes separate dedicated zones for machine stitching on one side and rotary cutting or iron pressing on the other. Unlocking the corner pin allows each table leaf to fold down independently flat against its respective wall, converting a busy corner into an open, spacious walkway in seconds.

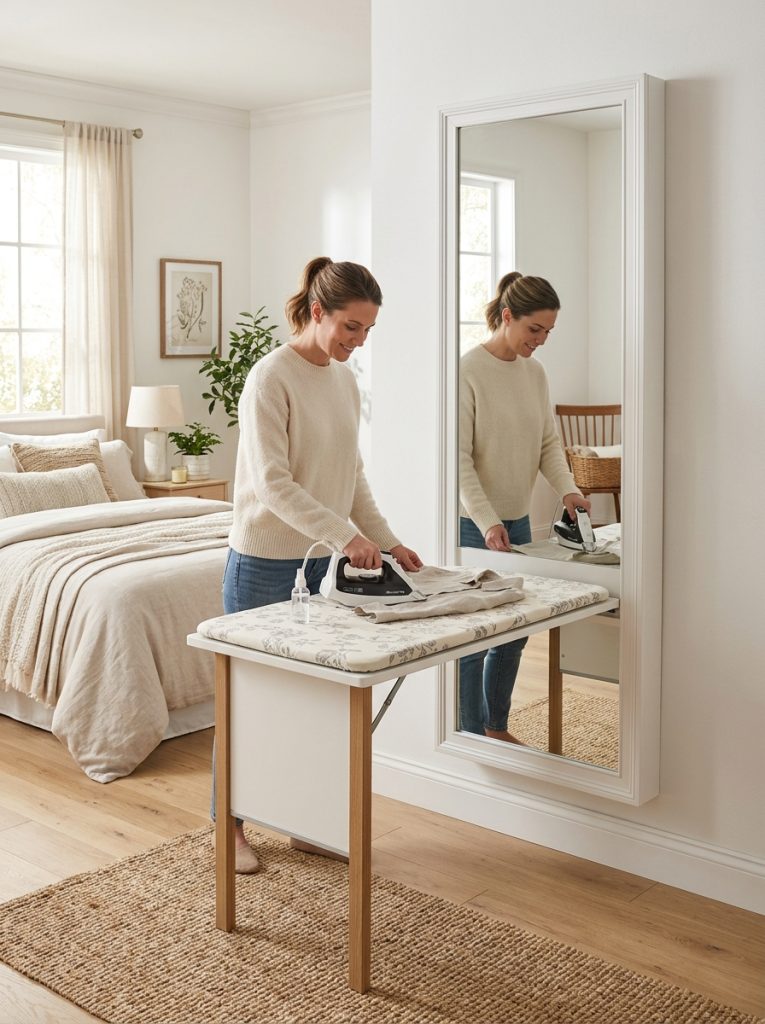
Mirror-Fronted Fold-Down Console with Concealed Ironing Station
Step-by-Step Guide
Hang a full-length wall mirror enclosed within a sturdy wooden cabinet frame, securing the unit with high-load wall cleats. The front mirror panel hinges downward from the waist-height midpoint, supported by heavy-duty folding metal legs that drop down to meet the floor automatically. The lower interior section of the cabinet features a built-in, heat-resistant pressing pad mounted beside a compact sewing machine storage shelf. Lowering the mirror panel creates an instant pressing and sewing desk, while the upper fixed mirror section remains upright for checking garment fit and drape during construction. Closing the unit restores a functional, light-reflecting full-length wall mirror that visually expands small rooms.
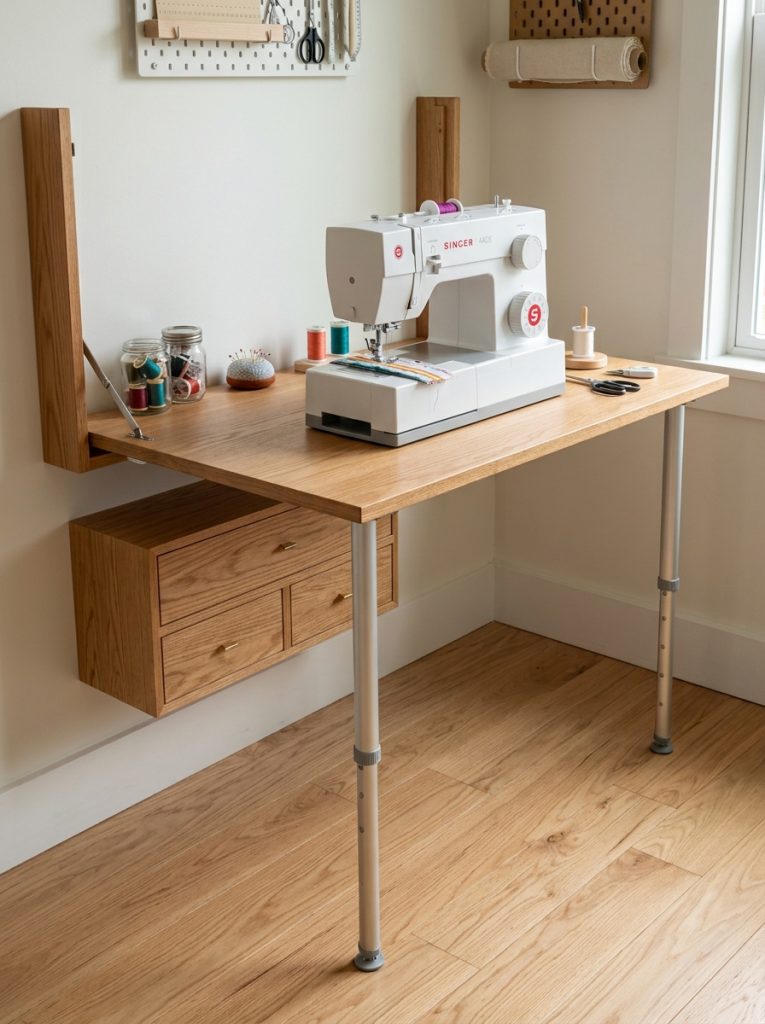
Telescoping Leg Drop-Desk over Shallow Drawers
Execution Process
Install a shallow wall-mounted drawer unit featuring three horizontal pull-out drawers designed for shallow notion organization, such as machine needles, bobbins, and tracing wheels. Attach a thick drop-down table leaf over the drawer unit face using top-mounted drop-leaf hinges. Equip the front underside of the table leaf with two telescoping aluminum legs that extend downward and twist-lock securely to match floor height precisely. Extending the legs provides rigid, wobble-free support capable of absorbing machine vibration during high-speed stitching. Stowing the desk involves collapsing the telescoping legs flat against the underside of the panel and lifting the table leaf upward to cover the drawer fronts in a neat, compact box.
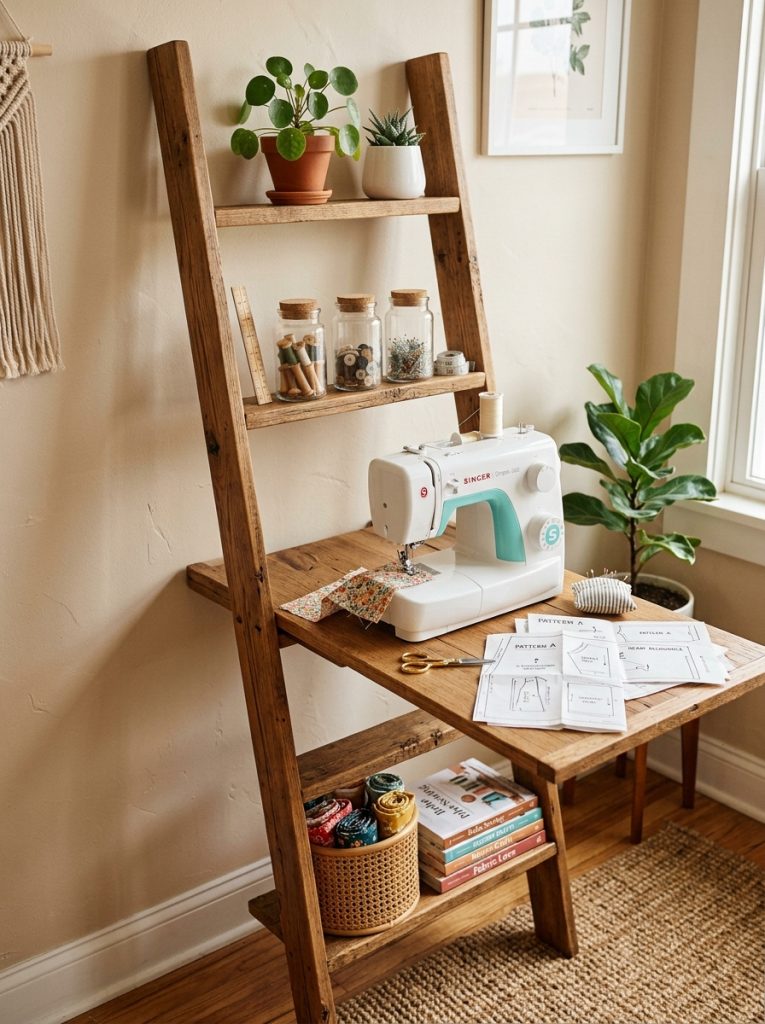
Vertical Ladder Shelf with Integrated Fold-Out Sewing Ledge
Setup Method
Position a leaning wooden ladder shelf framework against the wall, anchoring the top shelf securely to wall studs with discreet safety straps. Modify the middle shelf ladder rung by attaching a wide wooden desk panel using heavy-duty drop-down hinges and locking side supports. The upper ladder shelves host decorative plants, glass notion jars, and clear fabric storage containers, while the lower rungs remain open for legroom. Lowering the central desk panel converts the decorative shelving ladder into a functional sewing station without altering the footprint of the ladder frame. This hybrid design blends open decorative display with on-demand workspace utility, making it an ideal feature for living rooms or bedrooms.
Sliding Chalkboard Panel Over Fold-Down Craft Cabinet
How to Create
Construct a wall-mounted craft cabinet featuring a dark chalkboard paint finish across the exterior front panel, creating a surface for writing project notes and pattern dimensions. Mount the chalkboard face on bottom pivot hinges supported by heavy-duty side cables that hold the panel at a perfect ninety-degree angle when lowered. The interior cabinet contains shallow wooden compartments fitted with elastic bands to hold scissors, marking chalk, and drafting rulers securely in place during motion. Lowering the chalkboard surface provides a wide, smooth cutting desk while keeping project notes visible along the interior cabinet frame. Raising the desk locks the unit into a practical family message board that hides all sewing equipment completely.
Common Beginner Mistakes and How to Avoid Them
A frequent mistake when installing a fold-out wall desk is anchoring mounting hardware into drywall alone using plastic expansion anchors. Sewing machines generate significant downward force and vibration, which easily pulls anchors out of drywall; always secure structural brackets directly into solid timber wall studs using high-tensile lag bolts. Another common error is failing to account for the exact thickness of your sewing machine when designing interior cabinet depths. Measure the height, depth, and width of your machine with its power cords attached before building or purchasing a cabinet frame. Additionally, avoid choosing lightweight folding hinges that lack locking mechanisms; un-locked desk hinges can collapse unexpectedly under heavy fabric weight, risking damage to equipment and project materials.
Practical Tips for Better Results

Ensuring long-term functionality and comfort from a fold-out wall desk requires attention to detail during installation and usage. Mount your table surface at an ergonomic height tailored to your physical stature, typically between twenty-eight and thirty inches from the floor for seated sewing, or thirty-six to forty inches for standing cutting stations. Apply self-adhesive felt pads to the contact points where folding legs or support stays meet the wall face to prevent paint scuffs and reduce operational noise. Utilize clear, shallow plastic containers with snap-lock lids inside interior cabinet shelves to prevent small supplies like pins, buttons, and bobbins from falling out when the desk panel swings open or closed. Regularly check bracket screws and tighten hardware to maintain structural rigidity.
Styling, Presentation, and Organization Ideas
Integrating a fold-out sewing desk into your home decor requires harmonizing functional storage with clean interior design principles. Paint the exterior cabinet frame the exact same shade as your surrounding walls to make the closed desk visually blend into the background, creating a spacious, minimalist atmosphere. Alternatively, apply decorative geometric wallpaper or natural wood veneers to the exterior drop-panel face to turn the folded desk into an intentional accent wall feature. Organize interior shelf contents by shade and function, utilizing matching canvas baskets or clear acrylic containers to keep visual clutter at a minimum when the desk stands open. Position a stylish, armless task chair nearby that can easily tuck under the desk or move to another room when the workstation closes.
Budget and Time Planning Strategies
Building or installing a fold-out wall desk can be tailored easily to fit realistic financial constraints and busy schedules. Simple drop-leaf table setups utilizing pre-finished wooden panels and heavy-duty wall brackets offer an economical solution that can be completed in a single afternoon. Custom Murphy-style cabinets with internal pegboards require a higher investment in hardware and timber, serving as an ideal weekend DIY project. Allocate your financial budget primarily toward high-grade, load-tested steel folding brackets and quality mounting fasteners, as structural stability is critical for sewing safety. Plan the installation across structured phases: dedicate time to locating wall studs and marking level guidelines first, followed by bracket mounting, panel attachment, and internal storage organization.
Creative Expansion and Advanced Inspiration
As your creative sewing capabilities expand, your fold-out wall station can be upgraded with advanced integrated features to enhance efficiency. Install low-profile LED light strips along the underside of interior cabinet shelves, wiring them to a magnetic reed switch that turns task lighting on automatically when the desk drops open. Embed a thin, magnetic steel sheet behind the internal cabinet wall, allowing metal bobbin cases, magnetic pin dishes, and pattern guides to cling directly to the vertical backdrop. For garment makers working with large patterns, attach a retractable roll-down grid mat to the top edge of the cabinet frame, providing an instant pattern drafting surface that pulls down over the table and rolls back up neatly when work completes.