10 Recycled Garments Ideas Upcycled Clothing
Recycled clothing projects offer an effective approach to sustainable fashion by transforming discarded textiles into functional, stylish garments. This guide outlines ten practical upcycling methods designed to help creators repurpose old apparel into custom wardrobe pieces. Upcycling reduces environmental textile waste while providing a rewarding creative project for crafters of all skill levels. Throughout this article, readers will discover clear step-by-step instructions for converting unused items—such as worn sweaters, outdated jeans, and basic cotton shirts—into durable, modern designs. Each method emphasizes accessible sewing techniques, precise measurements, and material combinations that enhance garment longevity. By learning how to alter existing structural seams and integrate decorative accents, readers can develop an aesthetic personal collection without purchasing expensive raw fabrics. This comprehensive resource serves as both practical home decor and wearable art inspiration, bridging the gap between beginner-friendly crafting and long-term fashion utility.
Why This Idea Is Trending or Useful
The growing popularity of upcycled clothing stems from an increased awareness of textile sustainability paired with a desire for individualized style. Trending ideas on platforms like Pinterest highlight how simple garment modifications can instantly update a wardrobe on a low budget. This approach delivers immense practical value by extending the lifespan of quality fabrics that might otherwise be discarded. Modern design trends heavily favor tactile contrasts, structural layering, and custom aesthetic details, all of which are easily achievable through upcycling. The DIY appeal lies in its adaptability; makers can customize fits, colors, and cuts to match exact personal preferences. Furthermore, beginner friendly projects eliminate the complexity of pattern drafting from scratch, as the original garments provide built-in hems, buttons, and structural frameworks. Transforming existing apparel into high-concept fashion offers a practical, eco-conscious entry point into garment construction.
Materials and Preparation
Proper preparation and material selection are essential for achieving clean, professional upcycled garments. Begin by gathering old clothing items made from durable textiles such as heavy cotton denim, knit wool, structured linen, or sturdy canvas. Essential tools include fabric shears, a seam ripper, tailor’s chalk, measuring tape, sewing pins, and a reliable sewing machine fitted with standard universal and denim needles. Prior to cutting, wash and dry all garments to prevent unexpected shrinkage or distortion after the project is complete. Press the fabrics flat with an iron to ensure accurate measuring and straight cutlines. Planning considerations should include inspecting seams for wear, matching thread weights to fabric types, and organizing materials by texture and stretch capacity. Establishing a clean workspace with clear measurements mapped out ensures smooth execution throughout the construction process.
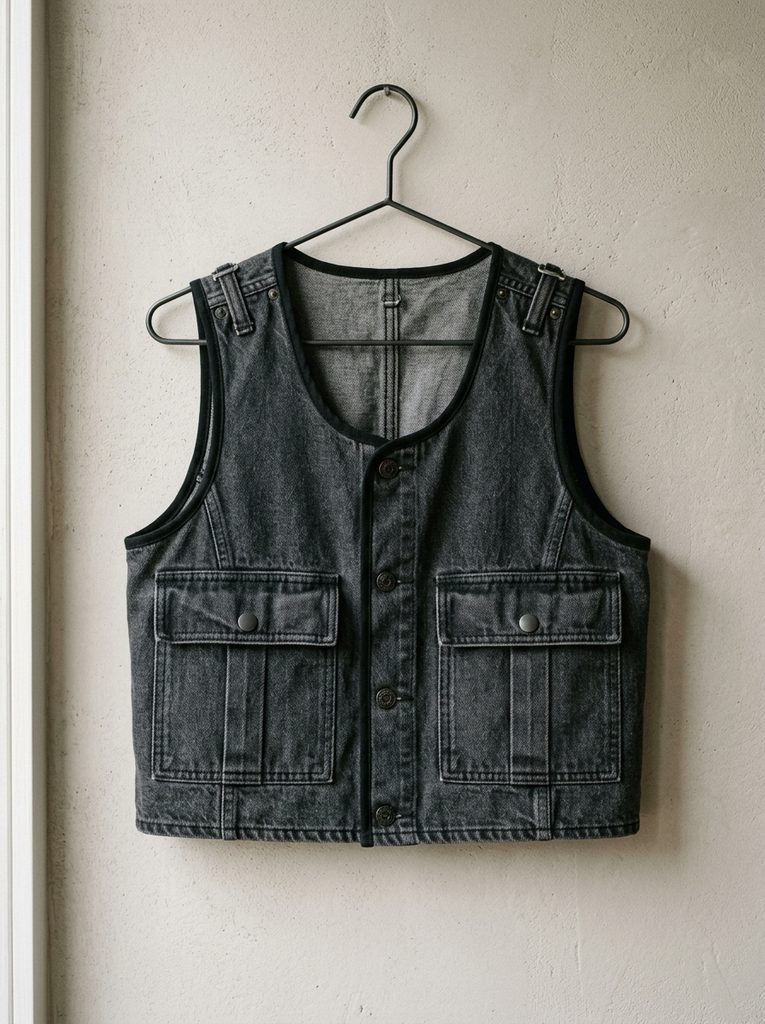
Charcoal Denim Utility Vest with Cargo Pockets Step-by-Step Guide
Transform a pair of relaxed-fit charcoal denim jeans into a tailored utility vest featuring functional front cargo pockets. Begin by laying the jeans flat and cutting off both pant legs at the upper thigh level. Use a seam ripper to split the outer leg seams, creating flat panels of heavy denim fabric. Next, take an existing fitted tank top to trace a basic vest front and back outline onto the denim using tailor’s chalk. Cut out the vest panels, allowing a half-inch seam allowance around all outer borders. Cut two small rectangular panels from the remaining pant leg scraps to construct two flap-covered cargo pockets. Pin and topstitch these pockets onto the lower front panels of the vest using heavy-duty thread. Join the front and back shoulder and side seams with a double straight stitch, then finish the outer armhole and neck edges with bias tape for a clean, durable result.
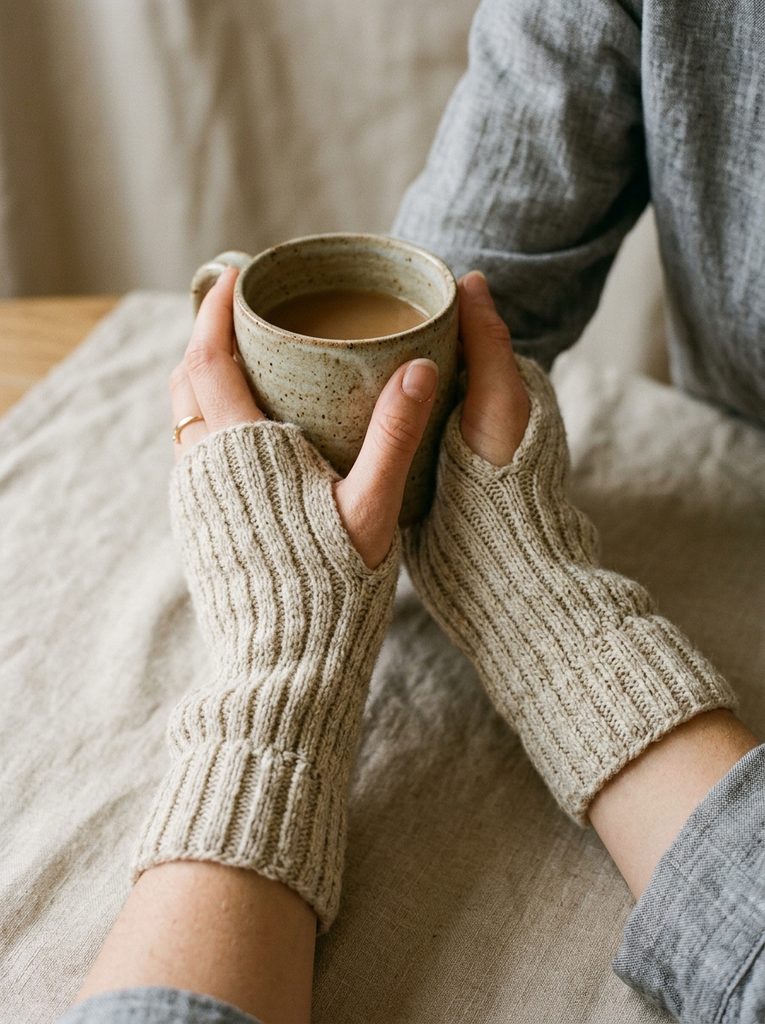
Ribbed Knit Arm Warmers from Cardigan Sleeves Execution Process
Convert the sleeves of an old ribbed knit cardigan into a pair of textured thumb-hole arm warmers. Start by carefully cutting both sleeves away from the shoulder armholes of the cardigan, keeping the wrist cuffs intact to serve as the bottom hem. Slide your arms into the detached sleeve sections to determine your desired overall length, typically extending from the knuckles up to the mid-bicep area. Trim the top raw edges evenly with fabric shears. Measure two inches up from the wrist cuff along the inner sleeve seam and mark a one-inch vertical slot for the thumb opening using tailor’s chalk. Use a seam ripper to carefully open this section of the seam, then secure the raw edges around the thumb hole with a tight hand-stitched blanket stitch to prevent unravelling. Hem the upper arm edge using a stretch zigzag stitch on your sewing machine to maintain flexibility.
Patchwork Linen Apron Dress from Button-Down Shirts How to Create
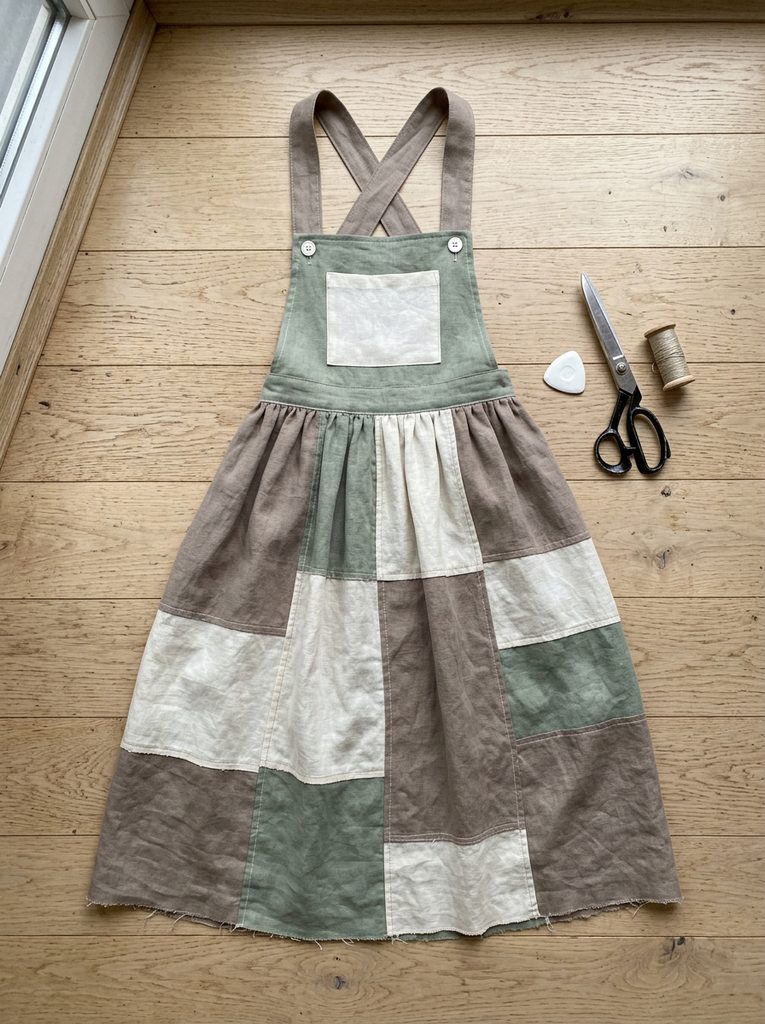
Construct an oversized linen apron dress by combining three unused woven button-down shirts of complementary solid tones. Unstitch the front button plackets, collars, and sleeves from two shirts, preserving the wide back panels to form the main front and back skirts of the dress. Cut the third shirt horizontally across the chest, using the lower torso section to fabricate wide waistband ties and shoulder straps. Gather the top edge of each wide back panel using a long basting stitch until it matches your waist width measurement. Attach the gathered skirt panels to a flat rectangular bib panel cut from the third shirt’s fabric. Stitch the wide shoulder straps onto the front bib corners, crossing them across the back before anchoring them securely inside the back waistband. Press all seams flat with a steam iron to establish a smooth, minimalist style silhouette.
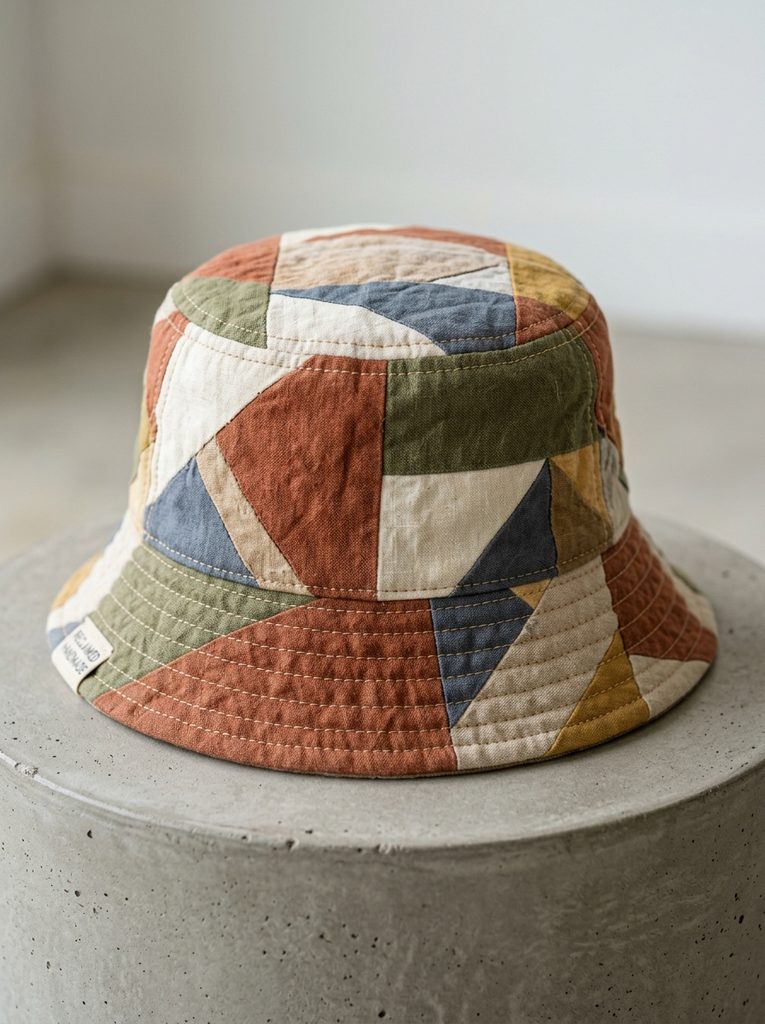
Quilted Fabric Bucket Hat from Cotton Scraps Setup Method
Fabricate a structured quilted bucket hat utilizing small cotton fabric scraps left over from previous sewing projects. Prepare the outer fabric layer by sewing various geometric cotton scraps together into a flat patchwork quilt top measuring roughly eighteen by twenty-four inches. Cut a matching panel of medium-weight fusible interfacing and iron it to the backside of the patchwork piece for structural stability. Cut out three fundamental hat components: one circular crown piece, two semi-circular side wall strips, and two angled brim rings. Repeat the cutting process using a solid cotton lining fabric. Lay matching outer and lining pieces together, sandwiching thin batting inside the brim sections before running parallel stitching lines across the brim for a classic quilted texture. Join the crown to the side walls, attach the quilted brim along the bottom perimeter, and finish internal seams with bias binding.
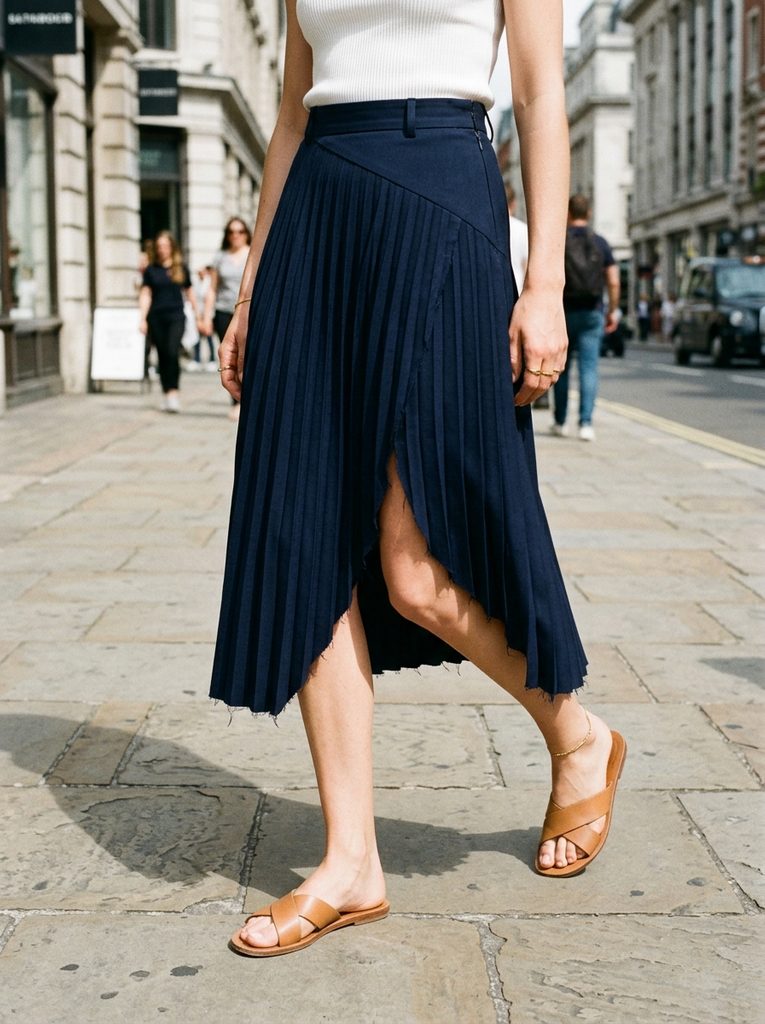
Asymmetrical Pleated Skirt from Men’s Trousers How to Make
Repurpose a pair of oversized pleated men’s dress trousers into a modern, high-waisted asymmetrical skirt. Lay the trousers flat on a cutting table and seam-rip the entire inseam to separate the inner leg construction. Cut away the crotch curve on both front and back panels, aligning the center edges into straight vertical lines. Overlap the front left panel over the front right panel at an angle to create a sharp asymmetrical front hemline, securing the fold with pins. Sew down the overlapped center seam with a precise topstitch from the waistband down to the mid-thigh level, leaving the lower portion split for ease of movement. Repeat the flattening process on the back panel to create a clean rear skirt wall. Trim the bottom hem diagonally, following the line of the front overlap, and finish the edge with a narrow folded hem.
Woven Canvas Corset Top from Upcycled Tote Bags Step-by-Step Guide
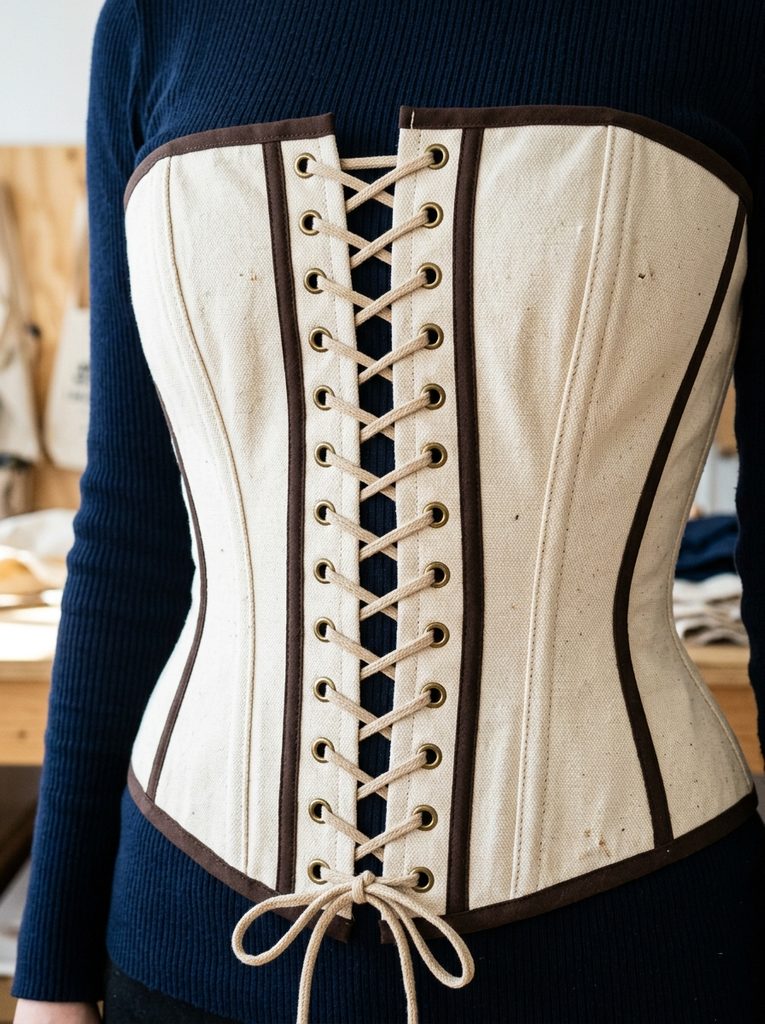
Create a structured, vintage-inspired corset top by repurposing durable cotton canvas tote bags. Deconstruct two unneeded canvas tote bags by removing the shoulder straps, handles, and bottom gusset seams, laying the canvas panels completely flat. Trace four corset pattern pieces—two center front panels and two side back panels—onto the stiff canvas material using a pencil or chalk. Cut out each panel, leaving a half-inch seam allowance along all edges. Join the panels sequentially using a high-tension straight stitch, pressing each open seam flat. Sew boning channels directly over the interior seam allowances and insert flexible plastic boning strips into each casing to maintain vertical structure. Fold the upper and lower edges inward, securing them with a contrasting bias tape trim. Install metal eyelets along the back vertical opening edges and lace a thick cotton cord through for an adjustable closure.
Color-Blocked Fleece Gaiter from Pullover Remnants Execution Process
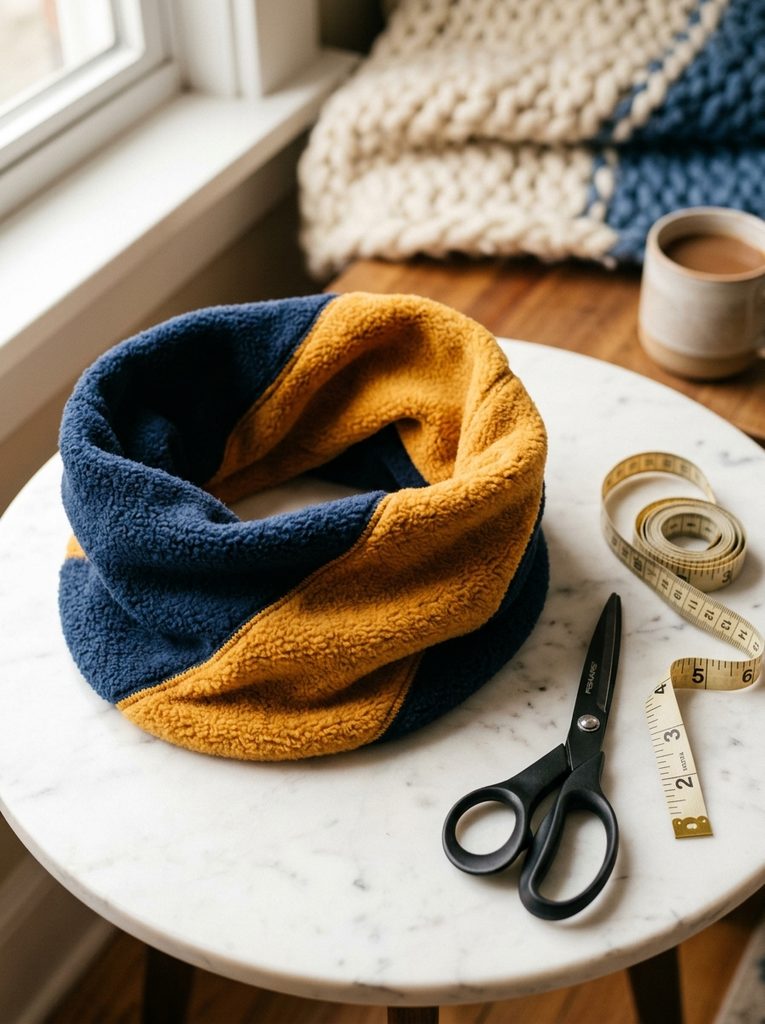
Design a thermal color-blocked neck gaiter by reusing fabric sections from worn-out fleece pullovers. Cut rectangular panels measuring twelve inches wide by nine inches tall from two fleece garments of contrasting shades. Lay one rectangular piece flat and cut it diagonally from corner to corner to form two right-angle triangles. Join a triangle from each color set along the hypotenuse using a narrow overlock stitch, creating a vibrant diagonal color-blocked panel. Repeat this process for the second set of triangles to build the matching inner lining panel. Place the outer gaiter panel and lining panel right-sides-together, stitching along the top and bottom horizontal borders. Turn the tube right-side-out through the open side ends. Bring the short vertical side edges together, matching the lining to lining and outer to outer, and sew the final connecting seam to complete a warm, continuous loop.
Gathered Peplum Top from Oversized Sweatshirts How to Create
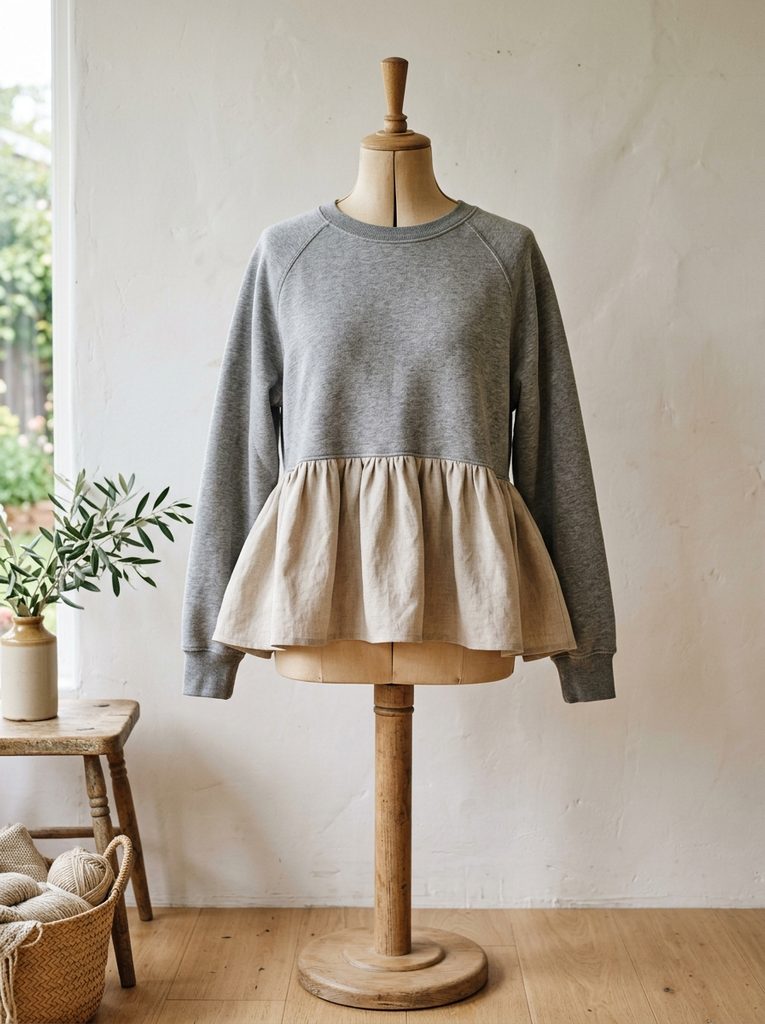
Transform a boxy, oversized crewneck sweatshirt into a fitted top featuring a gathered woven peplum hem. Cut off the bottom ribbing of the sweatshirt three inches above your natural waistline to form a cropped bodice silhouette. Cut two long, nine-inch wide fabric strips from a discarded cotton bedsheet or woven linen garment to create the decorative lower skirt extension. Join the short side ends of the fabric strips together to make a continuous wide fabric loop, then stitch a rolled hem along the bottom edge. Run two parallel gathering stitches along the upper raw edge of the fabric loop, pulling the threads evenly until the loop matches the waist circumference of the cropped sweatshirt. Pin the gathered peplum edge inside the sweatshirt waist, right sides facing, and stitch around the circumference using a stretch-compatible zigzag stitch.
Embroidered Pocket Crossbody Bag from Denim Waistbands Setup Method
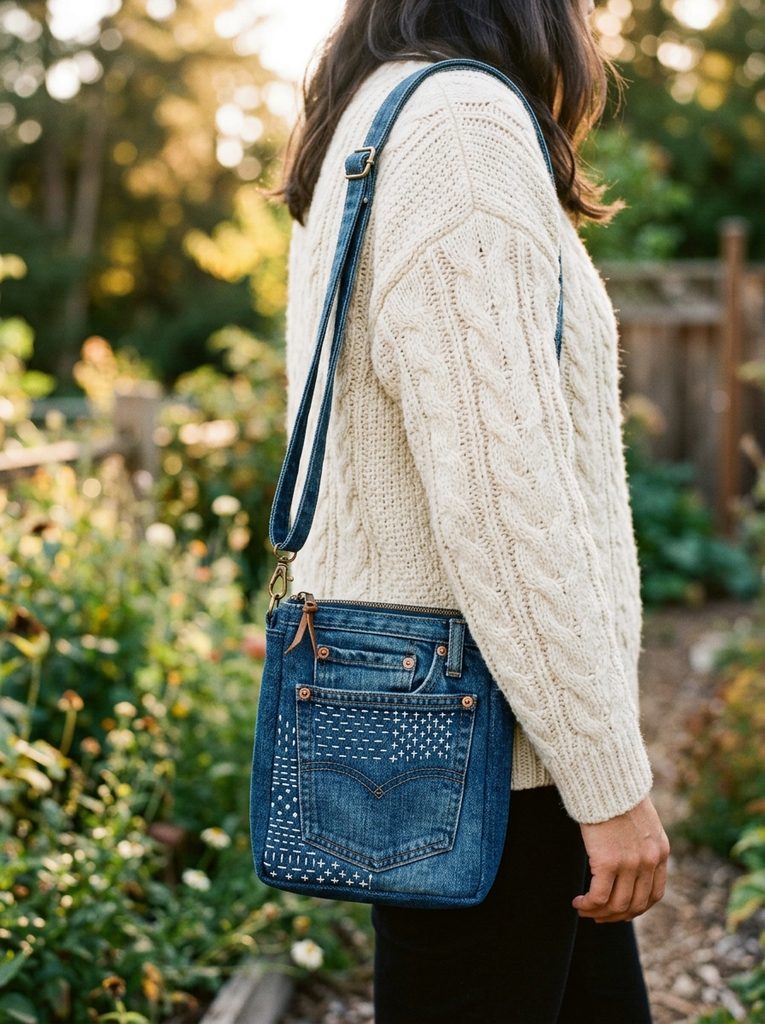
Craft a compact crossbody phone bag by combining waistbands and back pockets salvaged from worn denim jeans. Carefully unpick two intact back pockets from a pair of jeans, retaining the original topstitching details. Next, cut off the entire waistband of the jeans in one continuous strip to serve as the structural frame and strap attachment points. Place the two back pockets back-to-back with their finished open tops facing upward, inserting a thin piece of cotton padding between them for protection. Stitch around the side and bottom outer edges of the combined pockets, leaving the top main opening completely clear. Cut a twenty-inch section of the denim waistband and wrap it around the bottom and side perimeters of the sewn pockets to act as a sturdy side gusset. Attach the remaining long section of the waistband across the top sides to form a thick, comfortable crossbody shoulder strap.
Tiered Sheer Kimono from Vintage Silk Scarves How to Make
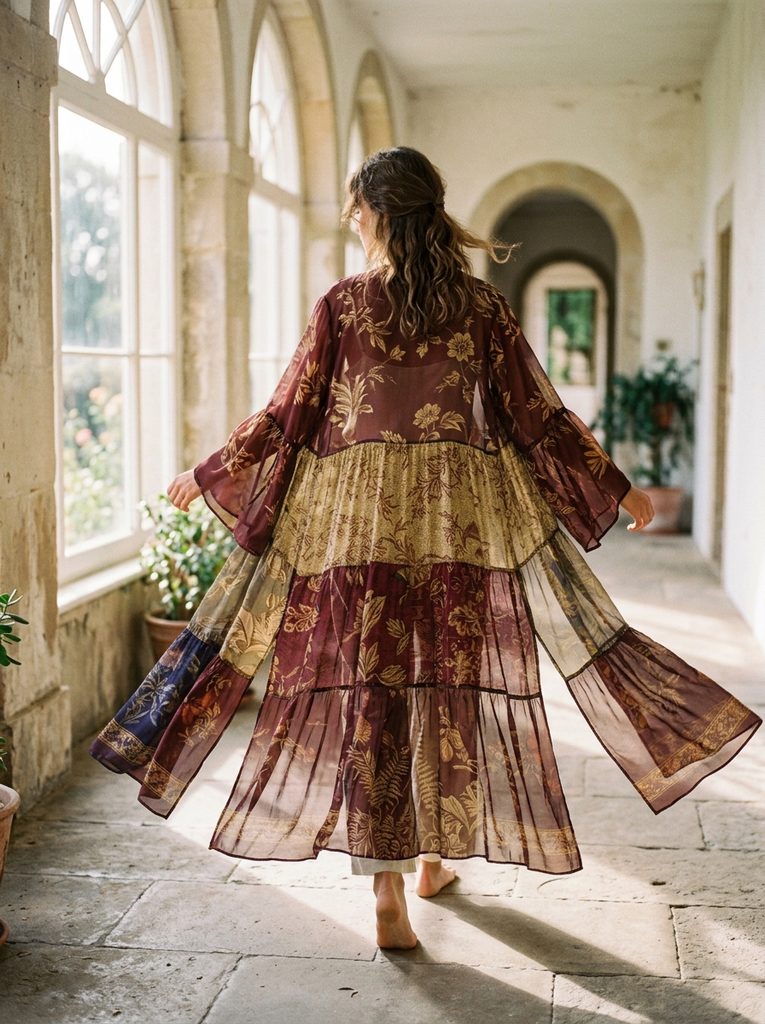
Assemble a lightweight, floor-length bohemian kimono using six vintage sheer silk or chiffon scarves. Select four large square scarves for the main body panels and two long rectangular scarves for the sleeves. Sew two square scarves together along one horizontal edge using a neat French seam to create a continuous panel for the back of the garment. For the front panels, take the remaining two square scarves, fold them in half vertically, and stitch their top outer corners to the back panel to establish the shoulder seams. Leave the center front wide open to form the neck drop. Attach the long rectangular scarves horizontally along the upper side seams to construct loose, flowing bell sleeves. Join the underarm seams down to the waist level, leaving the lower side edges open to form graceful side slits that showcase the drape of the silk.
Common Beginner Mistakes and How to Avoid Them
Beginners entering the world of upcycled clothing often encounter avoidable construction errors that impact the fit and durability of their projects. One prevalent issue is mixing fabrics with incompatible weights or stretch factors, such as sewing non-stretch canvas directly onto lightweight stretchy jersey, which causes seam puckering. To prevent this, pair fabrics with similar structural traits or apply lightweight fusible interfacing to stabilize stretchy materials before stitching. Another mistake is forgetting to adjust machine needle types to match the fabric thickness; using a universal needle on thick denim leads to skipped stitches and broken thread. Always select specialized denim or stretch needles as required. Finally, rushing through the cutting phase without taking accurate body measurements often results in ill-fitting garments. Using tailor’s chalk, clear acrylic rulers, and sewing pins before making permanent cuts ensures precise alignment every time.
Practical Tips for Better Results
Achieving professional results in DIY apparel projects requires attention to detail during assembly and seam finishing. Pressing every seam flat with a steam iron immediately after sewing is essential, as heat sets the stitches into the textile fibers and eliminates bulky, amateur-looking edges. When working with raw or distressed denim edges, run a stay-stitch line one-quarter inch above the frayed line to keep the fabric from unraveling excessively in the wash. Using high-quality all-purpose polyester thread guarantees strong seams capable of withstanding tension along stressed joints like armholes and waistbands. When adding decorative details or topstitching onto upcycled clothing, use a slightly longer stitch length setting on your sewing machine to create clean, visible lines. Taking time to trim loose threads and stabilize high-stress areas elevates simple handmade projects into durable, boutique-quality garments.
Styling, Presentation, or Organization Ideas
Styling upcycled garments effectively balances structural DIY elements with modern minimalist wardrobe essentials. A structured canvas corset top or utility denim vest pairs smoothly when worn over a simple, monochromatic long-sleeve base layer or neutral trousers. Contrast textured items, like ribbed arm warmers or a color-blocked fleece gaiter, against smooth leather jackets or streamlined wool coats for an elevated aesthetic. For closet organization, store heavy upcycled outerwear, such as trouser skirts and denim vests, on sturdy wooden hangers to preserve their structural shape over time. Delicate items made from silk scarves or lightweight linen should be folded neatly or stored in cotton garment bags to prevent snags. Displaying completed handmade creations on an open clothing rack highlights custom details, making daily outfit planning easy while keeping your sustainable wardrobe visible and accessible.
Budget or Time Planning
Careful planning of time and resources keeps upcycling projects affordable and manageable. Sourcing base garments from thrift shops, estate sales, or existing household wardrobes minimizes material costs while yielding high-quality fabrics. Simple projects, such as converting sleeves into arm warmers or assembling a fleece gaiter, generally require only one to two hours of active crafting time. More complex transformations—such as drafting a layered linen dress or assembling a quilted canvas hat—may take four to six hours divided into focused stages. Streamline your creative workflow by grouping tasks together; for example, complete all seam-ripping and measuring in one session before moving on to cutting and iron pressing. Budgeting a small amount for essential notions like durable thread, quality machine needles, and bias tape allows you to finish projects efficiently without unnecessary expenses.
Creative Expansion and Advanced Inspiration
Once foundational upcycling techniques are mastered, exploring advanced fabric manipulation method opens up new creative possibilities. Experimenting with natural dye techniques—using organic matter like avocado pits, onion skins, or indigo—allows crafters to unify mismatched fabric scrap colors before assembling complex garments. Incorporating decorative hand-embroidery stitches, such as sashiko, french knots, or running stitches, directly over seam junctions adds rich visual texture and personalized artistry to plain fabrics. Advanced makers can also explore zero-waste pattern drafting, joining micro fabric scraps together using intricate patchwork quilting before cutting out new pattern pieces. Integrating hardware like brass grommets, heavy zippers, and adjustable buckles elevates upcycled garments further, allowing you to turn basic second-hand clothing into unique, custom fashion statements.