10 Sewing Upcycled Clothing Ideas
Sewing upcycled clothing is a practical, eco-friendly approach to garment construction that breathes new life into existing textiles. This guide provides ten distinct, actionable transformation methods for repurposing old apparel using basic sewing machinery and hand techniques. Readers will learn how to inspect, measure, cut, and join secondary fabrics to build functional, stylish garments tailored to their individual preferences. Mastering these sewing techniques allows creators to build a personalized, sustainable wardrobe without buying expensive new bolts of fabric. Beyond reducing household textile waste, this creative project teaches key sewing fundamentals, such as seam ripping, bias binding, gathering, and panel integration. This step-by-step tutorial offers reliable design strategies that suit various skill levels, ensuring every finished item achieves a durable, professional finish.
Why This Idea Is Trending or Useful
The popularity of sewing upcycled clothing on platforms like Pinterest stems from a growing demand for unique, custom fashion solutions that align with sustainable living. This concept carries immense practical value, allowing individuals to transform unused, ill-fitting apparel into high-end pieces while saving money. Modern design trends heavily favor mixed-media textures, color-blocking, and relaxed silhouettes, all of which are easily crafted through upcycling techniques. The DIY appeal lies in its adaptability, as makers can customize every seam, hem, and detail according to personal style. For beginners, upcycling provides an accessible entry point to garment construction because pre-existing clothes supply pre-finished elements like collars, button plackets, and hems. Transforming discarded garments into fashionable apparel offers an enjoyable, beginner friendly method to master sewing essentials.
Materials and Preparation
Proper preparation and fabric selection are vital for executing clean, long-lasting upcycling projects. Begin by collecting worn or out-of-style garments crafted from stable fabrics, such as cotton denim, linen, canvas, ribbed knits, or woven flannels. Gather core tools, including fabric shears, a seam ripper, tailor’s chalk, measuring tape, sewing pins, an iron, and a reliable sewing machine fitted with standard universal and stretch needles. Prior to cutting, wash and iron all garments flat to eliminate wrinkles and prevent uneven shrinkage later. Carefully examine all fabrics for structural damage, trimming away threadbare areas while preserving intact structural seams. Planning considerations should focus on fabric weight compatibility, stretch orientation, and thread color coordination. Organizing materials by texture and weight ensures a smooth assembly process and professional results.
Tailored Denim Corset Top from Old Jeans Step-by-Step Guide
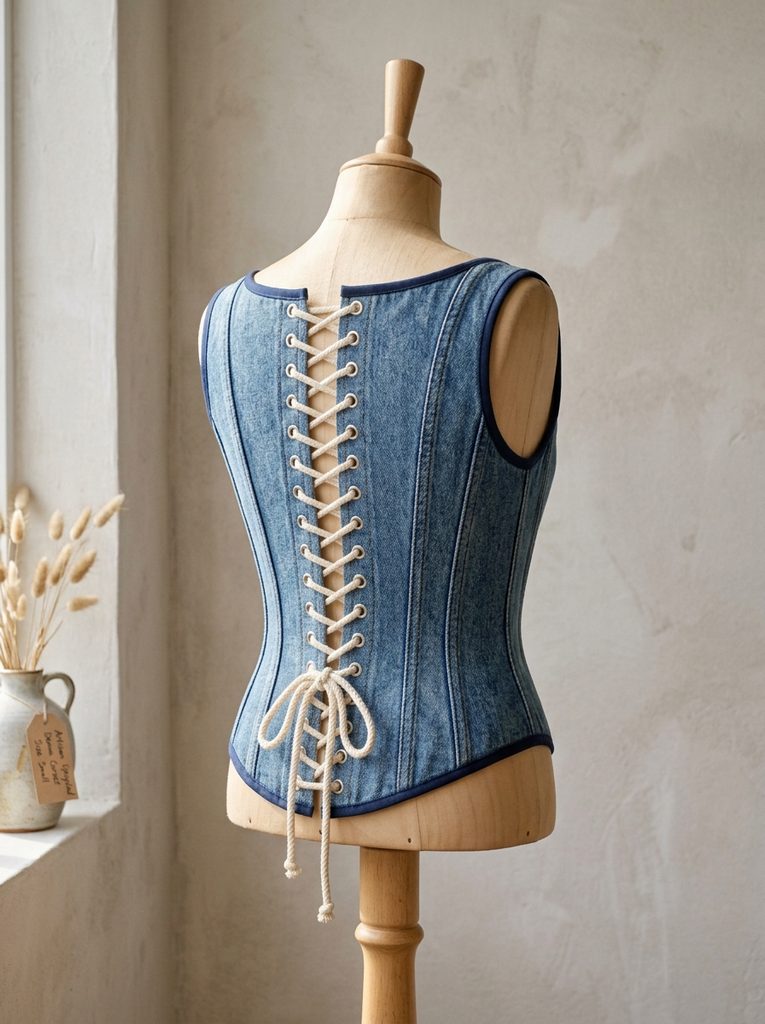
Construct a structured waist-cinching corset top using the sturdy legs of discarded cotton denim jeans. Start by unpicking the inseams of both pant legs using a seam ripper, pressing the denim flat with an iron. Trace four distinct corset pattern panels onto the fabric using tailor’s chalk, keeping two panels for the front and two for the back sides. Cut out the denim panels, leaving a precise half-inch seam allowance around all outer borders. Join the panels sequentially using a high-tension straight stitch on your sewing machine, pressing every seam open. Topstitch bias tape along the internal seam allowances to create narrow channels, then insert flexible boning strips into each casing for vertical structure. Hem the upper and lower borders with contrasting bias binding, and finish by installing metal eyelets down the center back seam for adjustable ribbon lacing.
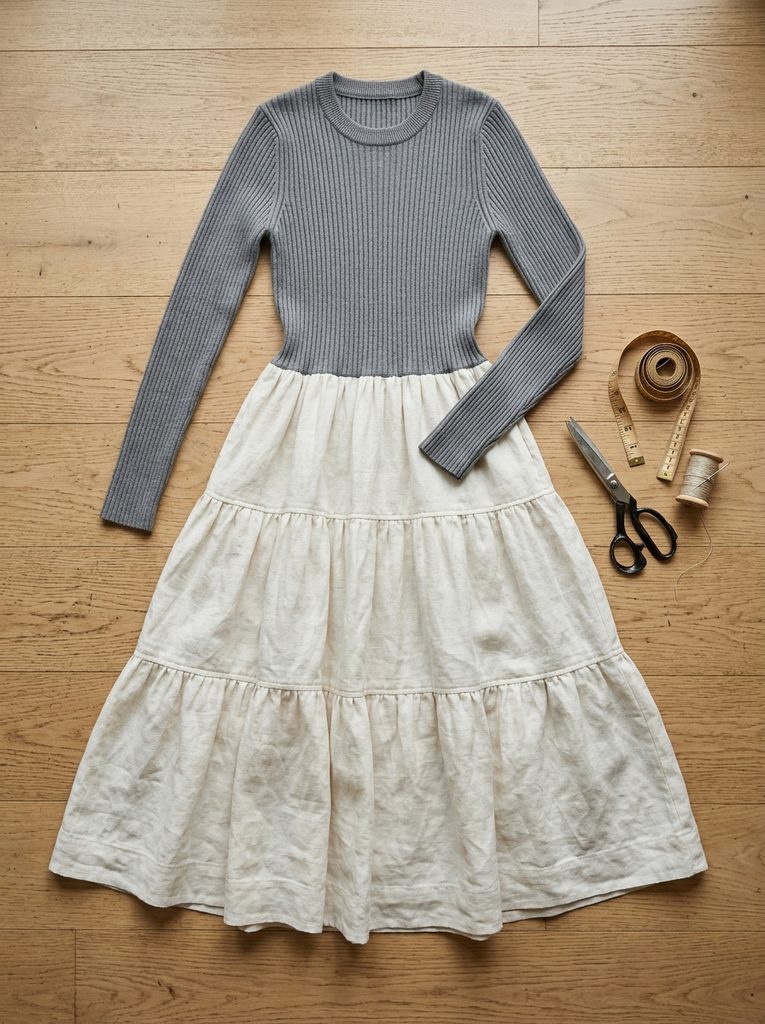
Ribbed Sweater Dress with Woven Tiered Skirt Execution Process
Transform an oversized ribbed knit sweater into a cozy, fitted sweater dress featuring a gathered fabric skirt extension. Cut off the bottom hem of the sweater horizontally right at your natural waistline, establishing a snug sweater bodice. Cut two long, twelve-inch wide rectangular strips from a repurposed cotton bedsheet or linen table runner to build the gathered lower skirt extension. Stitch the short ends of the fabric strips together to form one continuous fabric ring, then sew a double basting stitch along the upper raw edge. Pull the basting threads evenly until the gathered ring matches the circumference of the sweater waist. Pin the gathered fabric ring inside the sweater waist, right sides facing, and stitch along the joint using a stretch zigzag stitch. Finish the lower hem of the woven skirt with a narrow folded hem.
Linen Apron Dress from Men’s Button-Down Shirts How to Create
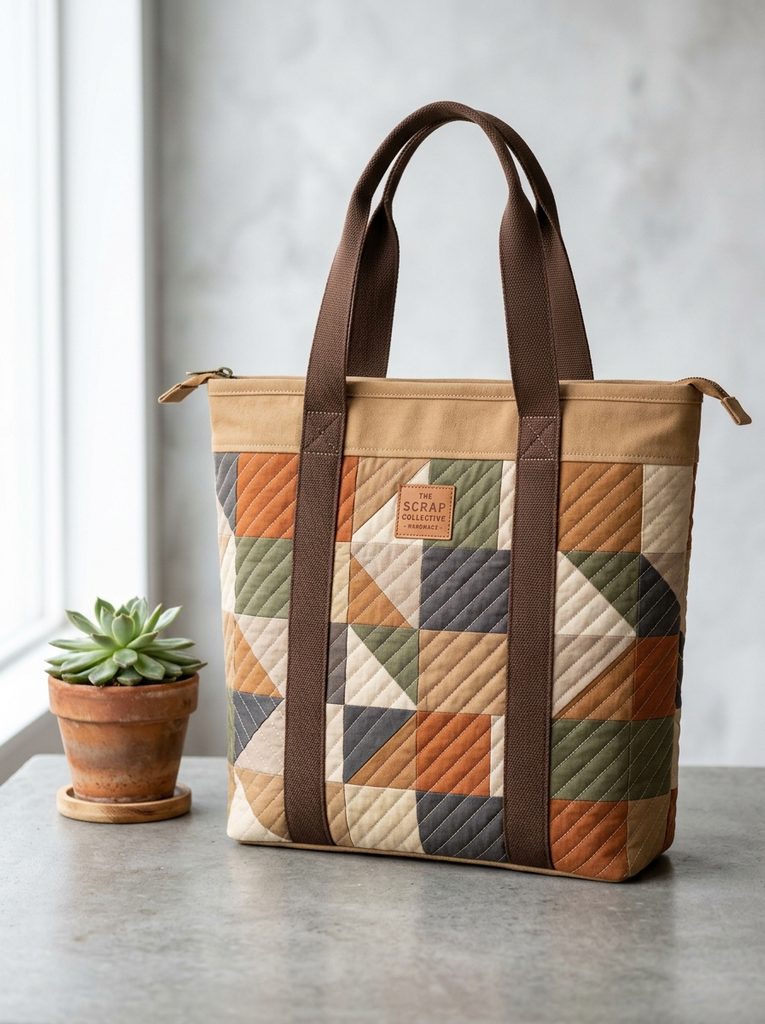
Craft an airy, pinafore-style apron dress by repurposing two oversized men’s linen button-down shirts. Unstitch the sleeves, collars, and shoulder seams of both shirts, setting aside the large back panels to form the front and back skirt sections. Cut the lower front placket sections of one shirt into two four-inch wide strips to fabricate long, cross-back shoulder straps. Gather the top edge of each back panel using a long basting stitch until the width matches your waist measurement. Attach a wide rectangular chest bib panel to the front gathered skirt section using a flat fell seam. Secure the wide shoulder straps to the top corners of the chest bib, crossing them across the open back before sewing them inside the rear waistband. Press all newly formed seams with a steam iron to maintain a crisp, minimalist style.
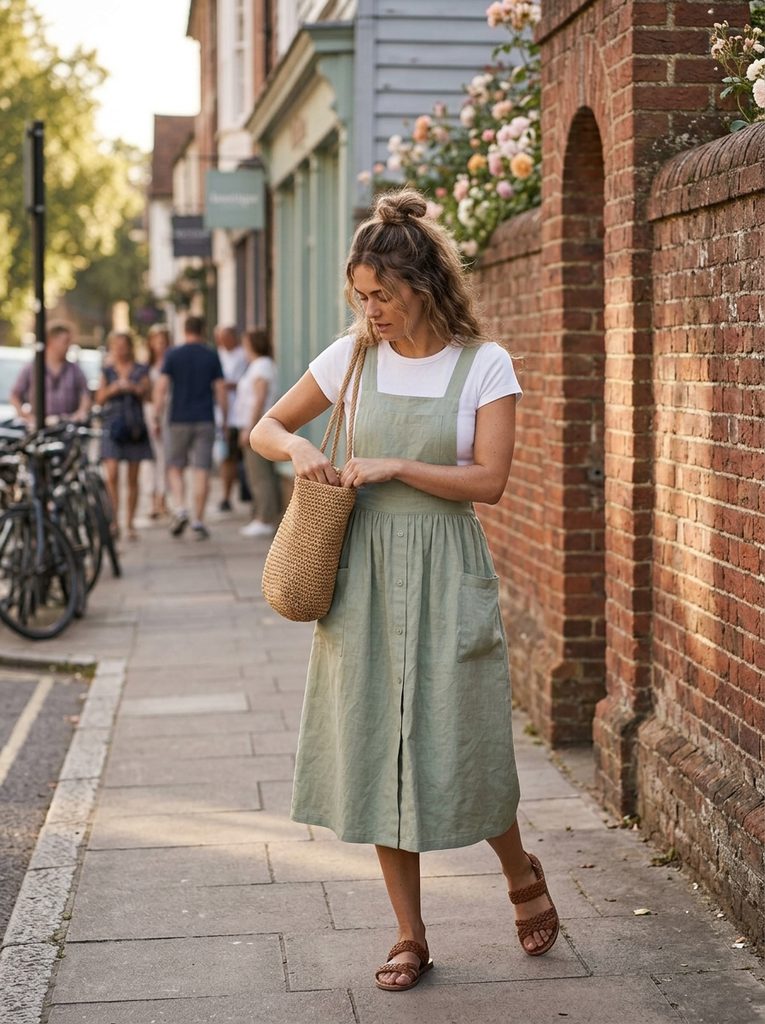
Quilted Fabric Tote Bag from Cotton Scrap Remnants Setup Method
Fabricate a durable, structured tote bag using layered cotton fabric scraps left over from previous sewing projects. Prepare the outer bag body by stitching various rectangular cotton scraps together into two flat patchwork panels measuring sixteen by eighteen inches. Cut matching pieces of fusible fleece interfacing and iron them onto the wrong side of each patchwork panel to add structural padding. Run parallel diagonal lines of topstitching across both panels to create a classic quilted diamond texture. Place the two quilted panels right sides together and stitch along the sides and bottom edge, boxing the bottom corners by two inches for depth. Repeat this process using a solid cotton lining fabric, sewing it inside the quilted outer shell along the top rim. Attach two sturdy cotton canvas webbing handles to the top hem using a double box-stitch pattern.
Asymmetrical Pleated Skirt from Wool Trousers How to Make
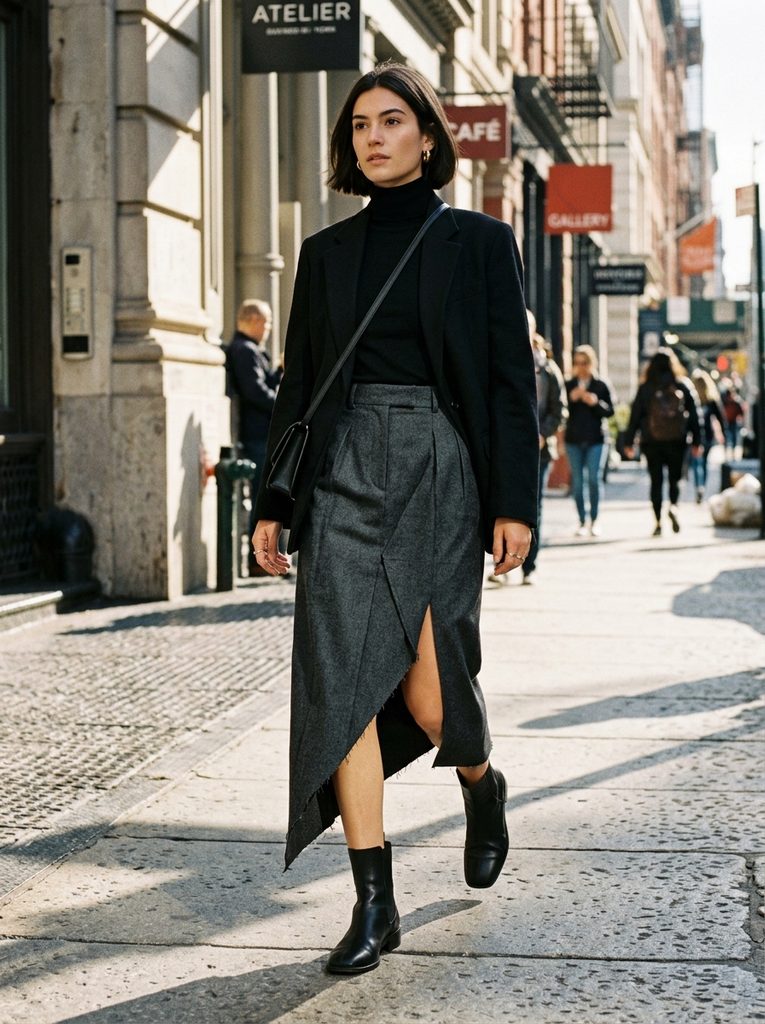
Repurpose a pair of wide-leg wool trousers into a modern, high-waisted asymmetrical skirt featuring clean pleated lines. Unpick the entire inner leg seam of the trousers from hem to crotch using a seam ripper, laying the fabric panels completely flat. Cut away the curved crotch seams on both front and back panels, aligning the center edges into straight vertical seams. Fold the front left panel over the right panel at a slight angle to establish a sharp, overlapping asymmetrical front hemline. Secure the overlapping fold with sewing pins and topstitch down the center front seam from the waistband to the mid-thigh level. Trim the lower hemline diagonally, following the line of the front overlap, and secure the edge with a clean rolled hem. Finish the interior waist with bias tape for structural stability and clean comfort.
Fleece Neck Gaiter from Pullover Sweaters Step-by-Step Guide
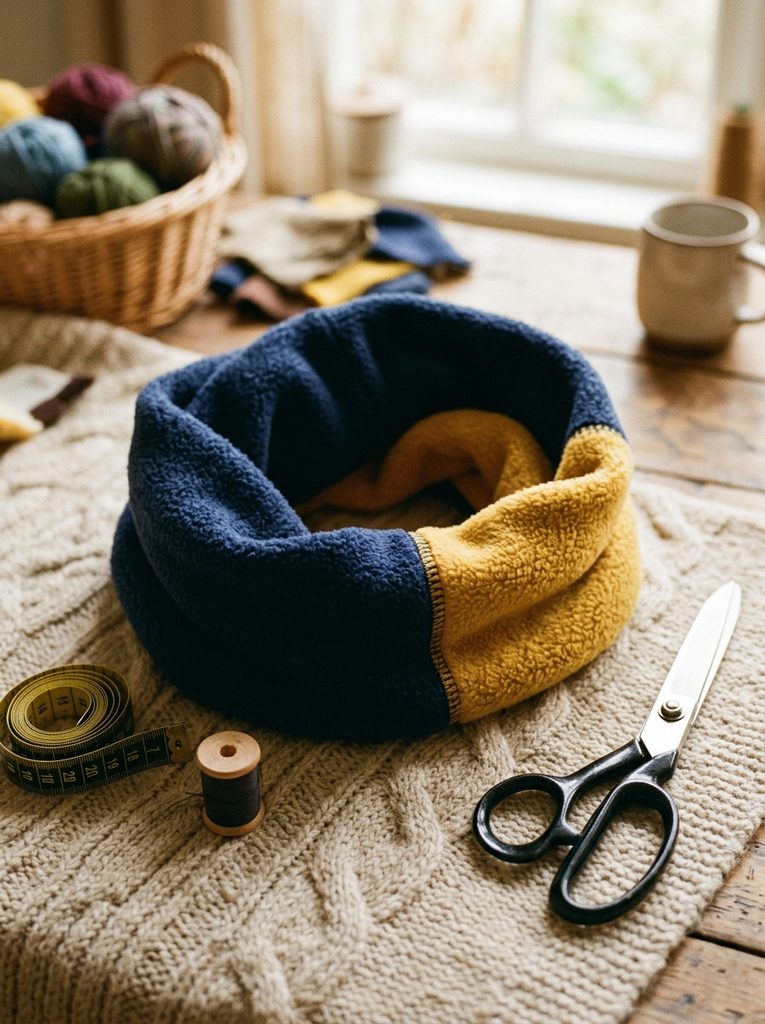
Assemble a warm, dual-toned thermal neck gaiter using fabric sections cut from two worn fleece pullover sweaters. Cut one rectangular panel measuring twelve inches wide by ten inches tall from each fleece garment in contrasting complementary colors. Lay both fleece panels flat, right sides facing together, and pin them along the long top and bottom horizontal edges. Stitch along both pinned horizontal edges using a stretch zigzag stitch or an overlock machine setting, leaving the short vertical side ends completely open. Reach inside the resulting fabric tube to pull one open end through to the other, aligning the matching raw edges of both fleece colors together. Stitch around the open circular raw edges, leaving a small two-inch gap for turning the piece right-side out. Hand-stitch the small opening closed using an invisible ladder stitch to complete a seamless fleece loop.
Flannel Patchwork Shacket with Denim Trim Execution Process
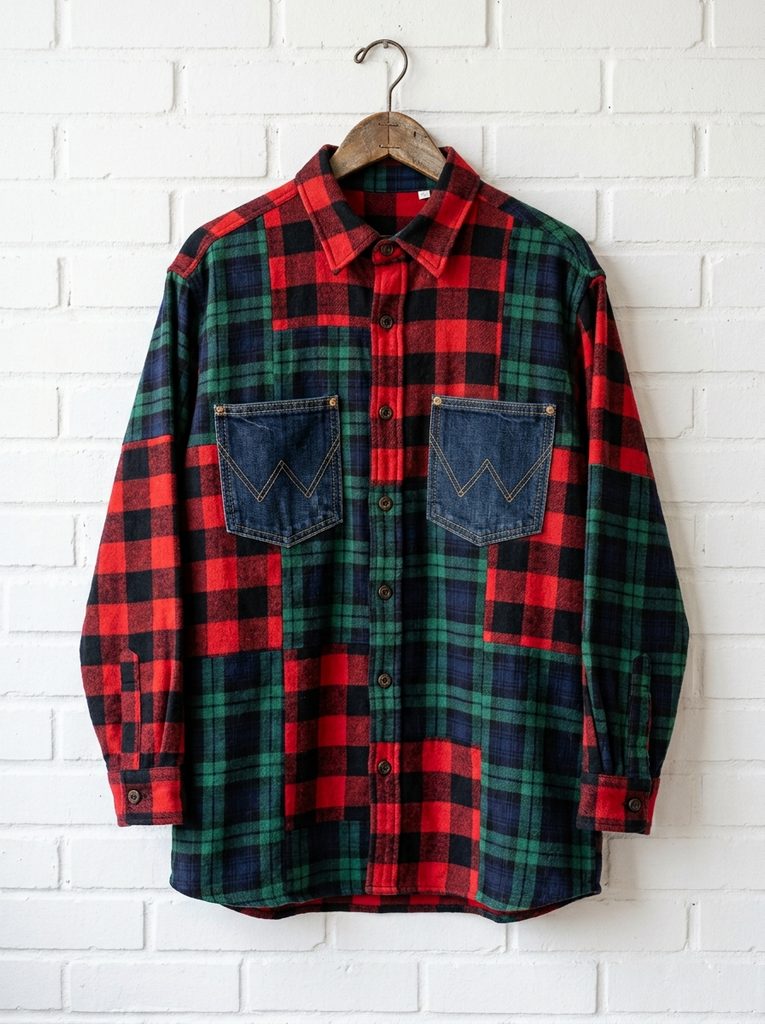
Combine two worn flannel shirts into an oversized patchwork shacket featuring heavy denim pocket accents. Carefully remove the sleeves and front panels from both flannel shirts, cutting the fabrics into equal-sized rectangular blocks using an acrylic ruler and rotary cutter. Stitch the flannel blocks together in an alternating grid pattern to form newly pieced fabric yards for the front, back, and sleeve panels. Reassemble the shirt components using standard flat-fell seams for heavy-duty reinforcement. Cut two large patch pockets from the back pockets of discarded denim jeans, positioning them symmetrically across the front chest panels of the pieced flannel shacket. Topstitch the denim pockets securely using heavy denim thread. Finish the sleeve cuffs and front button plackets by encasing the raw edges in narrow strips of vintage denim for contrasting visual texture.
Cropped Sweatshirt Top with Gathered Bell Sleeves How to Create
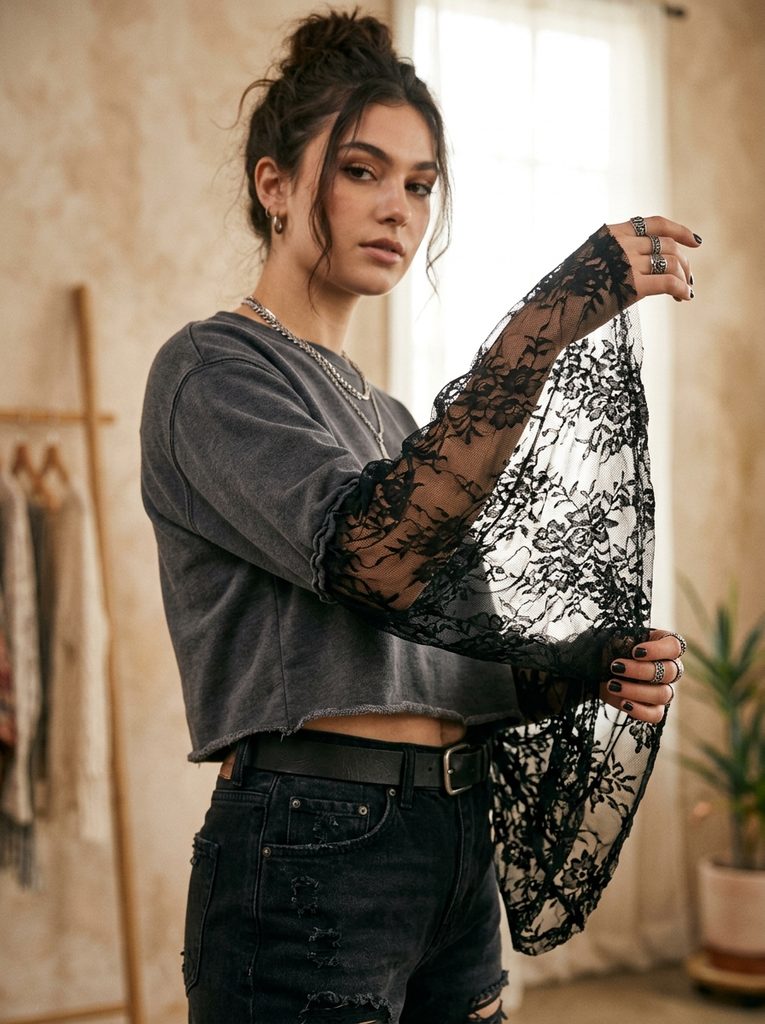
Upgrade a plain crewneck sweatshirt into a chic cropped top with dramatic gathered bell sleeves using sheer lace inserts. Cut off the bottom ribbing of the sweatshirt four inches above your natural waistline, folding the cut edge inward by half an inch to sew a clean hem. Cut off both original sweatshirt sleeves at the elbow line using sharp fabric shears. Cut two wide rectangular panels from sheer floral lace fabric, measuring twenty inches wide by eighteen inches long, to serve as lower sleeve extensions. Gather the top edge of each lace rectangle using a gathering thread until it matches the bottom circumference of the cut sweatshirt sleeves. Pin the gathered lace inside the cut sleeve openings, right sides together, and stitch using a stretch zigzag stitch. Finish the wrist hem of the lace sleeves with a delicate narrow turn-and-stitch hem.
Woven Canvas Utility Pouch from Canvas Trousers Setup Method
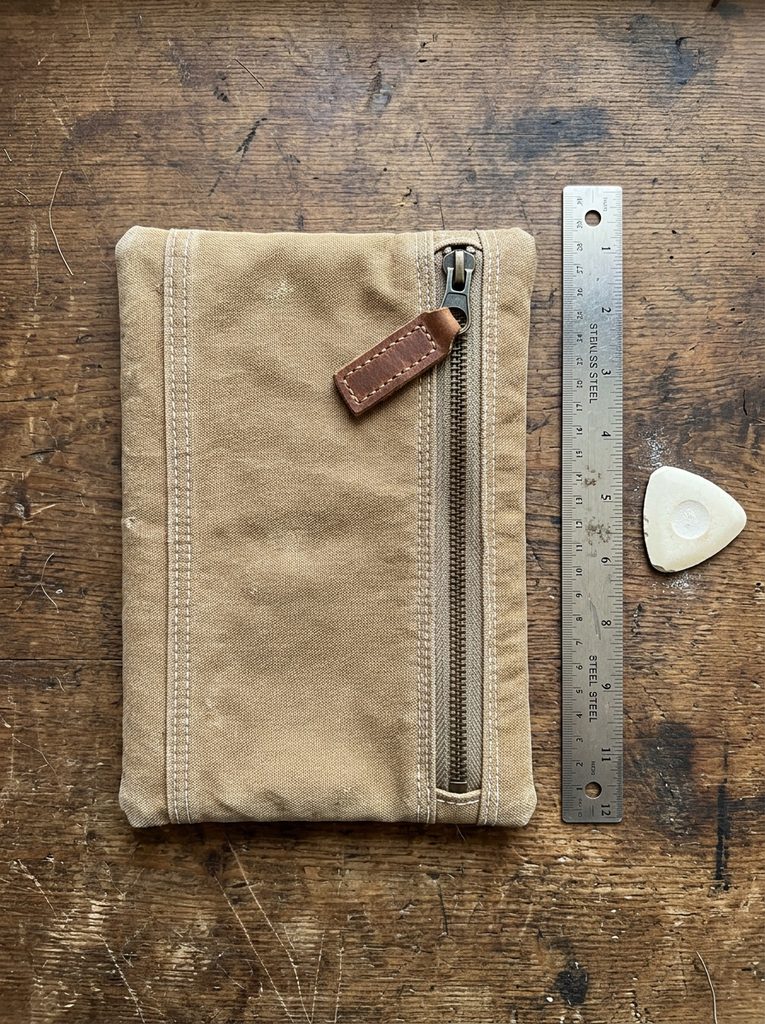
Convert the lower leg sections of heavy canvas work trousers into a set of durable, zipper-closed utility organizing pouches. Cut two nine-inch horizontal sections from the lower leg of a canvas trouser, preserving the original outer side seams for strength. Turn the canvas tube sections inside out and stitch one open end flat to form the sturdy bottom base of the pouch. Prepare a nylon zipper measuring nine inches in length, pinning the zipper tape face down along the top raw edge of the canvas tube. Machine stitch the zipper tape using a zipper foot, then fold the fabric back and topstitch along the edge to prevent the zipper from snagging. Repeat the zipper installation process on the opposite side of the tube opening. Open the zipper halfway, turn the canvas pouch right-side out through the opening, and press the corners neatly.
Tiered Sheer Duster Coat from Vintage Scarves How to Make
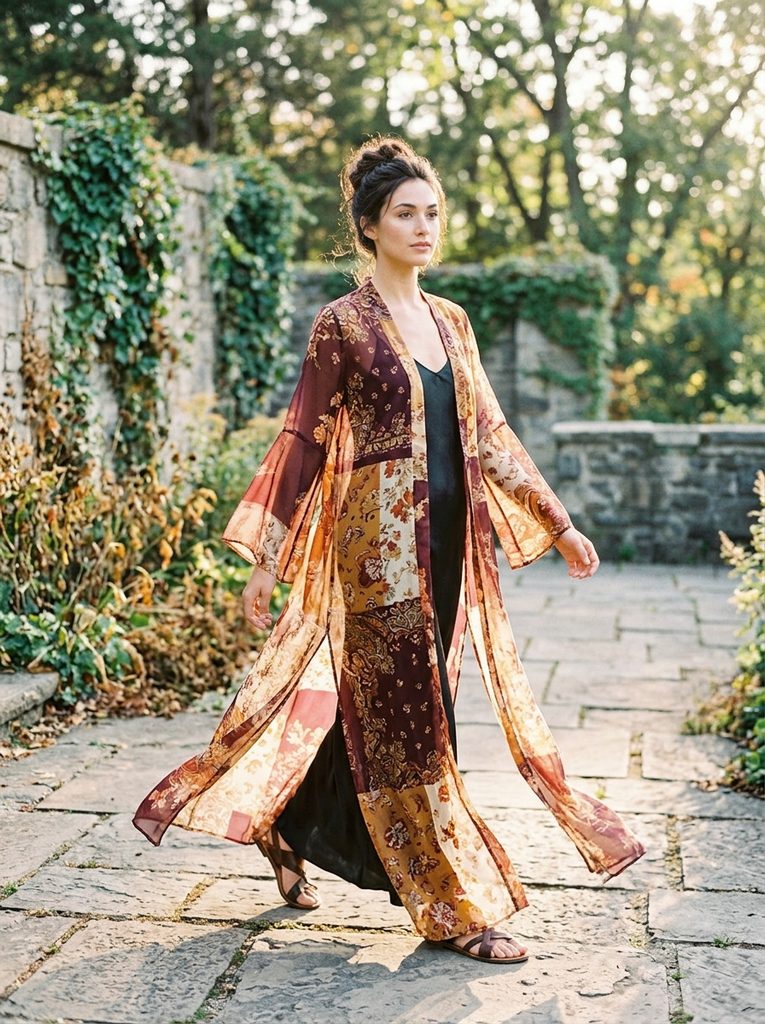
Construct a floor-length, airy bohemian duster coat by sewing together six vintage sheer silk or chiffon printed scarves. Select four large square scarves for the main body panels and two long rectangular scarves to fabricate the flowing sleeves. Join two square scarves along one horizontal side using a delicate French seam to form a continuous back panel that extends from shoulders to hem. Fold the remaining two square scarves in half vertically and stitch their top outer corners to the back panel to create the front panels and shoulder seams, leaving the center front open. Attach the long rectangular scarves along the upper side seams to serve as loose bell sleeves. Stitch the underarm side seams down to the waistline, leaving the lower half open to form graceful, floating side slits that enhance fabric movement.
Common Beginner Mistakes and How to Avoid Them
Beginners entering the world of upcycled clothing often make preventable structural errors that affect the finished garment’s fit and durability. A frequent mistake is combining fabrics with vastly different weights or stretch properties, such as joining heavy canvas directly onto stretchy cotton jersey, which causes seam distortion. Prevent this issue by selecting fabrics with similar weights or applying lightweight fusible interfacing to stabilize stretchy sections before stitching. Another common error is neglecting to change sewing machine needles to match specific textile requirements; using a standard needle on thick denim causes skipped stitches and thread breaks. Always switch to specialized denim, jersey, or microtex needles as dictated by your material. Finally, skipping the ironing step leads to uneven seams and misaligned cuts. Pressing every seam flat immediately after sewing ensures accurate measurements and a polished appearance.
Practical Tips for Better Results
Achieving professional-quality results with upcycled apparel relies heavily on precise seam finishing and careful material preparation. Always press seams with a steam iron after sewing every individual line, as heat sets thread stitches deep into textile fibers, eliminating bulky seams. When working with raw denim or loosely woven linens that fray easily, run a stay-stitch line one-quarter inch inside the cut edge before assembling the garment. Utilize high-quality all-purpose polyester thread to guarantee seam strength across stress points, such as armholes, waistbands, and pocket attachments. When sewing decorative topstitching onto upcycled clothing, increase your sewing machine’s stitch length setting slightly to create clean, well-defined stitch lines. Taking extra time to trim thread tails and finish raw interior edges with bias tape or a zigzag stitch dramatically improves garment longevity and comfort.
Styling, Presentation, or Organization Ideas
Styling upcycled garments effectively involves balancing structural DIY items with clean, modern wardrobe staples. A tailored denim corset top or a patchwork flannel shacket pairs effortlessly when styled alongside monochromatic trousers or basic cotton tees. Accent pieces, such as a fleece neck gaiter or a quilted canvas tote bag, add rich visual texture when combined with sleek wool coats or minimalist jackets. To organize upcycled apparel properly inside your closet, hang structured items like trouser skirts and denim corset tops on sturdy padded hangers to maintain their shape over time. Delicate garments constructed from sheer silk scarves or linen should be folded neatly or placed inside cotton garment bags to avoid snagging on hardware. Displaying finished upcycled projects on a garment rack keeps your sustainable fashion collection organized, visible, and ready for daily wear.
Budget or Time Planning
Planning project timelines and sourcing materials carefully keeps sewing upcycled clothing highly cost-effective and stress-free. Gathering base garments from thrift stores, clearance racks, or your own unused closet inventory minimizes fabric costs while supplying quality materials. Simple transformations, such as making a fleece neck gaiter or converting trousers into a utility pouch, generally take one to two hours of active crafting time. More intricate transformations—such as assembling a quilted scrap tote or drafting a linen apron dress—may require four to six hours split across multiple sessions. Streamline your workflow by organizing tasks sequentially; complete all seam ripping, measuring, and ironing in one batch before beginning the cutting and sewing stages. Setting aside a modest budget for essential notions, such as durable machine needles, thread, and bias tape, ensures uninterrupted project execution.
Creative Expansion and Advanced Inspiration
Once foundational upcycling techniques are mastered, exploring advanced fabric manipulation methods opens limitless creative possibilities. Experimenting with natural dye baths—using organic materials like avocado pits, onion skins, or indigo—allows crafters to unify mismatched fabric scrap colors before sewing complex garments. Incorporating hand-embroidery stitches, such as sashiko, french knots, or running stitches, directly across seam joints adds rich visual texture and custom personality to plain textiles. Advanced makers can also explore zero-waste pattern drafting, stitching micro fabric scraps together into complex patchwork quilts before cutting out new garment panels. Integrating heavy-duty hardware like brass eyelets, industrial zippers, and adjustable buckles elevates upcycled garments further, allowing you to convert basic second-hand clothes into high-concept, wearable art statements.