10 Renter-Friendly Sewing Room Organization Ideas
Creating a designated craft area within a rental home presents unique challenges, primarily the need to maintain walls and original structures while maximizing functionality. Renter-friendly sewing room organization focuses on non-permanent storage solutions, versatile modular furniture, and vertical layout strategies that adapt easily to temporary spaces. This guide provides structured methods to store fabrics, tools, pattern papers, and heavy machinery without causing property damage or requiring complex installations. Readers will discover systematically designed concepts tailored for compact, multi-use areas, enabling a clean aesthetic and an efficient workflow. Implementing these practical layout concepts allows makers to streamline their daily creative processes, protect delicate materials from dust and light exposure, and establish an inspiring work environment that complies with standard lease agreements.
Why Renter-Friendly Craft Storage Solutions Are Essential
Temporary creative spaces require organizational systems that balance accessibility with strict spatial limitations. Portable and modular setups are highly valued because they adapt to changing spatial layouts without requiring structural modifications like heavy drilling or permanent mounting. Modern craft room aesthetics emphasize organized visual harmony alongside physical functionality. Utilizing non-destructive methods ensures that individuals retain full mobility, allowing components to be packed, adjusted, or reconfigured quickly during a move. Designed specifically to be beginner friendly, these strategic organizational methods empower makers to convert underutilized nooks, quiet bedrooms, or shared living rooms into functional design studios. By focusing on smart space management, crafters minimize clutter, decrease preparation time, and increase overall productivity within their living spaces.
Necessary Materials, Equipment, and Setup Preparation
Establishing an organized sewing space begins with accurate measurements and thoughtful preparation. Prior to acquiring storage hardware, measure floor dimensions, table dimensions, and vertical wall space using a standard measuring tape. Essential equipment includes tension rods, heavy-duty removable adhesive hooks, freestanding wire shelving units, modular rolling carts, clear stackable bins, and canvas hanging organizers. Planning considerations involve grouping items by frequency of use, keeping primary tools like shears, pins, and bobbins within immediate reach of the primary sewing station. Secondary items, including bulk fabric bolts and seasonal patterns, should be assigned to contained lower or higher storage zones. Ensure that all temporary hanging solutions are matched to the weight specifications of your items to prevent slipping or wall damage over time.
Main Creative Layouts and Storage Concepts
Modular Rolling Cart System for Daily Supplies
Execution Process
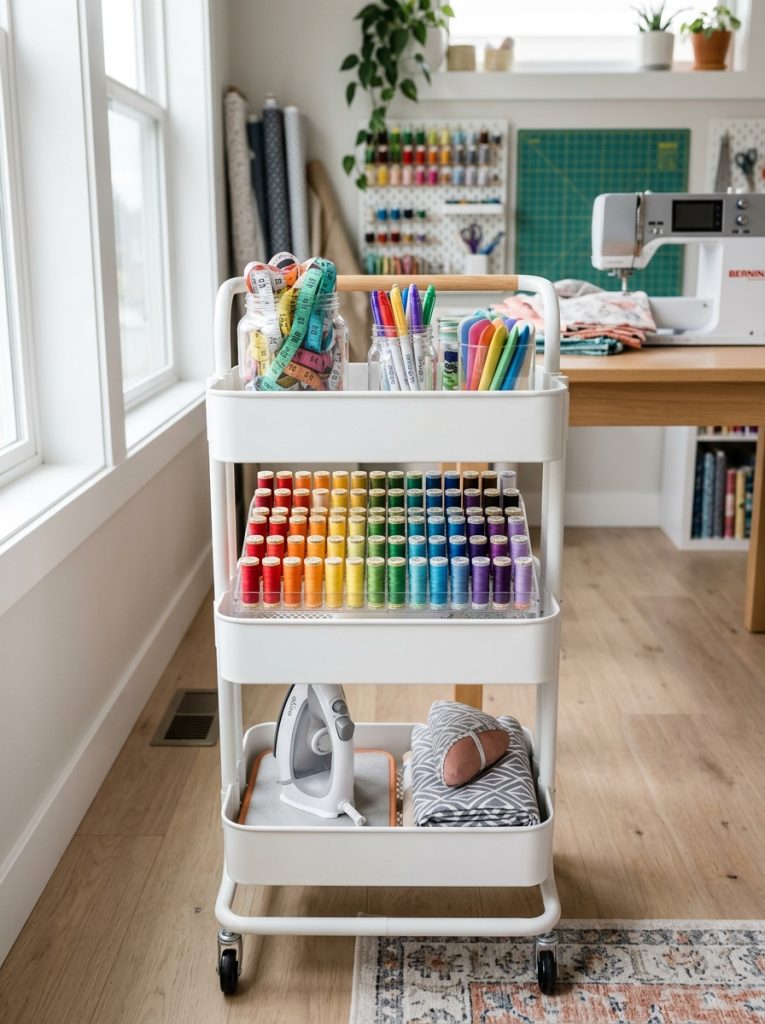
A multi-tier rolling cart serves as a mobile command station for essential sewing notions, thread spools, and pressing tools. Assemble a three-tier steel wire or plastic rolling cart, reserving the top bin for immediate necessities such as measuring tapes, rotary cutters, and marking chalk placed in shallow divider trays. Use the middle drawer for arranged thread spools categorized by color family and material weight, alongside clear cases of machine needles and bobbins. Place heavier press equipment, such as a compact iron and pressing tailor ham, on the lower shelf. This mobile unit glides effortlessly next to your main sewing machine during active construction and slides neatly into a closet or corner when work concludes, offering immediate spatial flexibility without requiring any wall attachment.
Tension Rod Fabric Display and Storage Wall
Step-by-Step Guide
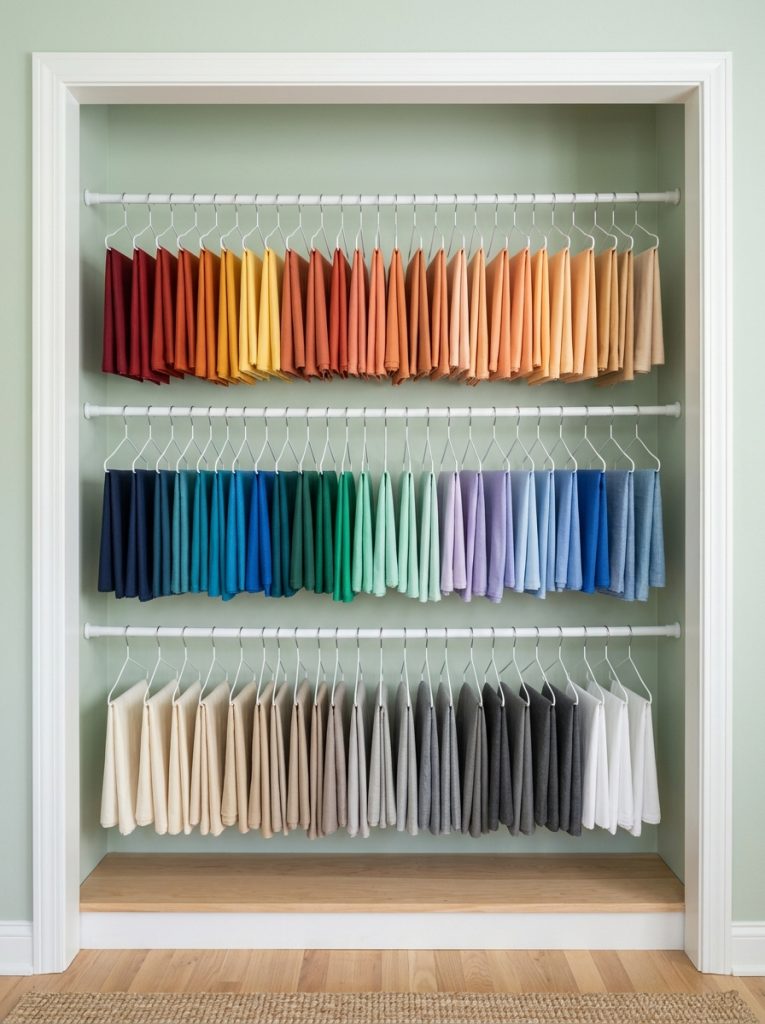
Tension rods offer an effective mechanism for vertical storage without drilling holes into rental walls. Install adjustable heavy-duty tension rods between tight alcove walls, inside shallow closet frames, or within sturdy bookshelf openings. Fold lightweight to medium-weight fabric cuts systematically over smooth wooden or plastic hangers, then suspend them along the tension rods. Organize textiles by fiber content, color hue, or project priority. This open layout allows clear visual access to your textile inventory, preventing accidental duplicate purchases and reducing storage creases. Ensure tension rods are adjusted tightly with rubber end caps to prevent slippage while supporting your fabric collection safely within small quarters.
Over-the-Door Pocket Grid for Tools and Notions
Setup Method
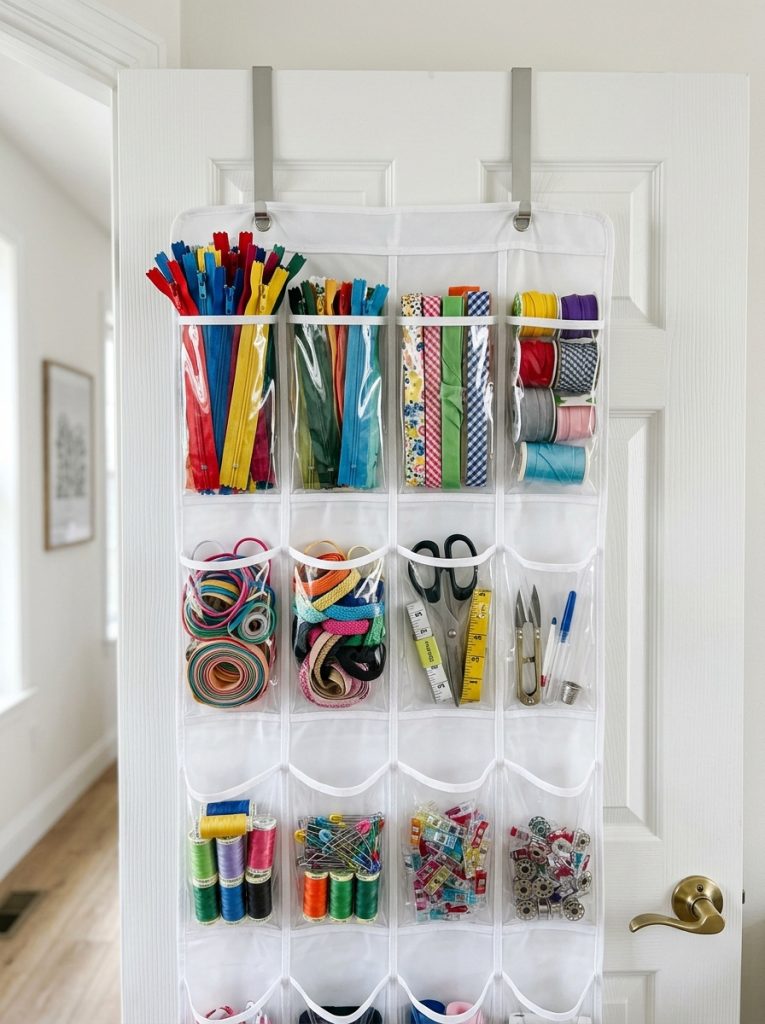
Utilize underutilized vertical surface space by hanging a heavy-duty fabric or clear vinyl pocket organizer over standard interior doors. Secure the unit using flat top hooks that slide smoothly over the door frame without scratching painted wood or interfering with door latching mechanisms. Assign individual clear pockets to specific supply categories, such as zippers, bias tapes, elastic bands, pattern drafting tools, and marking pens. Clear vinyl pockets allow immediate inventory visibility, eliminating time spent searching through closed drawers. The soft fabric construction protects fragile items from impact while ensuring the entire assembly can be removed instantly without leaving scuffs or residue.
Pegboard System Secured via Adhesive Mounting Clips
How to Create
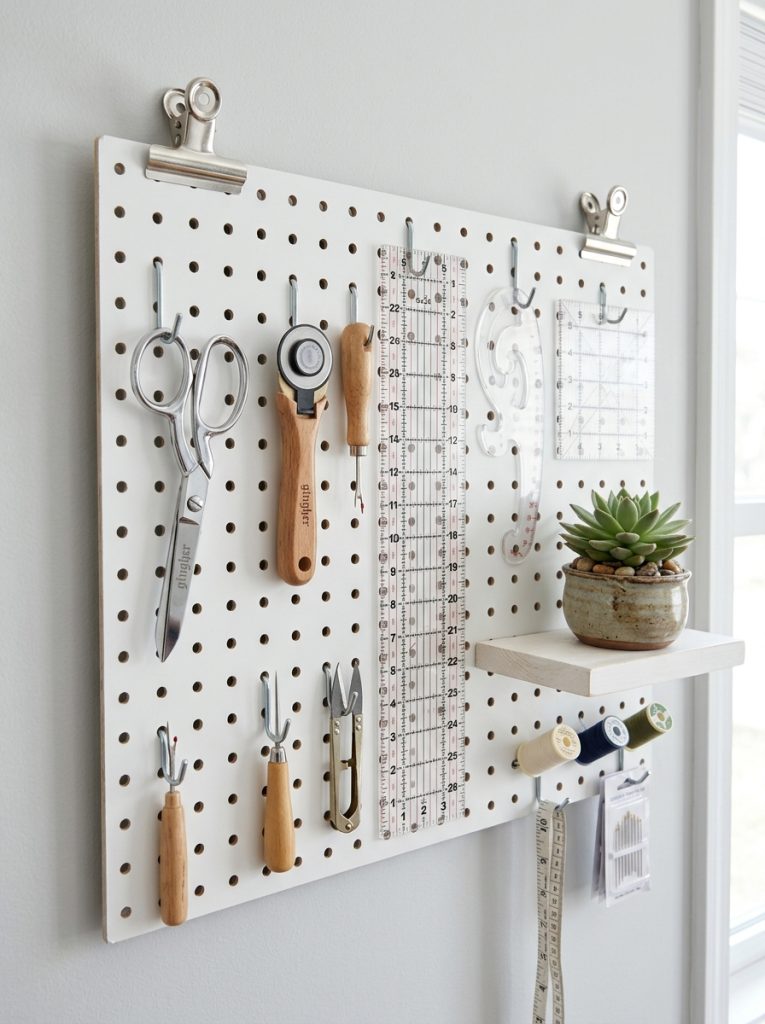
Mounting a custom pegboard does not require electric drills or drywall anchors when utilizing modern high-strength adhesive mounting hardware. Select a lightweight composite or aluminum pegboard sheet designed for small tool display. Clean the target wall surface thoroughly with rubbing alcohol to ensure proper surface bonding. Attach high-capacity adhesive strips or mounting brackets rated specifically for heavy display weights directly to the rear of the panel frame, pressing firmly against the wall for sixty seconds. Fit the board with metal or plastic pegs to hang scissors, acrylic rulers, pattern weights, and tape reels. This creates a clean, industrial display that keeps primary tools visible and off flat workspaces.
Freestanding Cube Shelving with Transparent Canvas Bins
How to Make
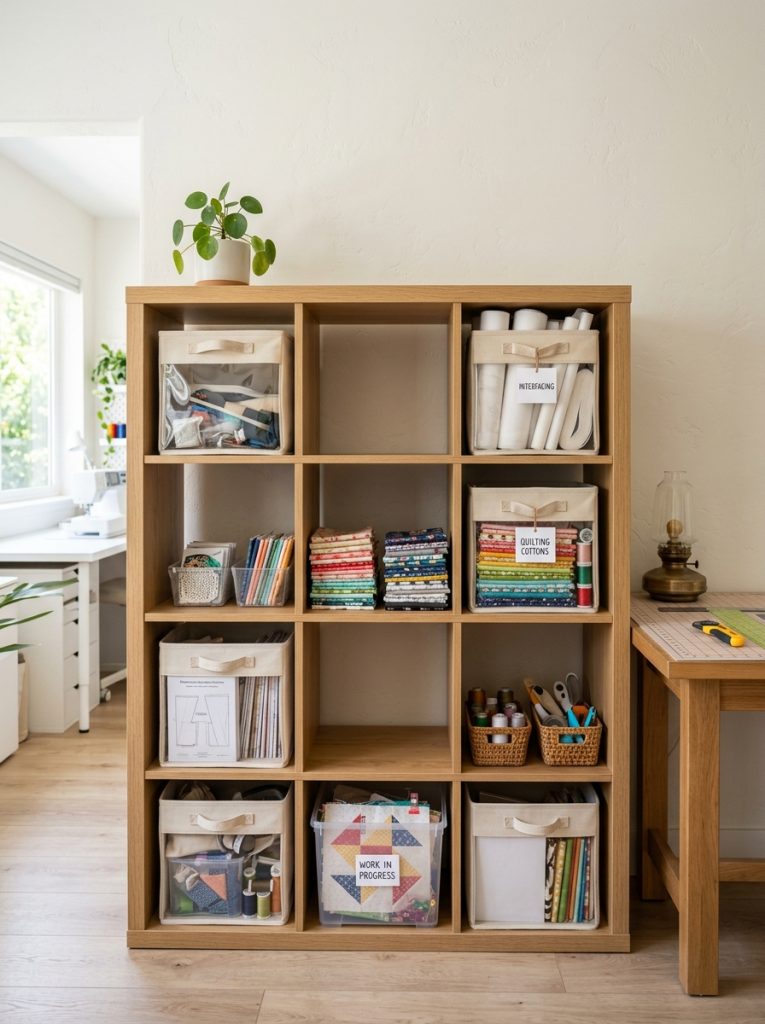
A modular cube storage unit creates a structured grid system for bulk material organization while remaining entirely self-supporting. Position a sturdy freestanding four-by-four or two-by-four cube unit along an available wall space. Insert durable clear-window fabric bins or transparent plastic drawers into individual grid cubes. Dedicate specific bins to distinct project categories, such as quilting cottons, apparel knits, interfacing materials, and work-in-progress garment pieces. Label each canvas container clearly using clip-on bin tags. This system maintains a clean aesthetic by hiding visual clutter while providing a predictable location for every raw material, allowing crafters to maintain order effortlessly.
Under-Bed Rolling Fabric Storage Vaults
Step-by-Step Guide
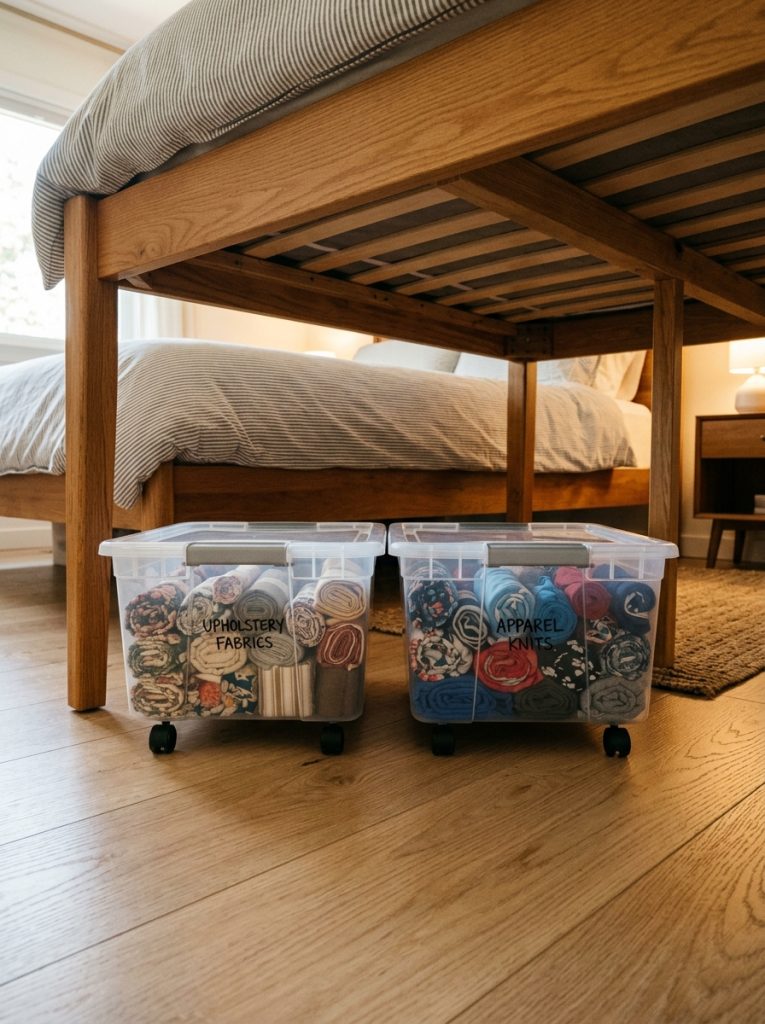
Maximize underutilized floor space by converting the area under a bed frame into a low-profile textile storage station. Select shallow, clear plastic storage boxes equipped with built-in base wheels and split-hinged lids for easy access. Roll folded yardage tightly into uniform cylinders or wrap textiles around uniform cardboards to form mini bolts, standing them upright within the container. Secure the lids firmly to protect stored fabrics from environmental dust, moisture, and sunlight degradation. Slide the containers smoothly underneath the frame. This concealed layout frees up valuable closet and tabletop real estate while preserving large fabric collections in prime condition until needed.
Collapsible Cutting Station with Built-In Storage
Setup Method
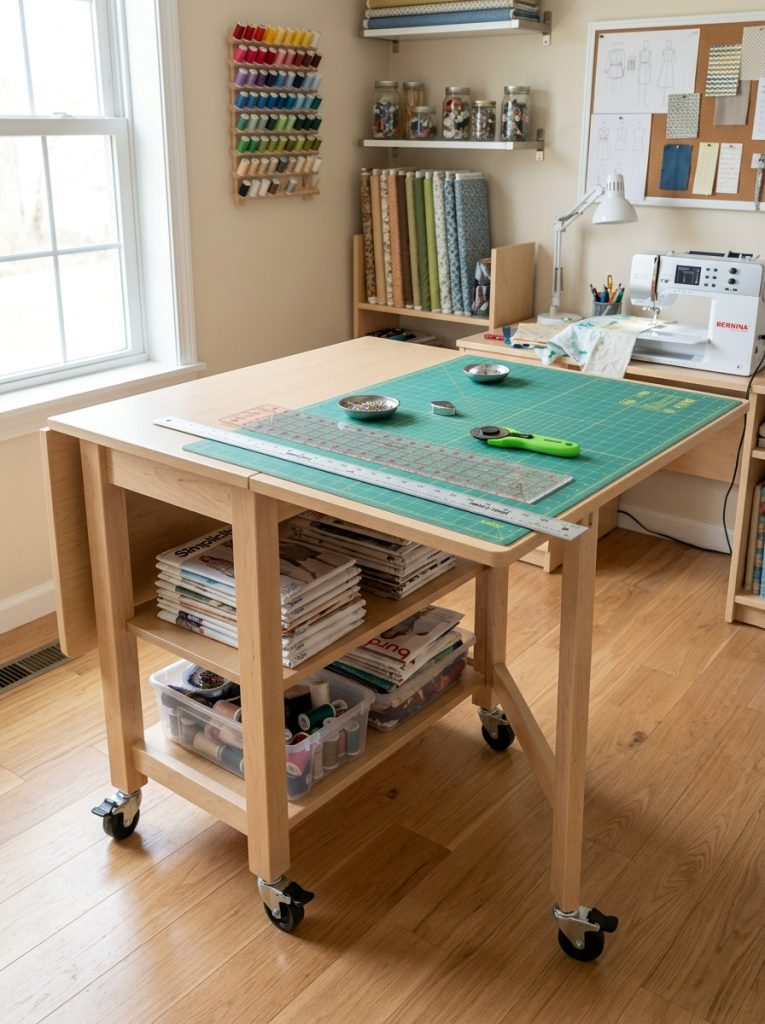
Limited living space benefits significantly from collapsible furniture that expands only during active cutting and patterning work. Position a folding drop-leaf table equipped with lockable caster wheels and internal shelving inside your craft area. Fold the side panels down when the table is not in use, reducing its footprint to a narrow console. Utilize the internal cabinet space to store large self-healing cutting mats, long acrylic drafting rulers, and heavy pattern weights. When beginning a project, roll the unit into an open floor area, extend the leaves, and engage the wheel locks to establish a firm, ergonomic cutting height without dedicating permanent floor area.
Magnetic Tool Strips on Freestanding Desk Lamps
How to Create
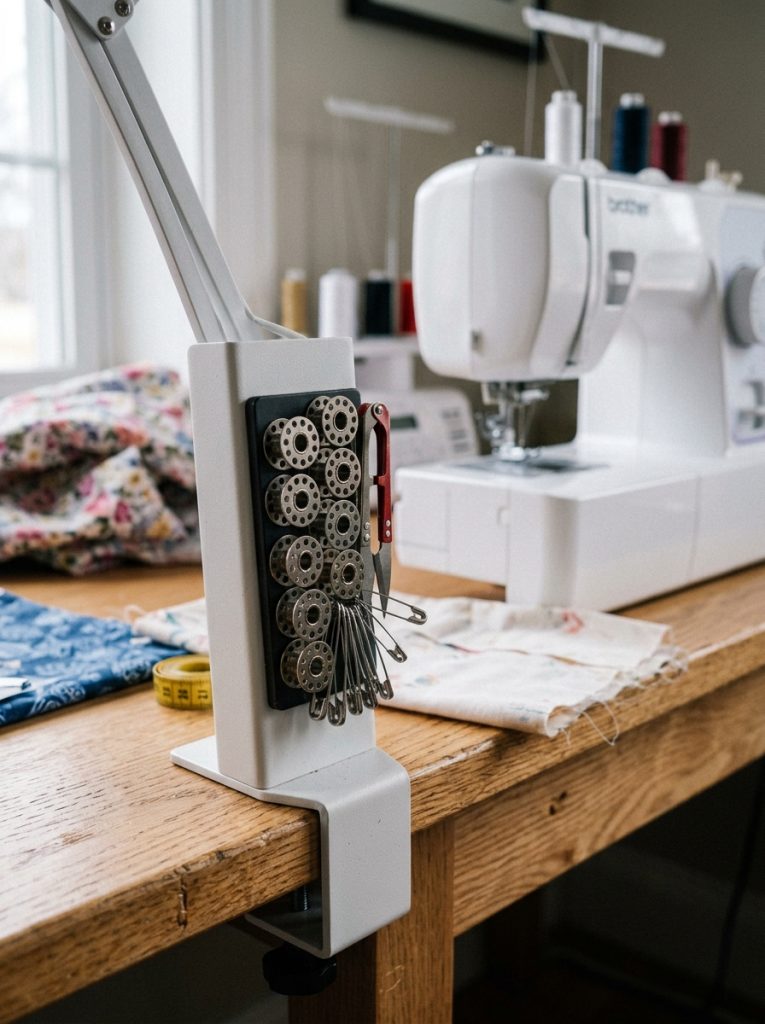
Keep small metal notions accessible without altering rental surfaces by utilizing existing desktop metal equipment. Attach strong self-adhesive magnetic strips along the flat sides or vertical stems of metal desktop lamps, metal sewing machine frames, or desk leg posts. Use these magnetic surfaces to hold pins, safety pins, seam rippers, metal bobbins, and small thread-snips instantly during active sewing sessions. This setup prevents loose pins from scattering across the cutting mat or carpet floor, eliminates the need for bulky desktop cushion boxes, and utilizes micro-spaces that typically sit empty, keeping your primary work surface wide open.
Hanging Closet Organizer for Sewing Patterns and Magazines
How to Make
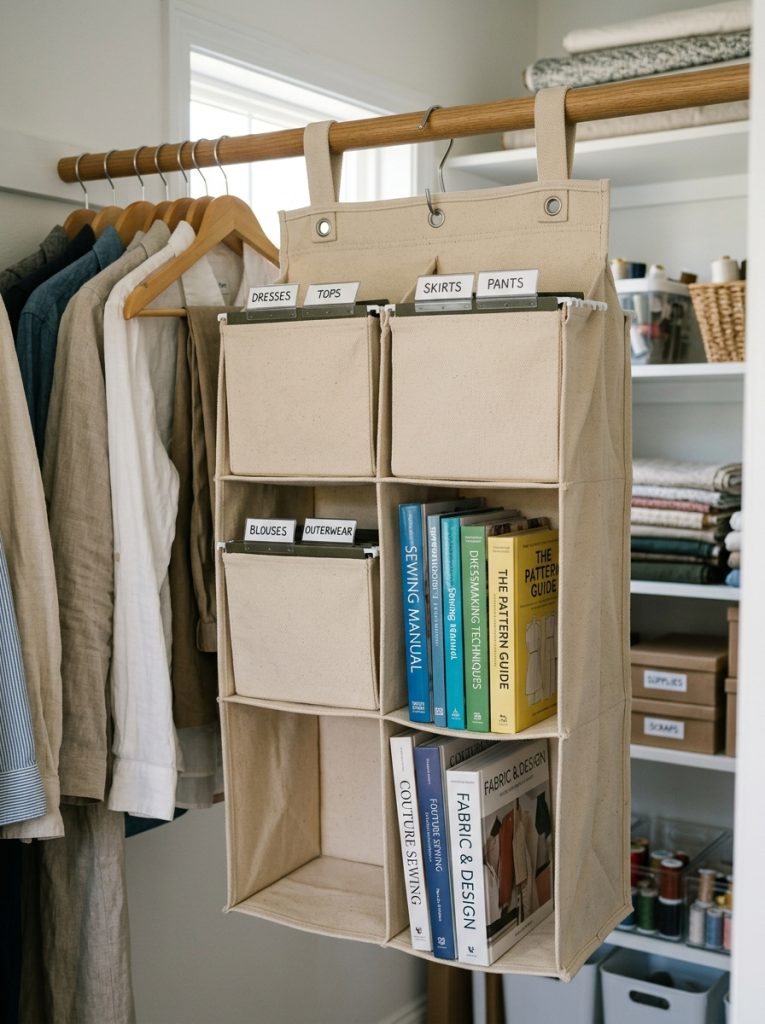
Transform a standard closet rod into a dedicated paper pattern library using hanging fabric shelf units and suspended file folders. Suspend a heavy-duty canvas closet organizer from the main wardrobe rail. Insert rigid hanging file boxes into the soft compartments, filling them with clear tabbed folders sorted by garment type, brand, or project size. Place full sewing books, printed PDF patterns, and style magazines neatly upright alongside the folders. This layout prevents delicate tissue patterns from becoming crumpled or lost inside deep drawers, maintaining paper flatness and enabling fast retrieval during the initial planning phase of your projects.
Stackable Clear Acrylic Drawers for Thread and Trims
Execution Process
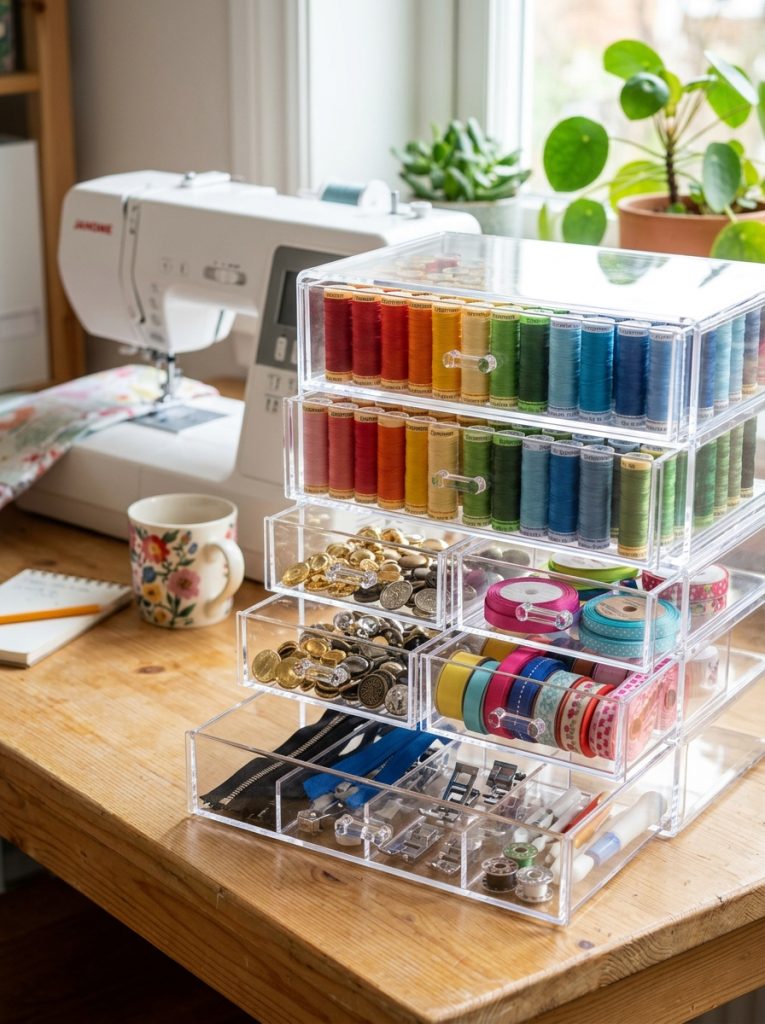
Maintain precision organization for delicate trims, buttons, and spools by building a desktop stackable acrylic tower. Place clear interlocking acrylic storage drawers directly on the back edge of your main sewing desk or adjacent shelving unit. Line the drawer bottoms with non-slip foam mats to prevent small items from shifting when drawers are opened. Organize small notions systematically: place buttons in clear divided compartments, organize ribbon spools by color, and align specialty threads by weight. The crystal-clear acrylic material provides instant visibility from any angle, serving as a functional, aesthetic element that enhances visual clarity across the workspace.
Common Beginner Mistakes and How to Avoid Them
A frequent mistake when setting up a temporary sewing space is purchasing storage containers before taking accurate physical measurements of both the room and the materials. Buying bins that are too deep or shelving that blocks natural light sources leads to cluttered, inefficient workspaces. Another issue involves overloading temporary adhesive hooks or tension rods beyond their specified weight limits, which can result in fallen equipment and damaged wall surfaces. To prevent structural failures, always verify product weight ratings and distribute heavier items across freestanding floor units. Additionally, avoid storing delicate fabrics in direct sunlight near unshaded windows, as exposure causes permanent color fading along fold lines. Protecting your materials requires positioning fabric storage units in shaded areas or using opaque, protective containers.
Practical Tips for Better Results
Maximizing efficiency in a compact craft area requires consistent maintenance and thoughtful spatial organization. Adopt a habit of folding all raw fabric pieces to a standardized dimension using a rigid cardboard template before storing them. Uniformly folded textiles stack neatly, maximize bin capacity, and present a clean visual display. Label every storage compartment clearly using removable adhesive labels or clip-on tags to eliminate unnecessary searching. Keep basic maintenance supplies, such as spare sewing machine needles, machine oil, lint brushes, and screwdriver keys, together inside a dedicated mini-kit stored right beside your primary sewing machine. Regularly auditing your inventory prevents duplicate purchases of notions and ensures that working surfaces remain clear for active sewing projects.
Styling, Presentation, and Organization Ideas
Creating a unified visual theme transforms a basic craft room into an inviting, productive design studio. Select a consistent color palette for all exposed storage bins, hanging organizers, and shelf units, such as clean white, soft gray, or natural canvas tones. Utilizing matching containers instantly reduces visual noise, making small rooms appear larger and more organized. Arrange thread spools on open displays using color-gradient sequencing to convert functional supplies into attractive wall accents. Group smaller tools into ceramic mugs, wire baskets, or clear glass jars arranged neatly on tray bases. Maintaining clean surfaces and hidden storage for loose scrap fabrics preserves an open, minimalist environment that encourages creative focus.
Budget and Time Planning Strategies
Building an organized craft workspace does not require substantial financial expenditure or excessive setup time. Allocate resources systematically by investing primarily in durable, high-utility foundational pieces, such as a sturdy folding table and quality rolling carts, while utilizing low-cost options for internal bin organization. DIY storage solutions, such as repurposing clean shoe boxes wrapped in decorative paper or reusing glass food jars for small button storage, keep expenses low while delivering high organization value. Plan the workspace transformation in progressive phases over a weekend. Dedicate the first phase entirely to sorting, measuring, and decluttering supplies, followed by unit assembly and supply categorization in the second phase to ensure a streamlined setup process.
Creative Expansion and Advanced Inspiration
As your skill level advances and your project scope expands, your organizational systems should adapt accordingly. Transition toward modular storage components that allow vertical expansion, such as stackable cube shelves or expandable track racks that require minimal wall anchoring points. Integrate specialized storage solutions, such as dedicated spool boards for industrial thread cones, padded cases for specialty press feet, and dedicated rolls for large-format drafting papers. For crafters managing multiple complex projects simultaneously, establish a clear project-tracking system using color-coded hanging garment bags. Storing cut pattern pieces, corresponding thread, linings, and notions together within a single suspended bag ensures seamless project management from initial layout to final assembly.