10 Book Crafts DIY Ideas
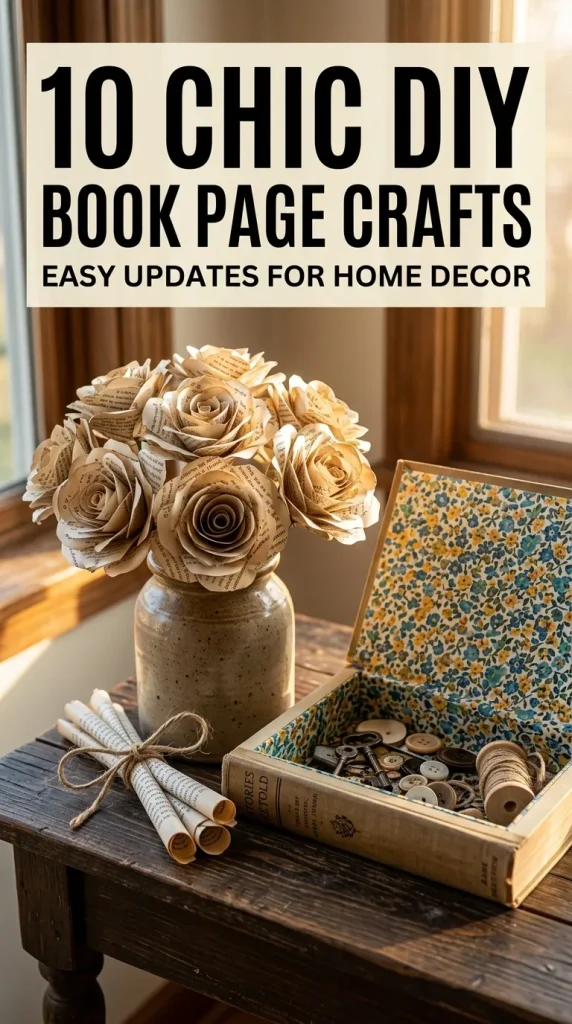
Book crafts are one of the most creative ways to transform old or damaged books into decorative and functional handmade projects. Instead of discarding worn books that are no longer suitable for reading, many DIY enthusiasts repurpose them into attractive home decor pieces, organizers, seasonal decorations, and personalized gifts. Pinterest ideas continue to feature book crafts because they combine sustainability with creativity while requiring only basic materials and simple techniques. These projects are suitable for beginners as well as experienced crafters, making them accessible to a wide audience. This guide introduces ten practical book craft ideas that can be completed using clear step-by-step methods and careful planning. Each project focuses on realistic techniques that create beautiful finished pieces while preserving safety, organization, and neat craftsmanship. Whether decorating a bookshelf, creating handmade gifts, or adding aesthetic accents to a room, these ideas provide inspiration for enjoyable DIY creativity.
Why This Idea Is Trending or Useful
Book crafts remain a popular category on Pinterest because they encourage creative reuse while reducing unnecessary waste. Many people have outdated books, damaged novels, dictionaries, or magazines that no longer serve their original purpose but still contain sturdy pages and attractive covers. DIY book projects allow these materials to become useful decorations without requiring expensive supplies or advanced crafting skills. Their popularity also comes from their flexibility, since the same materials can be transformed into home decor, storage solutions, holiday decorations, wall art, or table accents. Beginners appreciate that most projects require only simple cutting, folding, gluing, and planning techniques. The finished crafts often match modern design, farmhouse decor, minimalist style, or vintage interiors, making them versatile additions to many homes while encouraging creativity through affordable handmade projects.
Materials and Preparation
Preparing carefully before starting any book craft improves both safety and final results. Gather an old hardcover or paperback book, craft glue, sharp scissors, a precision craft knife, ruler, pencil, cutting mat, paintbrushes, decorative paper if desired, clips, and protective covering for your workspace. Select books that are no longer valuable or collectible, since permanent modifications cannot be reversed. Clean the book covers and pages to remove dust before beginning. Sketch measurements or folding lines lightly with a pencil whenever accuracy is important. Organize tools within easy reach to maintain smooth workflow throughout the project. Working slowly and measuring before every cut reduces mistakes and keeps pages aligned correctly. Careful preparation helps beginners complete each DIY tutorial confidently while producing neat handmade decorations suitable for modern home decor and Pinterest inspiration.
Idea 1: Folded Book Heart Sculpture
How to Create
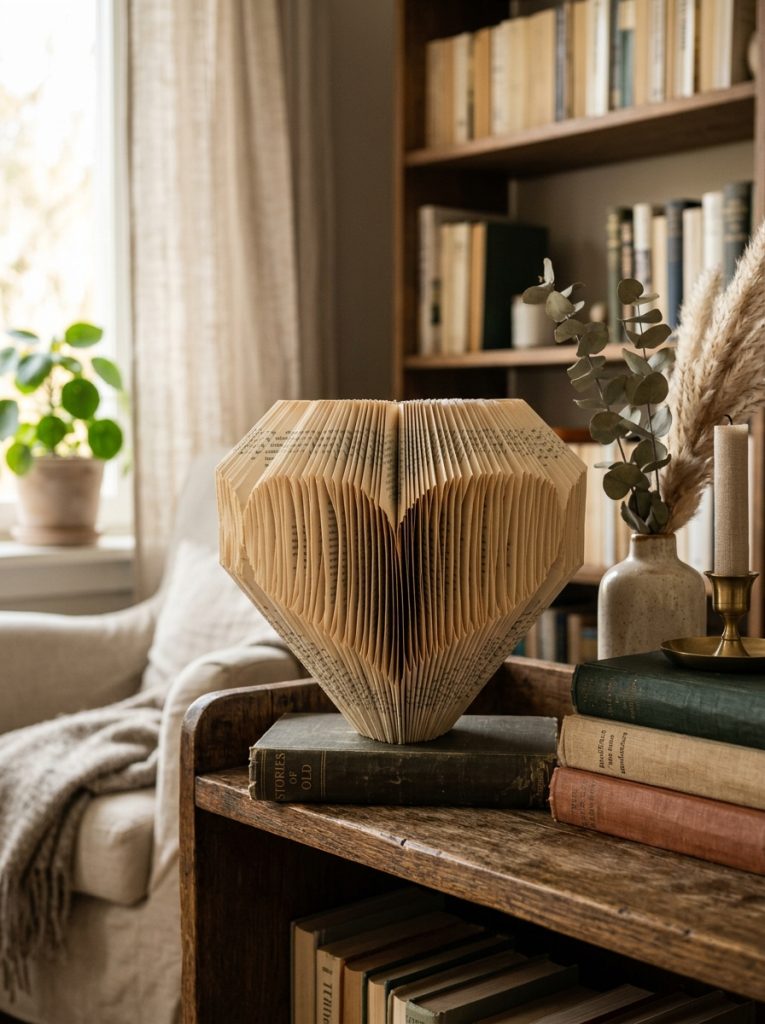
A folded heart sculpture transforms an ordinary hardcover book into an elegant decorative piece using only page folding techniques. Begin by selecting a thick book with evenly sized pages and lightly marking the folding pattern along the page edges. Fold each page inward according to the guide, ensuring every fold remains crisp and consistent throughout the design. Continue folding page by page until the heart shape gradually appears when the book is viewed from the front. Patience is essential because precise folds create a cleaner finished result. Avoid forcing pages into position, as gentle folds preserve the paper and maintain symmetry. Display the completed sculpture on a bookshelf, coffee table, or entryway console where its handmade craftsmanship becomes a focal point. This beginner friendly DIY project requires minimal materials while producing an aesthetic decoration inspired by popular Pinterest ideas and modern interior styling.
Idea 2: Secret Book Storage Box
Step-by-Step Guide
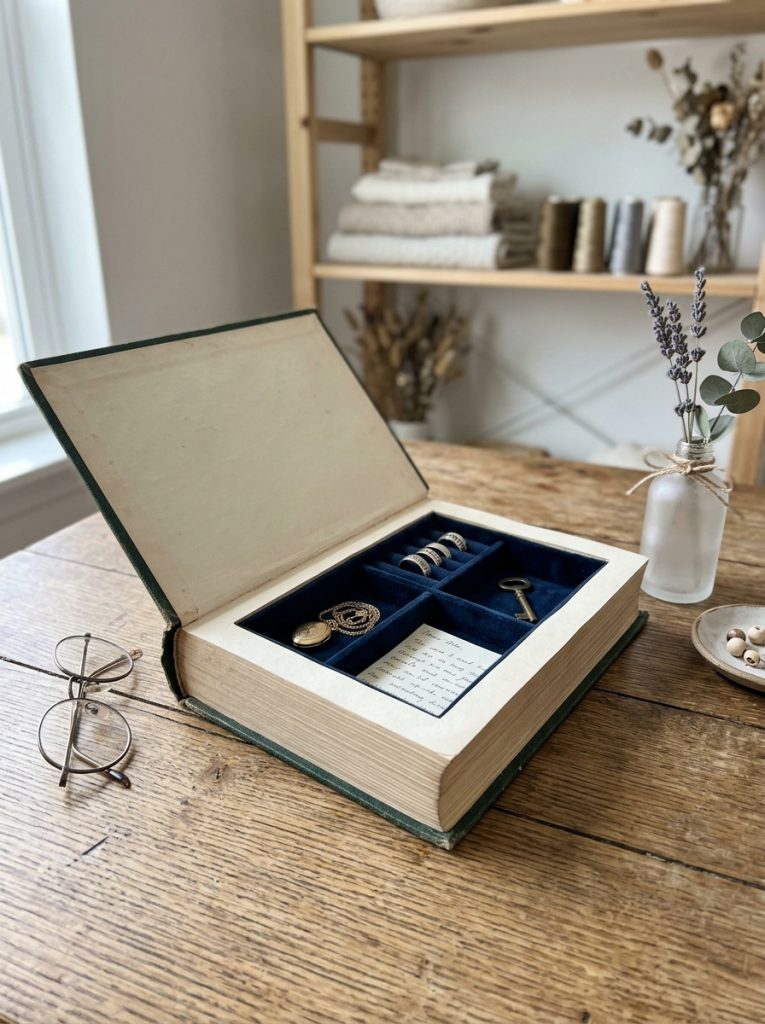
A hollow book storage box combines decorative appeal with practical organization by creating hidden space inside an old hardcover book. Begin by securing several front pages together while leaving the cover intact. Measure and draw a centered rectangle inside the remaining pages, leaving a wide border around the edges for stability. Carefully remove layers using a precision craft knife, working through only a few pages at a time. Apply glue along the inside edges after reaching the desired depth to strengthen the structure. Allow everything to dry completely before placing lightweight items inside. The finished compartment can organize small office supplies, keepsakes, jewelry, or craft materials while blending naturally into a bookshelf. Careful measuring and gradual cutting create clean edges that improve both appearance and durability, making this creative project practical as well as visually appealing.
Idea 3: Book Page Paper Flowers
How to Make
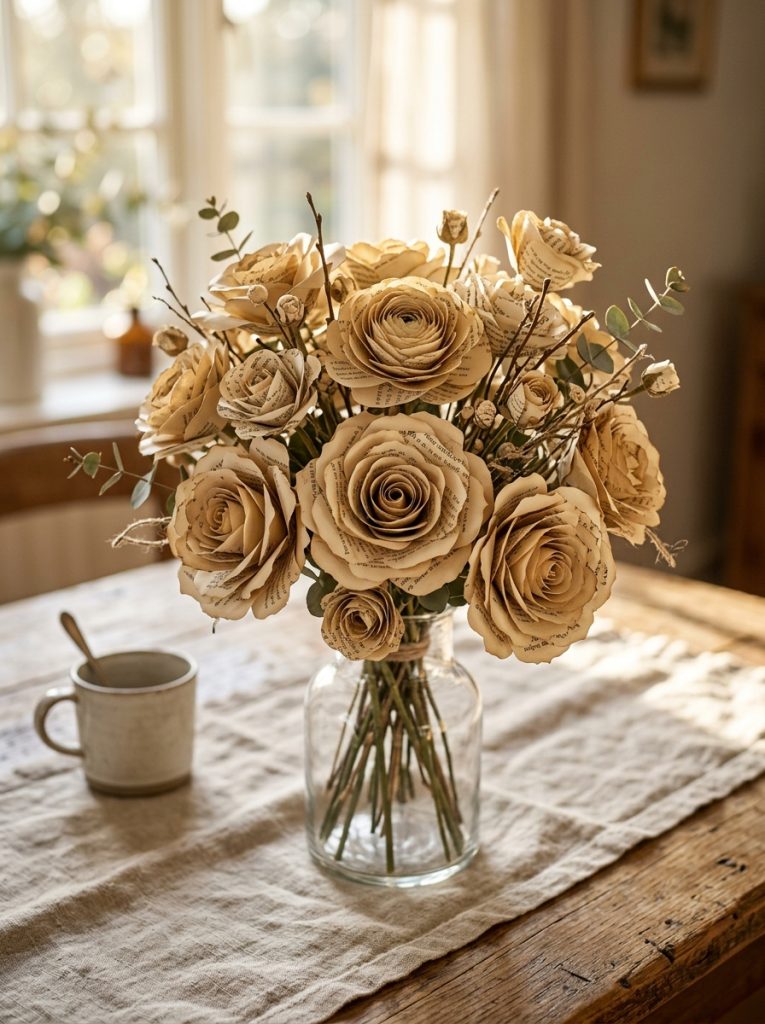
Paper flowers created from book pages provide timeless decoration suitable for centerpieces, wreaths, and handmade gifts. Tear or cut pages into petal shapes of different sizes, then gently curl each petal using a pencil or rounded tool to create natural dimension. Layer smaller petals inside larger ones and secure them with craft glue around a tightly rolled paper center. Continue building the flower until the desired fullness is achieved. Multiple flowers can be attached to floral wire stems, decorative branches, or wreath bases for larger arrangements. Leaving printed text visible adds character while highlighting the recycled nature of the project. Beginners should create a template for consistent petal shapes before cutting multiple pieces. These elegant flowers complement rustic, vintage, and minimalist home decor while demonstrating how simple materials can become attractive Pinterest-inspired handmade decorations.
Idea 4: Decorative Book Page Wreath
Setup Method
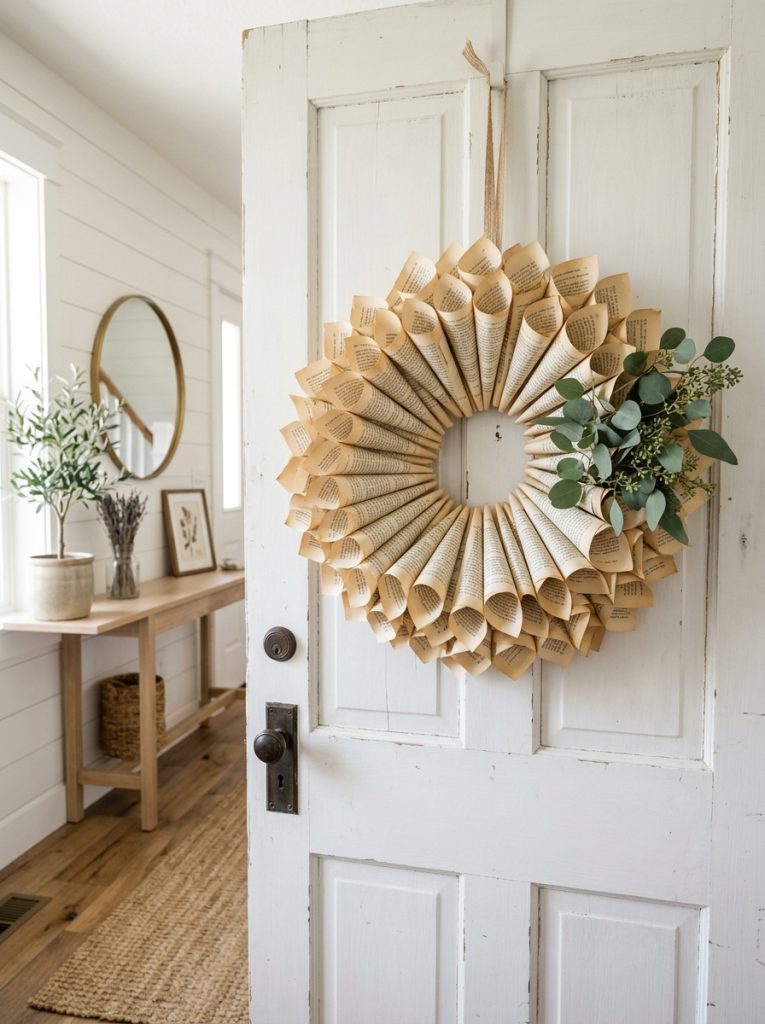
A book page wreath creates an attractive wall decoration suitable for every season by arranging folded paper into a circular pattern. Start with a sturdy cardboard or wooden wreath base and prepare dozens of identical paper cones by rolling individual book pages into pointed shapes. Secure each cone with glue before attaching them around the base in overlapping layers. Work evenly around the circle to maintain symmetry and fullness throughout the design. Smaller inner layers create depth while producing a balanced appearance from every angle. Optional neutral ribbons or simple twine can be added without distracting from the paper texture. This DIY tutorial emphasizes organization and planning because preparing all cones before assembly significantly speeds up the process. The finished wreath provides a lightweight handmade decoration that fits many modern design styles featured across Pinterest inspiration boards.
Idea 5: Book Page Wall Art
Execution Process
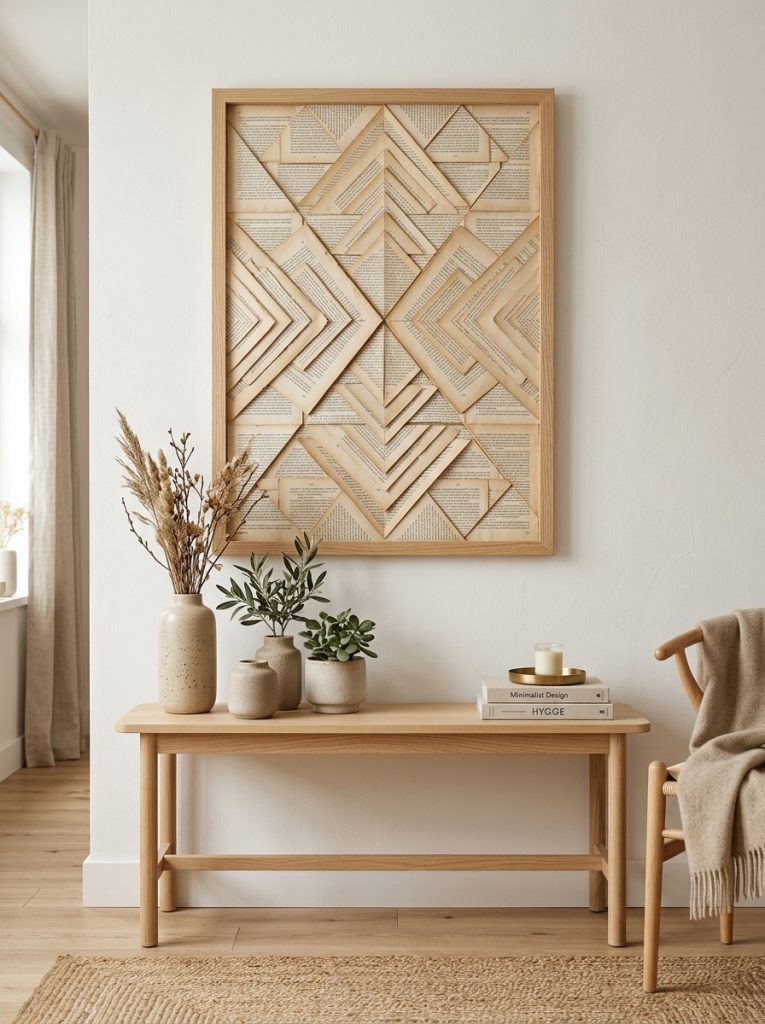
Transform printed pages into unique wall art by combining typography with geometric arrangements or layered designs. Select pages containing interesting text layouts and trim them into equal squares, rectangles, or abstract shapes. Arrange the pieces on a backing board before applying adhesive to confirm spacing and balance. Layering several pieces creates texture while maintaining a clean overall appearance. Simple paper flowers, folded accents, or minimalist cutouts can also enhance the composition without overwhelming the design. Frame the finished artwork using a plain frame that complements the paper rather than competing with it visually. This creative project encourages experimentation with organization, spacing, and composition while remaining beginner friendly. It demonstrates how recycled materials can become elegant home decor suitable for living rooms, offices, reading corners, or craft spaces.
Idea 6: Handmade Book Page Garland
How to Create
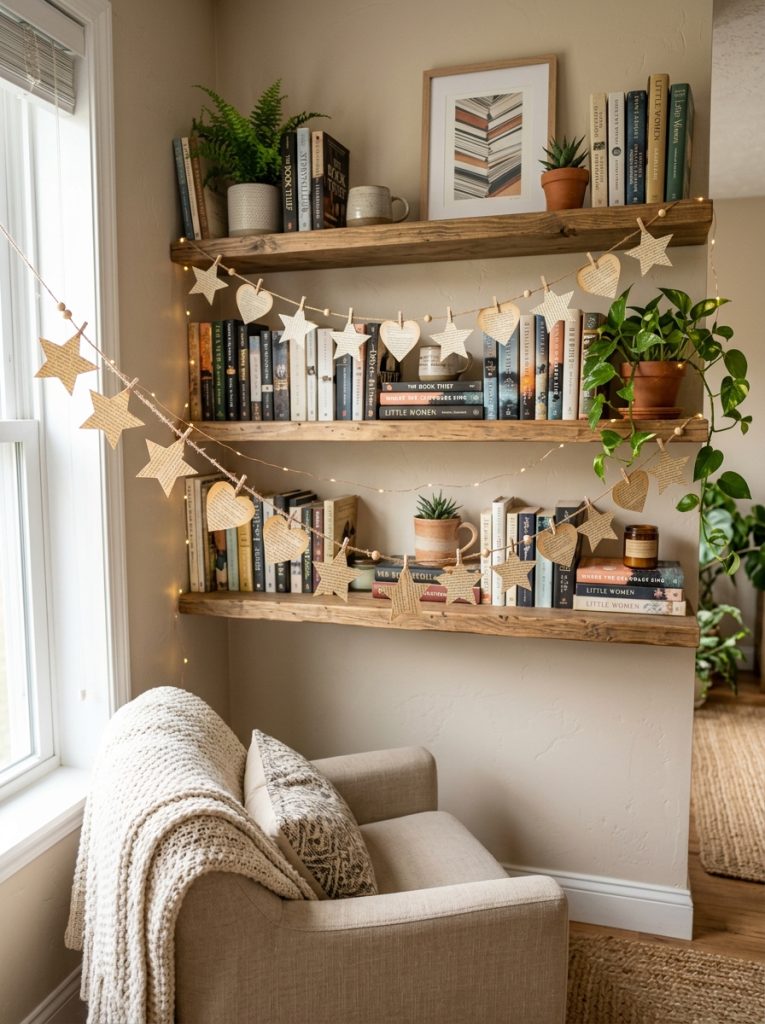
A decorative garland made from book pages provides versatile decoration for shelves, parties, reading nooks, or seasonal displays. Cut identical shapes such as circles, stars, hearts, or leaves from old pages using templates to maintain consistency. Punch small holes near the top of each shape and thread them evenly onto twine, cotton string, or thin ribbon while leaving equal spacing between each piece. Secure the shapes with small knots if necessary to prevent shifting. Layer different sizes or alternate shapes for added visual interest without creating clutter. This project requires only simple materials and minimal crafting experience, making it an excellent beginner friendly activity. The finished garland adds texture and personality to home decor while reflecting creative Pinterest ideas that combine sustainability with attractive handmade decoration.
Idea 7: Book Cover Picture Frame
Step-by-Step Guide
An old hardcover book can become a distinctive picture frame by carefully modifying the front cover while preserving its original character. Remove selected interior pages, leaving enough support for stability, then measure and cut a centered window in the cover to fit the chosen photograph. Secure the image behind the opening using acid-free adhesive or photo corners before reinforcing the interior with lightweight cardboard. The remaining pages create depth that distinguishes this frame from traditional flat designs. Decorative fabric or patterned paper can line the interior edges for a cleaner finish. Display the completed frame on a shelf or tabletop using a simple stand. This DIY tutorial combines practical organization with creative presentation, transforming forgotten books into meaningful handmade displays suitable for family photographs or inspirational artwork.

Idea 8: Book Page Gift Tags
How to Make
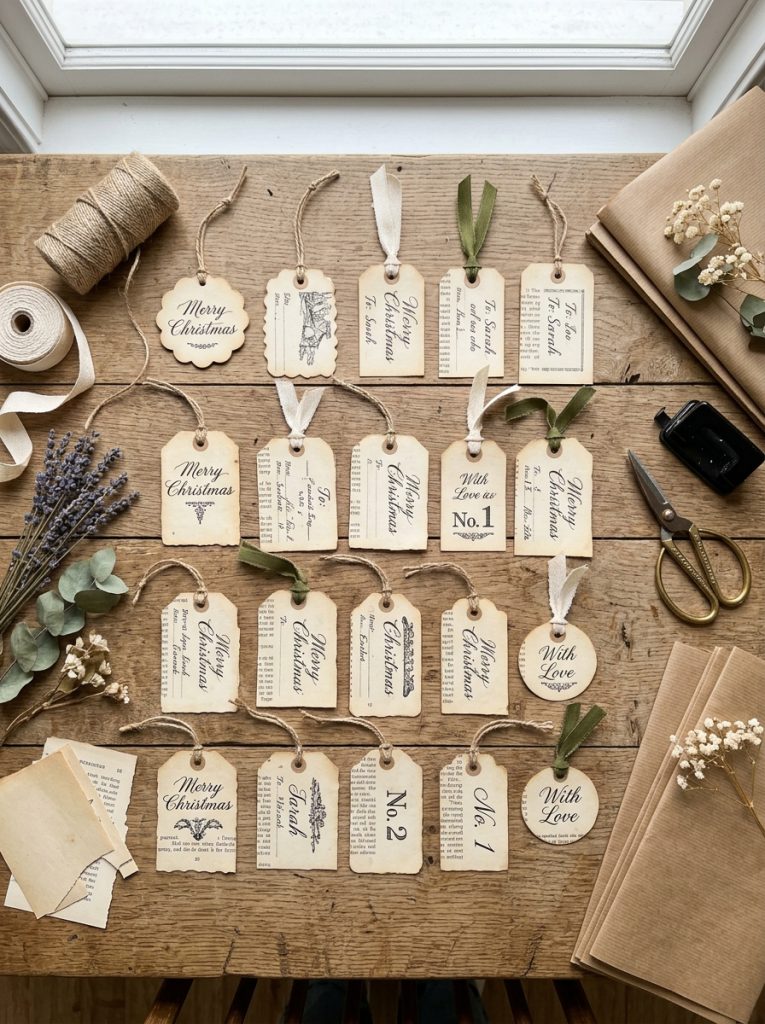
Handmade gift tags created from book pages offer an inexpensive way to personalize presents while reducing paper waste. Begin by tracing uniform tag templates onto clean book pages and cutting them carefully with scissors or a craft knife. Reinforce each tag by gluing the paper onto lightweight cardstock if additional strength is needed. Punch a neat hole near the top and thread ribbon, twine, or string through the opening. Simple stamped designs, pressed leaves, or handwritten messages can add decoration while preserving the printed background text. Organize completed tags by size inside labeled envelopes for future use. This easy project requires very little time or preparation, making it ideal for beginners who enjoy creative ideas that combine functionality with aesthetic handmade presentation inspired by Pinterest trends.
Idea 9: Book Page Bookmark Collection
Setup Method
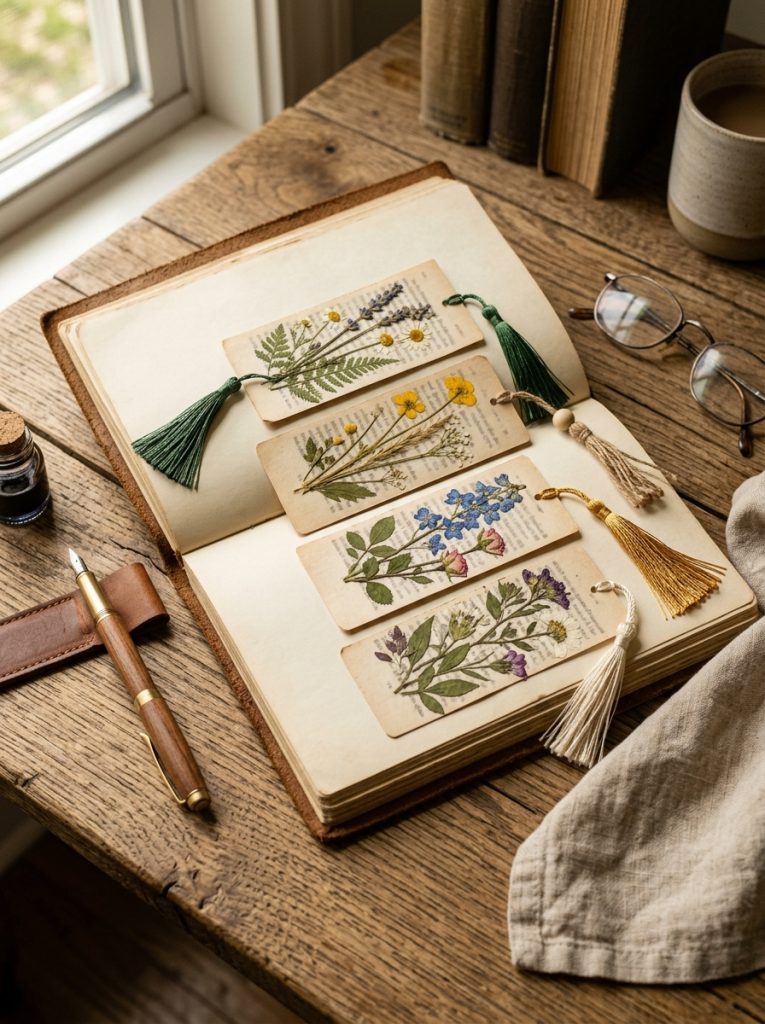
Bookmarks crafted from recycled book pages provide useful accessories for readers while encouraging creative customization. Trim pages into long rectangular strips using a ruler for consistent measurements, then laminate them with clear adhesive film or mount them onto cardstock for durability. Decorate the tops with tassels, pressed flowers, or simple punched shapes without making the bookmarks bulky. Rounded corners help prevent bending during regular use. Creating several bookmarks together allows matching sets for gifts or personal organization. Store finished bookmarks inside small boxes or envelopes to keep them flat and protected. This beginner friendly DIY project demonstrates how even small paper scraps can become practical handmade items while supporting sustainable crafting and providing attractive Pinterest inspiration for readers and stationery enthusiasts.
Idea 10: Book Page Decorative Vase Wrap
Execution Process
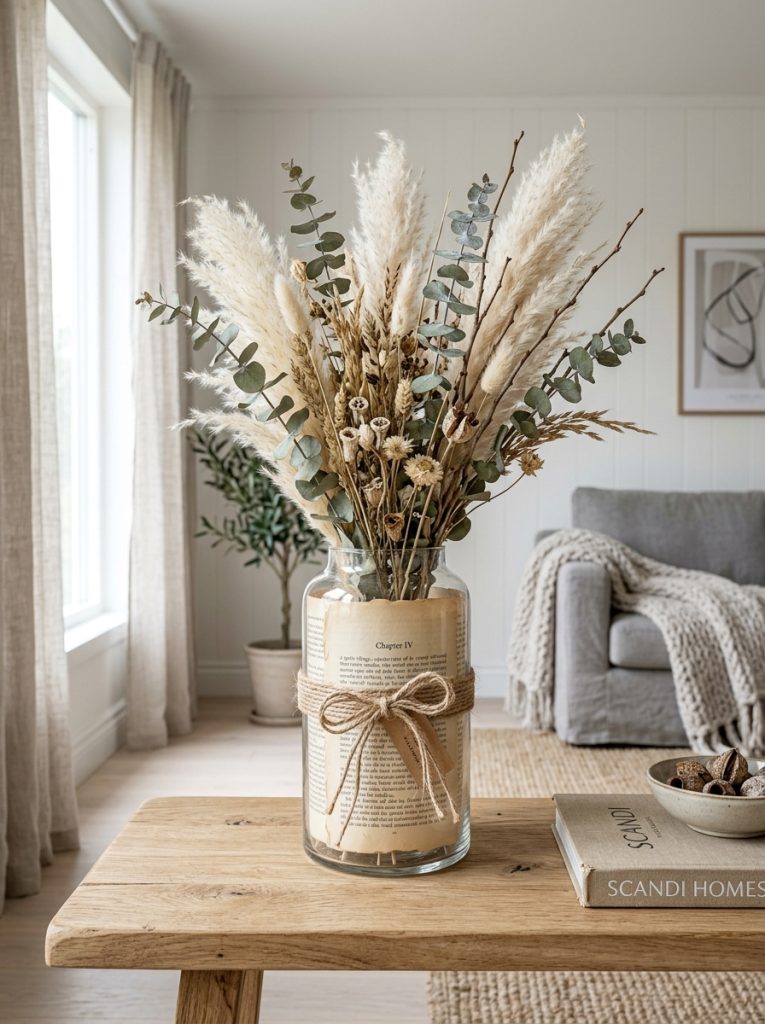
Create a removable decorative wrap for glass vases by using carefully selected book pages that complement neutral home decor. Measure the vase circumference before trimming the page to the correct size, leaving a slight overlap for attachment. Wrap the paper smoothly around the vase and secure it using removable twine, ribbon, or reusable paper bands rather than permanent adhesive. This allows the decoration to be changed easily throughout the year. Pair the finished vase with dried flowers, branches, or greenery to enhance its natural appearance. Multiple wrapped vases displayed together create an attractive coordinated arrangement suitable for shelves, dining tables, or entryways. The project requires accurate planning but only basic materials, making it an accessible creative project that combines simplicity, organization, and elegant handmade decoration.
Common Beginner Mistakes and How to Avoid Them
Many beginners rush through measuring and cutting, resulting in uneven shapes or damaged pages. Always measure twice before making permanent cuts and use sharp tools designed for paper crafts. Another frequent mistake involves applying excessive glue, which causes pages to wrinkle or stick together unintentionally. Thin, even adhesive layers produce cleaner results and allow better drying. Choosing valuable or collectible books for permanent projects should also be avoided; instead, select damaged or outdated books intended for recycling. Organizing materials before beginning prevents interruptions that may affect accuracy during folding or assembly. Working patiently and following each step carefully leads to stronger, more attractive handmade projects while building confidence for future Pinterest-inspired creative ideas.
Practical Tips for Better Results
Maintaining a clean workspace significantly improves the quality of every DIY tutorial because paper remains free from dust, glue marks, and accidental tears. Use templates whenever creating repeated shapes to ensure consistent sizing throughout the project. Replace dull blades frequently, as sharp cutting tools produce smoother edges and reduce paper damage. Test decorative arrangements without glue before making permanent attachments, allowing adjustments to spacing and balance. Store leftover pages by size for future creative projects instead of discarding usable material. Protect completed crafts from excessive moisture and direct sunlight to preserve their appearance over time. These practical habits improve organization while helping beginners achieve polished handmade decorations suitable for display and gifting.
Styling, Presentation, or Organization Ideas
Book crafts become even more attractive when displayed thoughtfully throughout the home. Group folded sculptures with candles, ceramic vases, or framed artwork to create balanced shelf arrangements. Decorative wreaths and garlands can serve as seasonal accents while remaining neutral enough for year-round use. Organize smaller projects such as bookmarks and gift tags inside labeled storage boxes for easy access during holidays or celebrations. Paper flowers displayed in recycled glass containers add texture without overwhelming minimalist interiors. Keeping similar color tones together creates cohesive presentation while allowing printed text to remain a decorative feature. Well-organized displays highlight handmade craftsmanship and provide fresh Pinterest ideas for home decor and creative organization.
Budget or Time Planning
Most book craft projects require inexpensive materials that are already available in many homes, making them excellent budget ideas for beginners. Repurposed books, leftover ribbon, recycled cardboard, and basic craft glue significantly reduce overall costs. Smaller projects such as bookmarks or gift tags can often be completed within thirty minutes, while folded sculptures and storage boxes may require several hours depending on complexity. Preparing templates and organizing materials before starting saves valuable time during assembly. Completing similar tasks in batches, such as cutting multiple flower petals or folding wreath cones, also improves efficiency. Thoughtful planning allows each creative project to remain enjoyable while producing attractive handmade results without unnecessary expense.
Creative Expansion and Advanced Inspiration
Once basic techniques become comfortable, combine several book craft methods into larger decorative arrangements for more personalized results. A reading corner may include folded sculptures, matching paper flowers, decorative garlands, and framed book page artwork that share consistent colors and design themes. Experiment with layered folding patterns, dimensional paper sculptures, or mixed-media additions using fabric, natural twine, and lightweight wood accents while maintaining balanced composition. Seasonal decorations can also be adapted by changing colors, shapes, and display arrangements without replacing the core projects. Recording measurements and successful techniques in a crafting notebook helps improve future DIY tutorials and encourages continued creativity. These advanced ideas demonstrate how simple recycled materials can evolve into sophisticated handmade home decor inspired by modern Pinterest trends.