10 Salt Dough Handprint Impression Toddler Craft Ideas
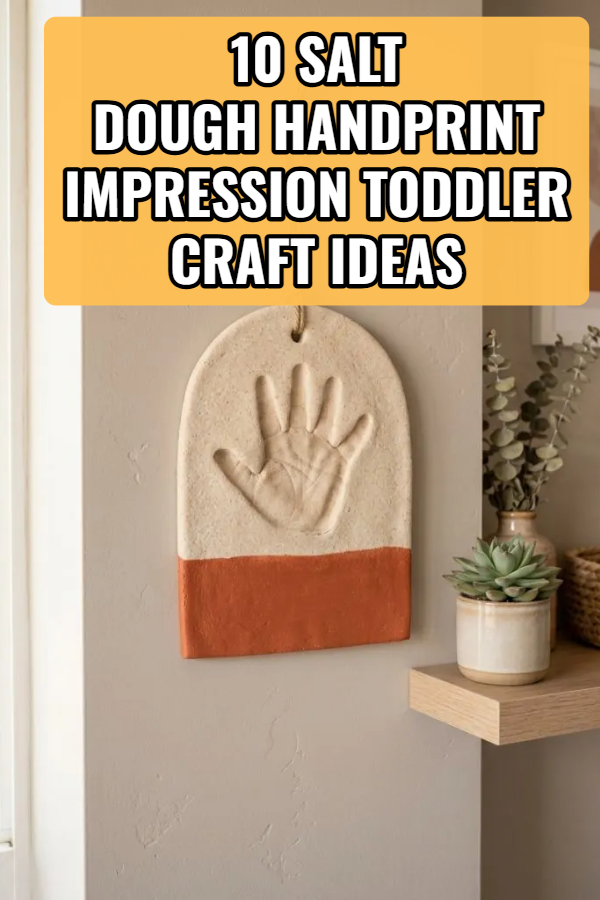
Creating preserved salt dough handprint impressions provides an exceptional, tactile crafting method for capturing a toddler’s early growth while introducing simple sculptural techniques at home. This classic craft medium relies on basic pantry ingredients to form a durable dough that accepts detailed palm prints, textures, and painted finishes easily. Readers exploring this detailed guide will discover ten unique project concepts tailored specifically for young children, complete with precise step-by-step methods, baking guidelines, and long-term preservation steps. Learning how to formulate, press, bake, and seal salt dough enables parents, early childhood educators, and caregivers to produce high-quality handmade keepsakes without requiring expensive studio equipment. Implementing these structured DIY tutorials ensures that creative art sessions remain organized, safe, and visually appealing. The resulting tactile ornaments and wall plaques serve as timeless home decor accents or meaningful gifts that permanently preserve precious early childhood milestones.
Why This Idea Is Trending or Useful
Salt dough handprint projects continue to dominate modern Pinterest inspiration boards because they blend nostalgic sentiment with accessible, budget friendly crafting techniques. For families seeking affordable ways to create lasting keepsakes, this medium provides immediate practical value using household staples found in almost every kitchen. Design relevance remains exceptionally high because raw or painted dough impressions fit seamlessly into modern design aesthetics, minimalist style nurseries, and cozy seasonal displays. The DIY appeal stems from the non-toxic, soft texture of the dough, which offers an inviting sensory experience for toddlers developing fine motor control and spatial awareness. Beginners appreciate the forgiving nature of the clay-like mixture, as uneven prints can be kneaded and re-rolled instantly without wasting materials. These low-cost, beginner friendly creative project ideas deliver elevated decorative results while providing an engaging, hands-on activity that fosters early childhood artistic exploration.
Materials and Preparation
Thorough preparation ensures that salt dough handprint impressions bake evenly without cracking, warping, or retaining excess moisture. Essential dough ingredients include all-purpose flour, fine table salt, and warm water mixed in a standard two-to-one ratio of flour to salt. Crucial crafting tools comprise a sturdy rolling pin, parchment paper, circular biscuit cutters, drinking straws for hanging holes, fine-grit sandpaper, acrylic craft paints, and clear protective sealant. Preparation begins by combining the dry flour and salt in a large bowl before slowly adding warm water to form a smooth, non-sticky dough ball. Knee the mixture on a light board for five minutes until the surface becomes supple and pliable. Planning considerations require setting aside a flat baking sheet lined with parchment paper and preheating an oven to a low temperature to facilitate a slow drying process that prevents surface blistering.
Main Ideas Section
Idea 1: Botanical Floral Imprinted Handprint Plaque
How to Create
Constructing a nature-infused handprint plaque begins by rolling a batch of smooth salt dough to a uniform half-inch thickness directly onto parchment paper. Select a large circular cutter or smooth knife to cut a neat five-inch disk from the dough. Guide the toddler to press their palm firmly into the center of the disk, ensuring each finger leaves a distinct impression in the dough. Gather small pressed dried flowers, lavender sprigs, and delicate fern leaves, placing them carefully around the outer perimeter of the handprint. Press the botanicals gently into the dough surface using a clean wooden roller so they embed flush with the background. Use a plastic straw to punch a clean hanging hole near the top edge before baking at two hundred degrees Fahrenheit for three hours. Once fully cooled and dried, coat the plaque with clear acrylic spray to preserve the natural plant colors alongside the detailed palm impression.
Idea 2: Terracotta Dip-Dyed Keepsake Wall Hanging
Step-by-Step Guide
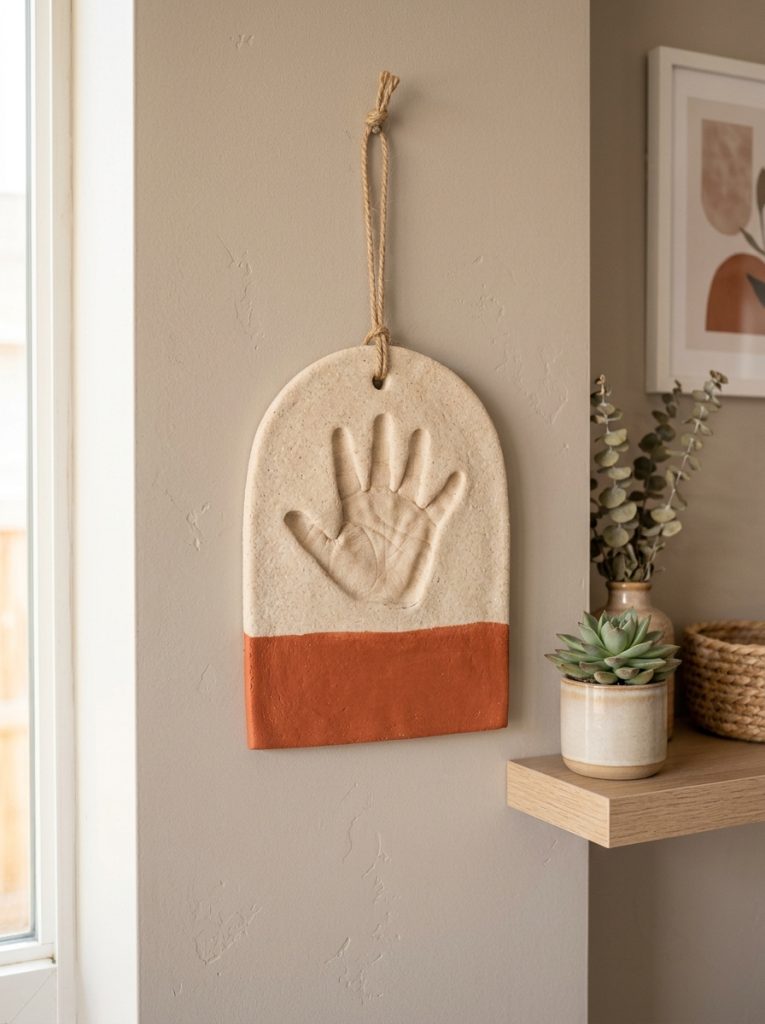
Transforming a basic salt dough impression into a contemporary interior accent requires strategic shape cutting and modern color-blocking techniques. Roll the prepared salt dough to a half-inch thickness and trim it into an elegant arch silhouette using a craft knife and a cardstock template. Assist the toddler in making a deep palm impression in the upper section of the arch, pressing down on each knuckle to capture accurate skin line details. Punch two hanging holes at the top corners using a drinking straw to accommodate a hanging cord later. Bake the dough plaque at low heat until completely hardened, then smooth any rough outer edges using fine-grit sandpaper. Paint the bottom half of the arch with matte terracotta acrylic paint, leaving the top half and the central handprint in its raw, natural oat-colored state for a stylish dip-dyed effect. Thread natural jute twine through the top holes to complete a modern boho wall plaque.
Idea 3: Sunburst Rays Raised Impression Plate
Setup Method
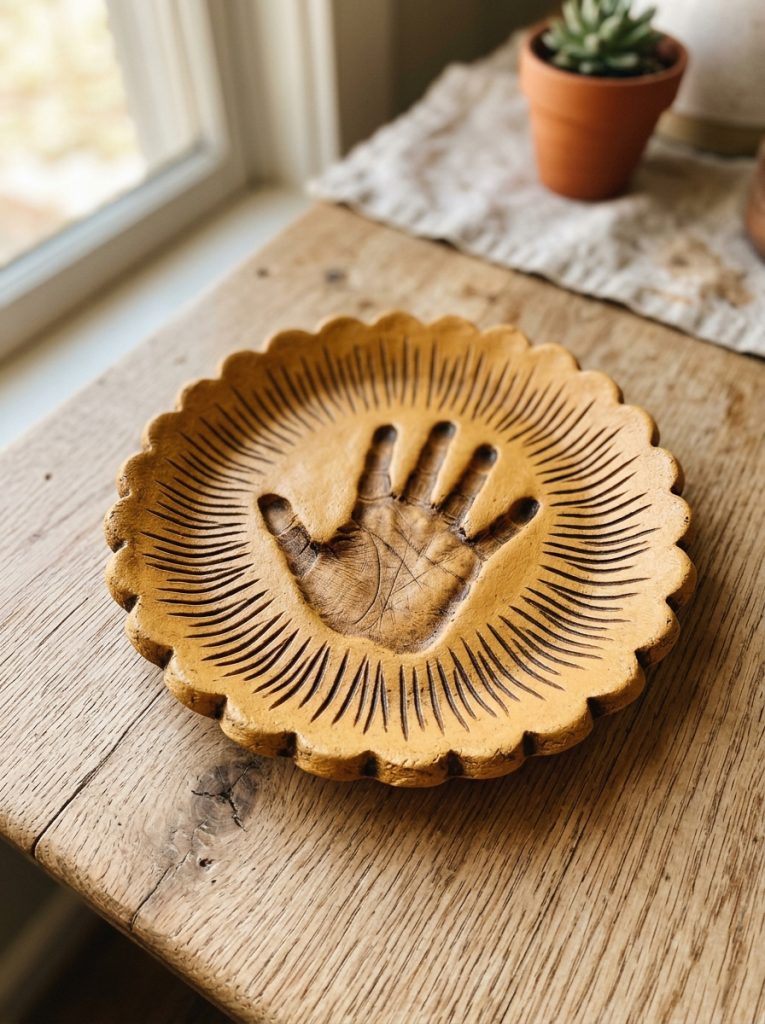
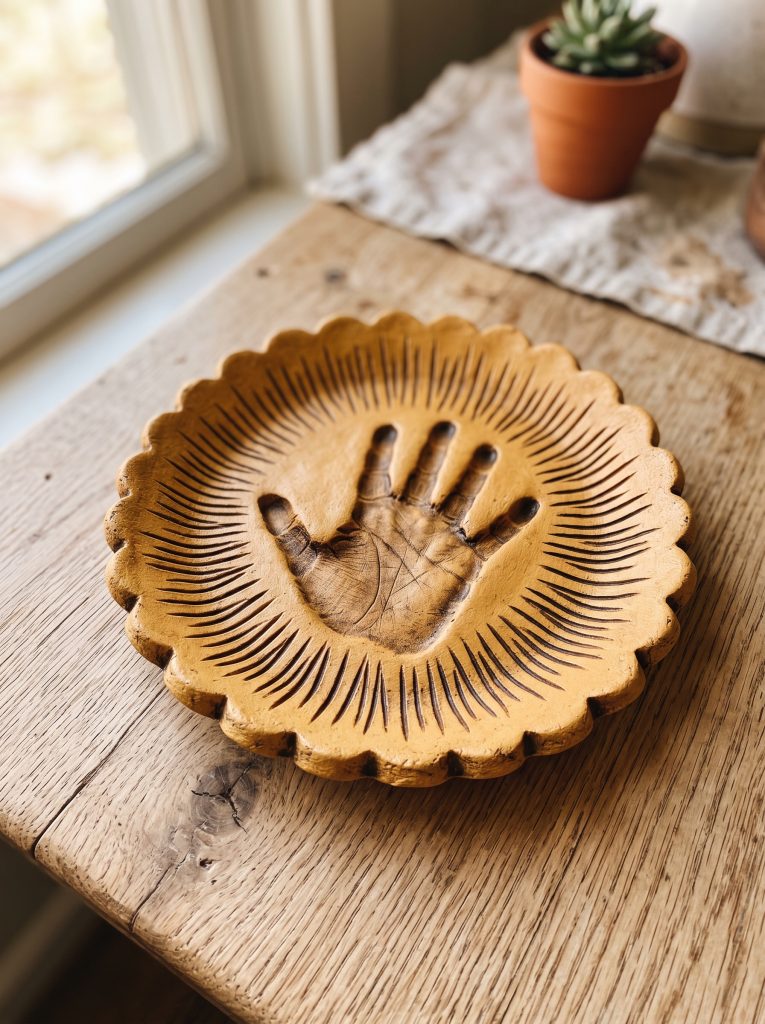
Designing a sun-inspired circular plate turns a simple hand print into an artistic focal point suitable for display on a plate stand or wall mount. Roll out a thick, round piece of dough measuring six inches in diameter and gently curve the outer rim upward to form a shallow dish shape. Position the toddler’s hand in the center of the dish and press down evenly so the palm forms the central body of the sun. Use a sharp toothpick or small clay tool to score straight, radiating ray lines extending outward from the handprint to the scalloped edge of the dish. After baking the piece slowly until fully hardened and dry, apply a base coat of warm ochre or pale mustard acrylic paint across the entire front surface. Highlight the recessed lines and palm grooves by brushing a diluted brown wash over the plate, wiping away excess paint from the high surfaces with a damp cloth to accentuate depth.
Idea 4: Pressed Seashell Coastal Impression Round
Execution Process
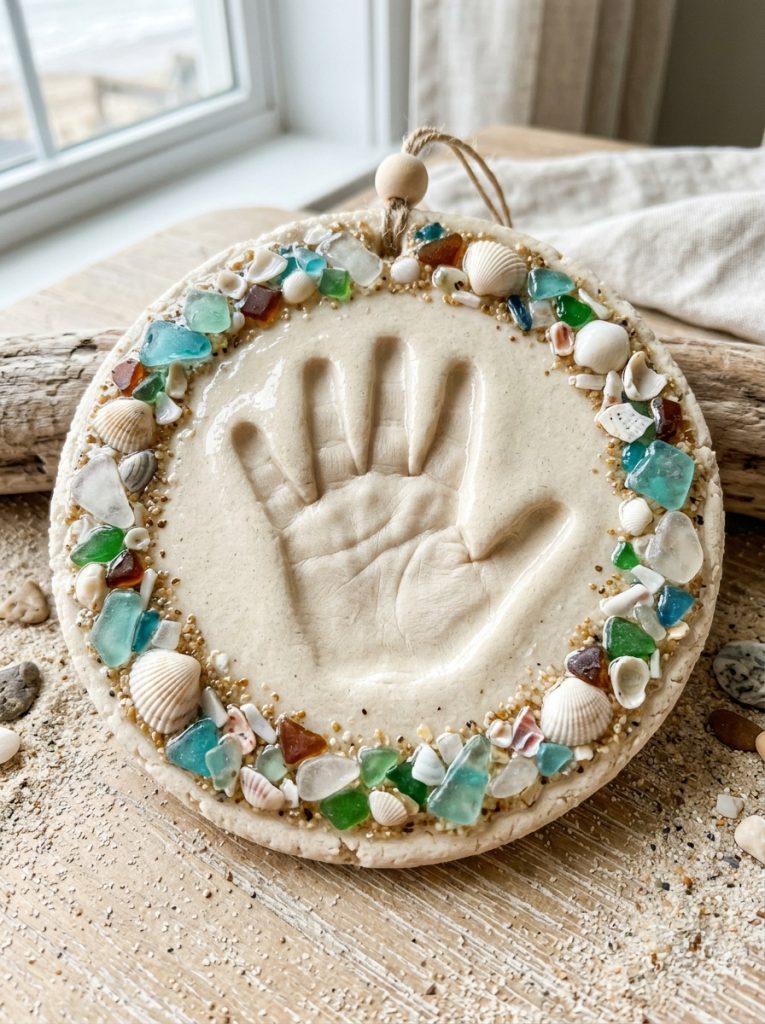
Integrating ocean elements into salt dough crafts produces a richly textured keepsake that evokes coastal relaxation and outdoor exploration memories. Prepare a round dough slab five inches wide and half an inch thick, placing it on parchment paper to prevent sticking. Guide the child’s hand into the center of the dough disc, applying firm, even pressure across the palm and fingers. Collect small, smooth sea glass pieces, tiny cockle shells, and fine beach sand to embellish the surrounding border. Press the shells and sea glass firmly into the dough surrounding the hand impression, ensuring they sink halfway into the dough to remain securely anchored after baking. Sprinkle a light dusting of fine sand into the wet hand impression, pressing it down lightly so it adheres. Bake the coastal round at low heat for several hours until completely dry, then seal the entire piece with a glossy varnish to highlight the shell sheen.

Idea 5: Mosaic Glass Bead Shadow Impression
How to Make
Building a glittering mosaic handprint ornament adds light-reflecting qualities and vibrant color accents to standard baked dough crafts. Roll a thick portion of salt dough into a smooth star or flower shape using a large cookie cutter template. Have the toddler press their hand squarely in the center to create a deep, well-defined handprint outline. Provide small, flat-backed glass mosaic tiles or smooth glass gems, helping the child push them into the dough along the outer rim of the handprint to outline the finger shapes. Ensure the glass beads are pressed deep enough into the dough so they bond securely during the drying phase. Punch a ribbon hole at the top of the shape before placing the ornament into a low-temperature oven. After cooling, paint the flat background area with iridescent pearl paint, leaving the embedded glass beads clear to catch surrounding ambient light.
Idea 6: Rustic Braided Hemp Hanging Wreath
Step-by-Step Guide
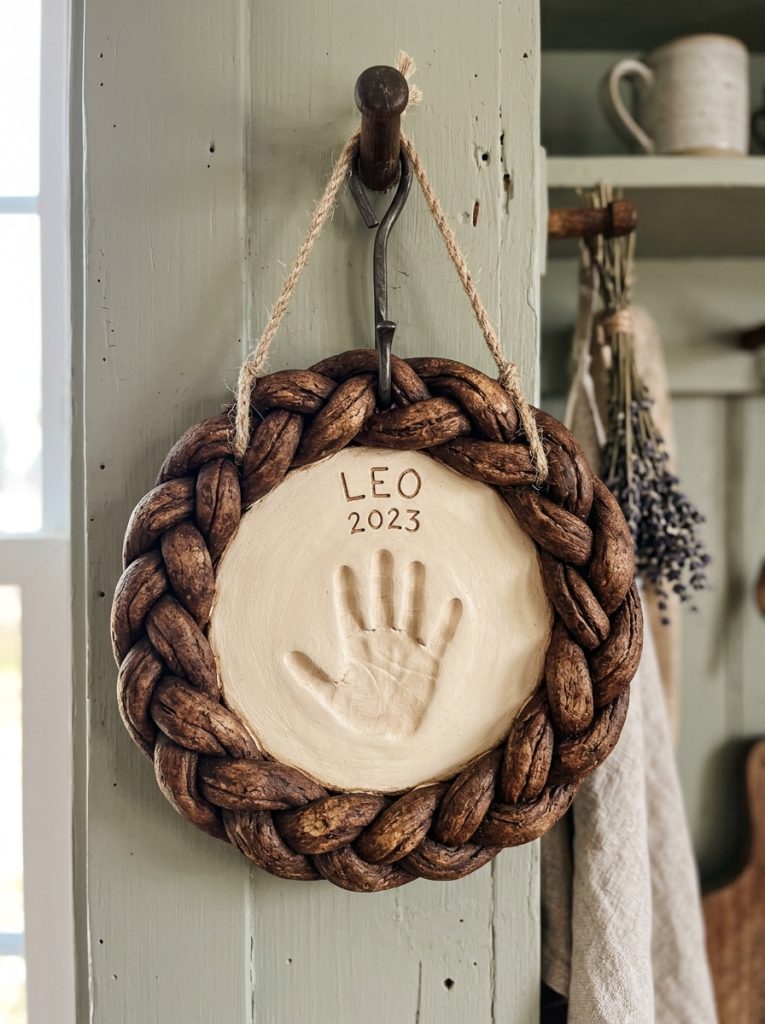
Forming a braided salt dough wreath around a central hand impression combines traditional dough sculpting with natural fiber styling. Roll three long, thin snakes of dough, each roughly a quarter-inch thick, and gently braid them together to form a flexible rope. Coil the braided rope into a six-inch ring on parchment paper, pressing the overlapping ends together with a drop of water to fuse the dough. Roll a flat circular dough disc that fits neatly inside the center opening of the braided ring, pressing it to join the inner rope border. Guide the toddler to imprint their hand into the center disc, ensuring clear finger marks. Bake the unified wreath assembly slowly for four hours to prevent cracking in the thick braided sections. Once cooled, coat the outer braided ring in dark walnut stain and the center handprint in a warm cream shade, finishing with a raw hemp cord tied around the top loop.
Idea 7: Geometric Gold Leaf Impression Tile
Setup Method
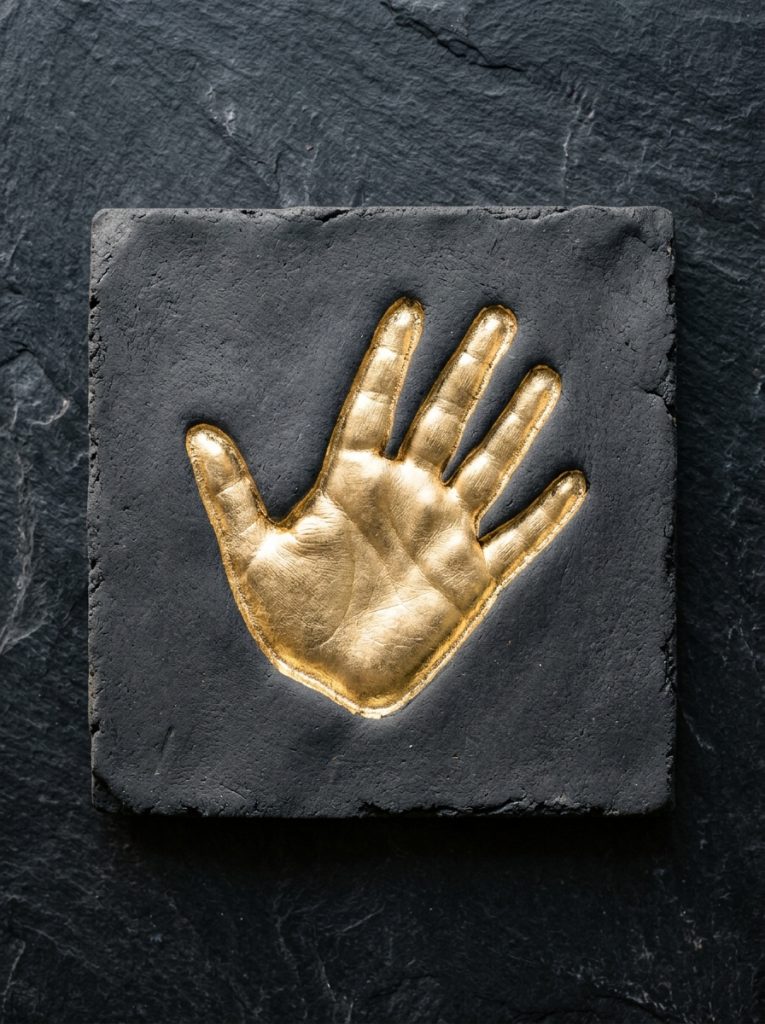
Creating a chic, elevated wall tile involves pairing structured geometric shapes with metallic leafing accents over the hand impression. Roll a half-inch thick sheet of salt dough and trim it precisely into a four-inch square using a ruler and utility knife. Position the toddler’s hand diagonally across the square tile, pressing firmly to capture a crisp, deep impression. Cut a small hanging slot into the back of the raw dough tile using a clay tool for flush wall mounting. Bake the square tile at two hundred degrees Fahrenheit until completely dry and hard. Apply a smooth coat of matte charcoal gray paint over the entire tile surface and allow it to dry fully. Using a small detail brush, paint gilding adhesive inside the recessed palm impression, then press sheets of gold leaf foil into the handprint. Brush away excess foil flakes to reveal a striking metallic handprint set against a dark matte tile.
Idea 8: Double-Sided Parent and Child Nested Prints
Execution Process
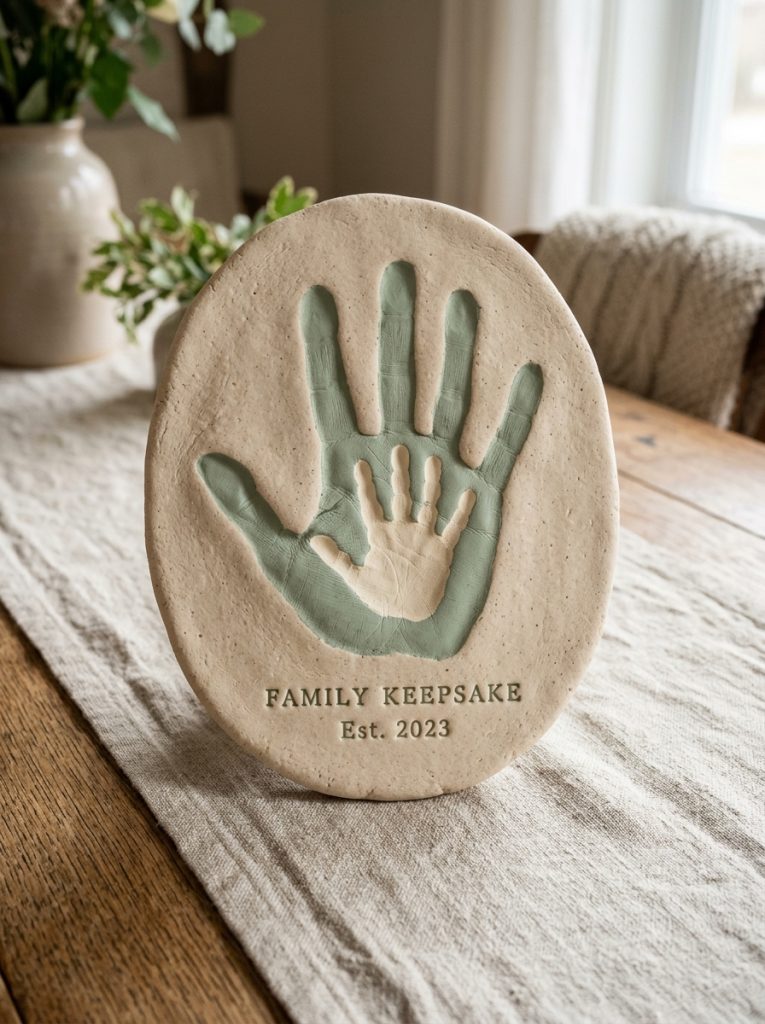
Design a layered family keepsake by nesting a toddler’s small hand impression inside a larger parent’s hand print within a single salt dough slab. Roll a generous oval slab of dough to a three-quarter-inch thickness, ensuring sufficient surface area for both hand sizes. Press the adult’s hand firmly into the center of the dough slab first, creating a deep, wide impression. Next, guide the toddler to press their smaller hand directly inside the indented palm footprint left by the adult, creating a nested impression effect. Carefully trim the excess dough around the outer contour of the large hand, leaving a uniform one-inch border. Punch two small holes along the top edge for hanging display options. Bake the thick slab slowly at a low temperature to ensure internal moisture evaporates completely. Paint the outer parent impression in soft dusty sage and the inner toddler print in a warm cream tone before sealing.
Idea 9: Scalloped Edge Pastels Keepsake Ornament
How to Make
Crafting a soft, nursery-friendly ornament utilizes delicate pastel tones and scalloped borders to frame a toddler’s hand impression beautifully. Roll salt dough out to a half-inch thickness and use a scalloped-edge circular cutter to produce a soft, ruffled border plaque. Guide the toddler’s palm into the center of the scalloped disc, ensuring equal spacing between the fingertips and the outer ruffled edge. Punch a top hole using a straw to allow stringing ribbon after baking is complete. Bake the piece at low heat until the dough transforms into a hard, solid ornament. Coat the entire ornament in a pale blush pink, mint green, or powder blue chalk paint for a soft, matte finish. Highlight the interior hand impression by filling the recessed palm print with a slightly lighter shade of cream paint using a detail brush. Thread a satin ribbon through the top hole and tie it in a delicate bow.
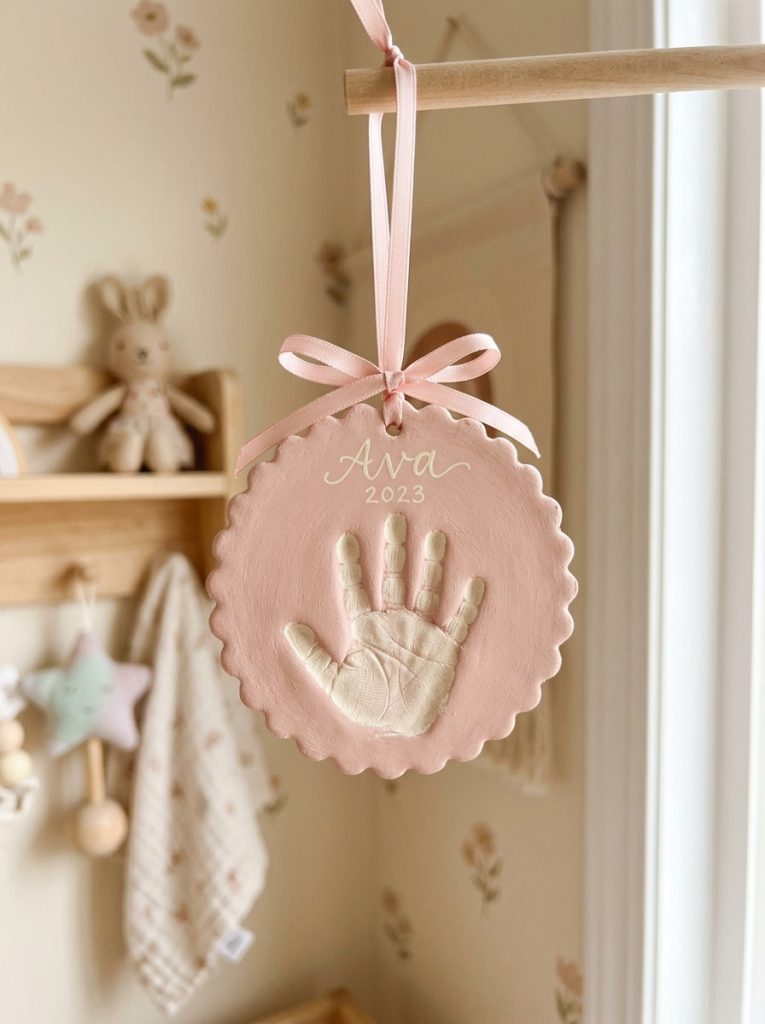
Idea 10: High-Contrast Monochromatic Paw and Hand Print
Step-by-Step Guide
Combining a child’s handprint alongside a family pet’s paw print produces a unique, high-contrast keepsake that celebrates household companionship. Roll a large rectangular salt dough plaque to a three-quarter-inch thickness, smoothing the surface with a wet fingertip. Position the toddler’s hand on the left side of the plaque and press firmly, then guide your pet’s paw onto the right side to create a side-by-side comparative impression. Use a small letter stamping kit to press the child’s and pet’s names neatly beneath their respective prints while the dough is still soft. Punch two hanging holes in the upper corners before transferring the plaque to the baking sheet. Bake the large plaque for several hours until rigid, then allow it to cool completely. Paint the entire surface with a clean off-white acrylic base coat, then fill the recessed hand and paw prints with dark charcoal paint to create an eye-catching monochromatic design.

Common Beginner Mistakes and How to Avoid Them
Crafting with salt dough can present challenges like cracking, air bubbles, or incomplete drying if key processing steps are executed improperly. A frequent mistake involves rolling the dough too thin, which causes the finished plaque to warp or snap during the baking process. To prevent structural fragility, always maintain a uniform thickness of at least half an inch for small ornaments and three-quarters of an inch for larger plaques. Another common error is setting the oven temperature too high; baking dough above two hundred and twenty-five degrees Fahrenheit causes steam to form inside, resulting in unsightly surface blisters and uneven puffing. Bake pieces low and slow for three to four hours instead. Additionally, applying paint or liquid sealer before the dough has cooled and dried completely traps internal moisture, leading to mold growth over time. Always verify that the dough is rock-hard on both sides before applying finishes.
Practical Tips for Better Results
Achieving professional-quality salt dough handprint keepsakes requires precise mixing, proper handling, and deliberate finishing techniques. When preparing the dough batch, use finely milled table salt rather than coarse sea salt to guarantee a smooth, refined surface texture that captures subtle skin lines clearly. Kneading a teaspoon of vegetable oil into the dough mixture improves overall pliability and minimizes surface cracking during rolling. If a toddler is hesitant to press their palm into the dough, apply a light dusting of cornstarch to their hand to prevent sticking and ensure a clean release. After baking, allow the pieces to rest in a dry environment for twenty-four hours before painting. Sanding the back and sides of baked plaques with fine-grit sandpaper removes minor imperfections and ensures pieces rest flat against walls. Finally, applying two coats of non-yellowing acrylic sealer protects finished pieces against ambient atmospheric humidity permanently.
Styling, Presentation, or Organization Ideas
Displaying completed salt dough handprint creations thoughtfully integrates childhood keepsakes into sophisticated home decor arrangements. Mounting small circular or arched plaques inside shadow box frames lined with linen fabric creates an elegant gallery presentation suitable for living rooms or hallways. Alternatively, hanging a series of uniform round ornaments from a wooden peg rail using raw linen ribbons provides a warm, organized visual accent in a nursery. For flat plates and thick geometric tiles, utilizing miniature iron or wooden tabletop display easels allows prints to sit securely on bookshelves, side tables, or mantels alongside family photographs. Grouping handprint ornaments by year using consistent color palettes establishes a cohesive timeline that documents a child’s growth without creating visual clutter. Selecting neutral paint shades like taupe, cream, sage, and warm ochre ensures that finished craft projects complement contemporary interior decor seamlessly.
Budget or Time Planning
Executing salt dough handprint projects efficiently involves minimal financial investment while requiring structured time management across several stages. Basic dough ingredients—flour, fine salt, and tap water—cost negligible amounts, making this craft one of the most budget friendly creative ideas available. Time planning must account for dough preparation, shaping, baking, cooling, and painting phases spread over two days. Kneading dough and capturing hand impressions requires approximately twenty minutes of active time, which aligns perfectly with a toddler’s short attention span. Baking requires three to four hours of passive oven time, during which pieces should be flipped once at the halfway point to ensure even drying on both sides. Allowing pieces to cool overnight guarantees a stable surface for painting and sealing on the second day. Breaking the project into manageable phases prevents fatigue and ensures every keepsake turns out beautifully.
Creative Expansion and Advanced Inspiration
Once foundational salt dough techniques are mastered, crafters can expand into advanced artistic applications and custom gifting concepts. Consider creating an annual holiday ornament tradition by capturing a handprint every year on a uniform circular disc, painting each with a new accent color and stamping the year along the rim. Teachers and group caregivers can combine individual handprint tiles into a large, framed mosaic display for classroom wall decoration. Experimenting with natural dye additives—such as cocoa powder for rich brown tones, turmeric for golden yellow, or match powder for soft green—infuses color directly into the raw dough without requiring post-bake painting. Furthermore, embedding small hanging hardware, such as brass screw eyes, directly into the top edge of raw dough plaques offers a hidden, streamlined mounting solution. These innovative adaptations allow simple salt dough techniques to evolve into sophisticated, timeless art projects.