10 Victorian Chandelier & Multi-Teacup Vintage Bird Feeder Stations
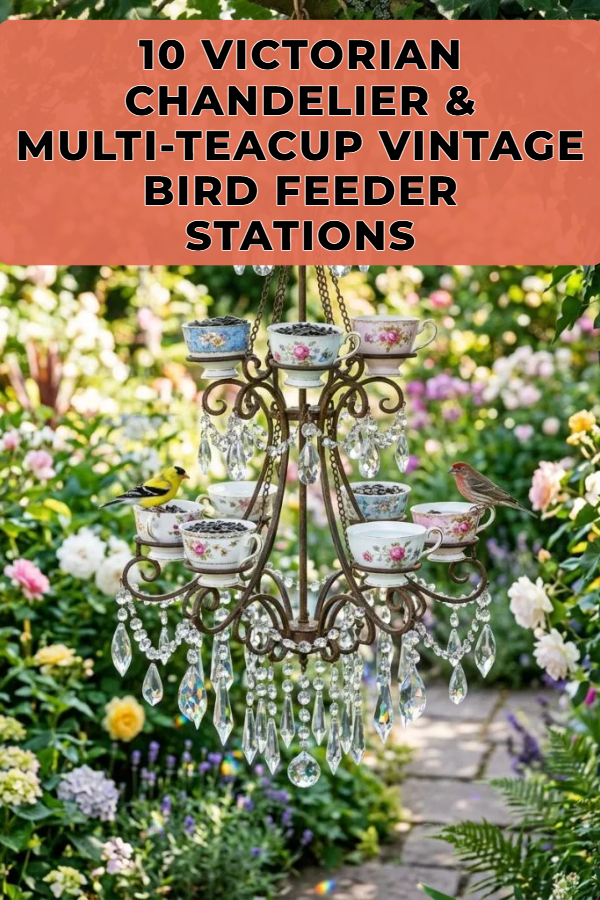
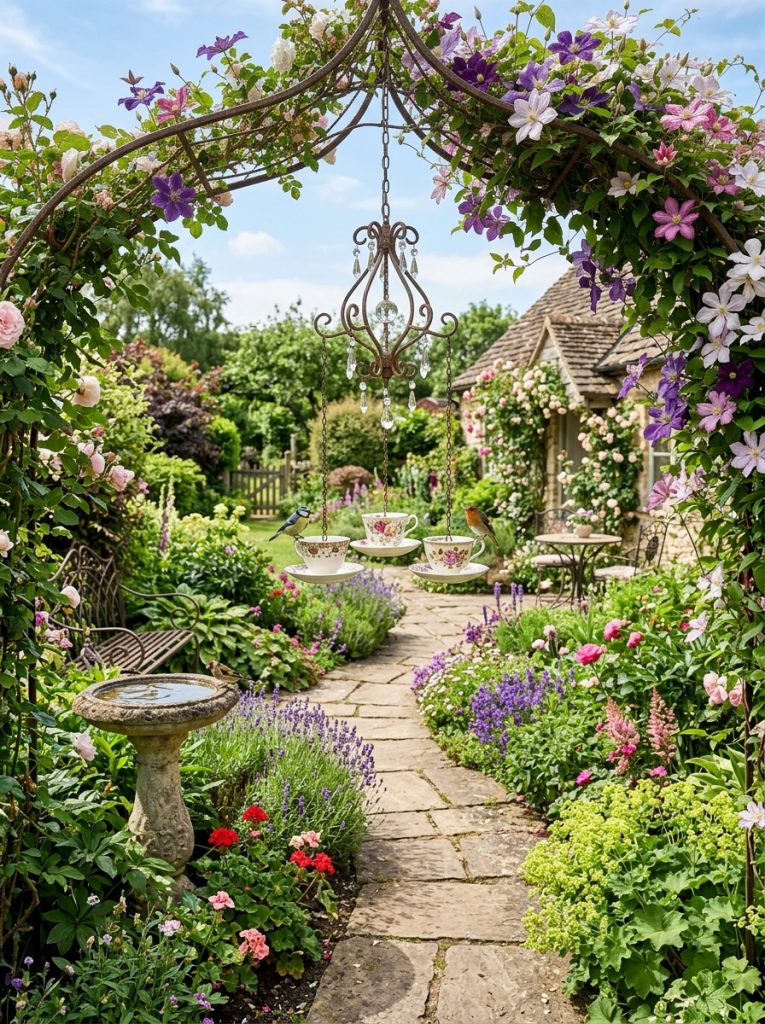
Transforming vintage metalwork and porcelain into outdoor garden decorations allows home crafters to blend historical design with functional wildlife support. Building a Victorian chandelier and multi-teacup vintage bird feeder station provides a creative project that repurposes antique lighting frames and classic teacups into multi-tiered bird feeding hubs. Readers will learn the step-by-step assembly techniques required to securely attach ceramic cups to curved iron scrollwork, select weather-resistant hardware, and balance multi-branch feeding arms effectively. This DIY guide offers practical value by creating accessible feeding stations for local songbirds while adding distinctive aesthetic charm to outdoor living spaces. Understanding structural balance, adhesive properties, and proper hanging mechanics ensures that the final handmade fixture withstands wind, moisture, and daily bird activity.
Why This Idea Is Trending or Useful
Victorian-inspired garden art continues to gain strong traction across online visual platforms because it combines upcycled antique home decor with practical backyard utility. Reusing forgotten brass, iron, or crystal chandelier frames offers exceptional DIY appeal, giving new purpose to vintage items instead of discarding them. The multi-arm layout inherent to chandelier designs provides natural separation for different birdseed blends, water basins, and suet treats, maximizing its practical value in small garden footprints. This beginner friendly project requires minimal specialized tooling, making complex vintage aesthetics achievable for novice crafters. Incorporating detailed porcelain patterns against rustic metal frames aligns with modern cottage core trends, creating a striking visual focal point that elevates outdoor patio spaces and traditional flower gardens alike.
Materials and Preparation
Thorough preparation ensures a stable structure and an efficient assembly process. Essential materials include a stripped vintage light chandelier frame, four to six porcelain teacups with matching saucers, waterproof epoxy adhesive, stainless steel mounting hardware, and heavy-duty hanging chain. Tools required for this project include wire cutters, an adjustable wrench, sandpaper, a power drill with diamond core bits, and safety glasses. Begin by removing all electrical wiring, bulb sockets, and plastic candle sleeves from the vintage chandelier body using wire cutters and pliers. Clean all metal components and ceramic surfaces thoroughly with warm, soapy water to remove grease, rust particles, and dust. Lightly sand the metal contact points and teacup bases to create a textured surface that enhances chemical bonding during adhesive application.
Main Ideas Section
Idea 1: The Six-Arm Cast Iron Porcelain Oasis
Execution Process
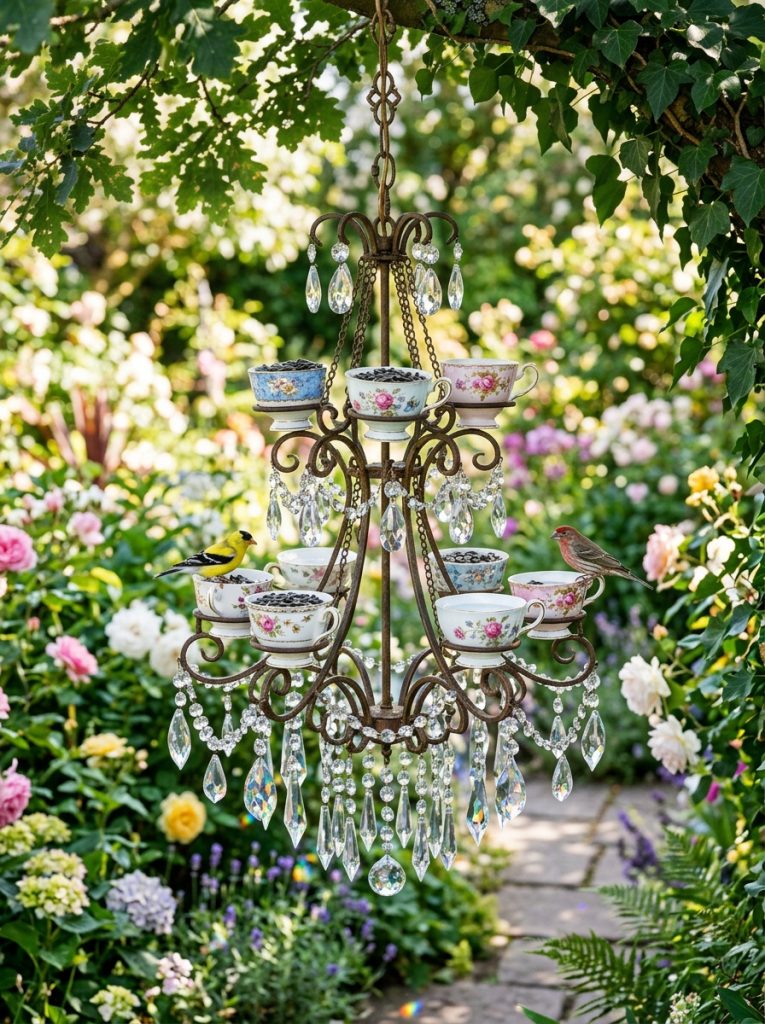
Construct a symmetrical feeding hub by utilizing a six-arm cast iron chandelier frame stripped down to its bare metal foundation. Drill a small drainage hole through the center of six porcelain teacups and matching saucers using a diamond-tipped drill bit under running water. Sand the bottom of each saucer and the top flat candle plate of each chandelier arm to remove gloss and paint. Apply a generous layer of two-part exterior marine epoxy between each saucer and its arm plate, pressing down firmly for two minutes to eliminate air bubbles. Once cured, apply epoxy to the bottom rim of each teacup, securing one cup onto the center of each saucer with the handles facing outward. Suspend the station from a heavy-duty tree branch using a weather-resistant steel chain. Fill three cups with mixed birdseed, two cups with fresh water, and one with suet nuggets.

Idea 2: The Crystal Drop Dual-Ring Sanctuary
Step-by-Step Guide
Combine elegance with functional outdoor decoration by retrofitting a two-tier crystal chandelier frame with alternate teacup placements. Remove all electrical wiring and inspect the frame rings to ensure structural integrity under added ceramic weight. Secure four large floral teacups to the lower outer ring arms using waterproof construction sealant, ensuring each saucer rests flat against the metal candle pans. On the upper smaller ring, mount two wider teacups directly opposite each other to maintain precise balance across the central vertical axis. Reattach selected glass crystal prisms beneath the lower arm scrolls using stainless steel wire, allowing them to catch natural sunlight without obstructing bird access. Fill the upper cups with water for drinking and bathing, while filling the lower four saucers and cups with sunflower seeds and mealworms.
Idea 3: The Brass Scrollwork Hanging Tea Tray
Assembly Technique
Utilize a lightweight, four-arm brass chandelier frame to create a compact, balanced bird feeding station suitable for small patio spaces. Strip the central wiring column and install a heavy stainless steel eye bolt at the top cap for secure hanging. Sand the brass candle cups down to raw metal, then apply a high-strength polyurethane adhesive to bond four matching vintage teacup and saucer sets onto the arms. Position each teacup handle inward toward the central column to reduce the outer clearance requirement and prevent snagging on nearby foliage. Secure small metal mesh inserts over the bottom of the cups to improve seed aeration and rain drainage. Hang the assembly from a heavy shepherd hook, filling two cups with thistle seed and two with cracked corn to attract varied bird species.
Idea 4: The Inverted Umbrella Crown Feeder
Setup Method
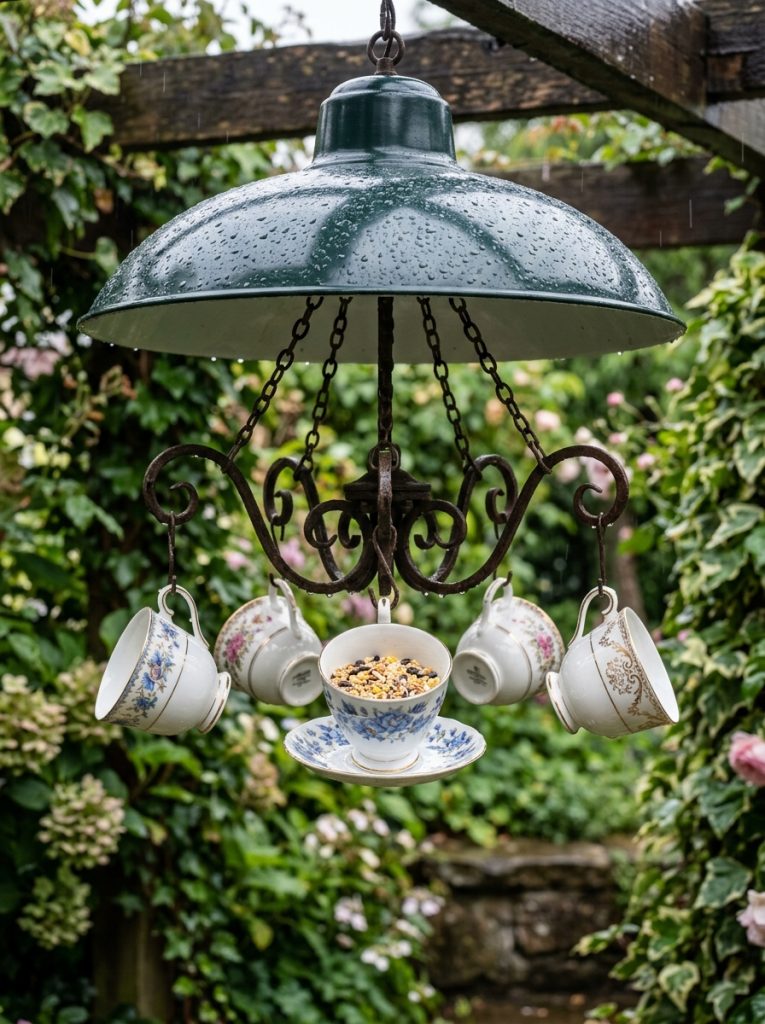
Design an umbrella-style shelter feeder using a inverted Victorian chandelier frame mounted beneath a wide metal dome shade. Secure a broad, painted aluminum dome or metal basin over the top hanging loop of a five-arm chandelier frame to act as a rain guard shield. Fasten five vintage floral teacups securely onto the lower arm platforms using two-part exterior epoxy, ensuring the saucers are sealed flush to catch stray seeds. The overhead metal dome deflects rainwater away from the lower teacups, keeping birdseed dry and fresh during inclement weather. Attach a heavy S-hook through the top of the umbrella dome, suspending the entire unit from a sturdy pergola or wooden arbor beam. Fill the sheltered cups with delicate seed blends that require protection from moisture.
Idea 5: The Tiered Cascade Water and Seed Hub
Step-by-Step Guide
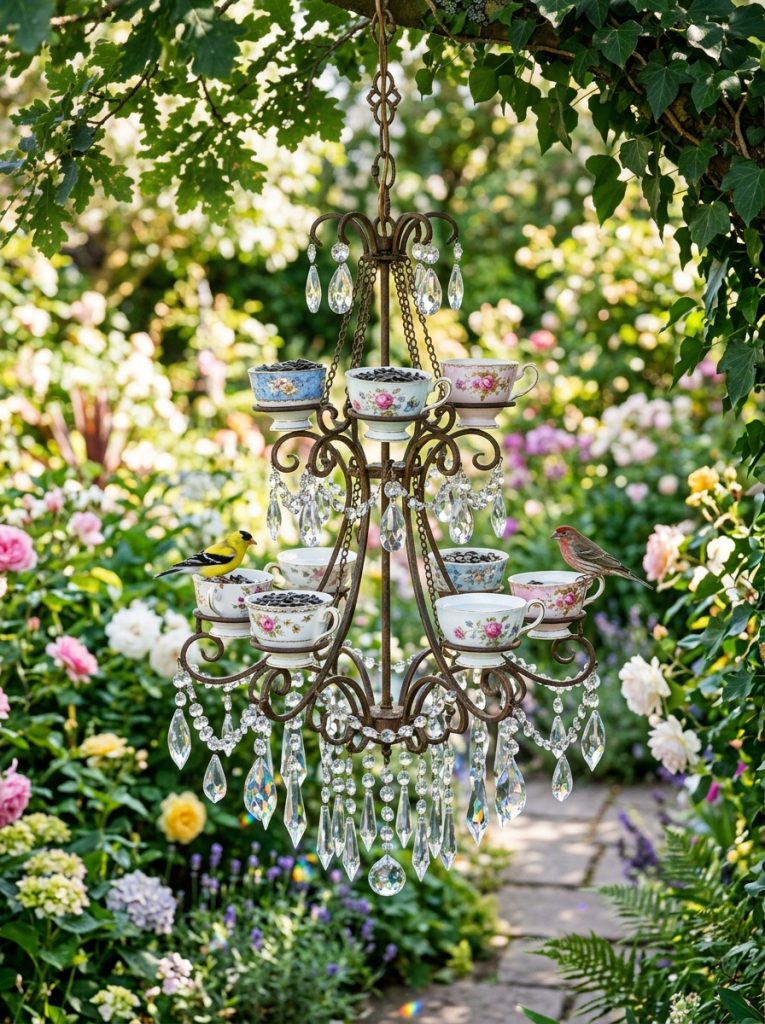
Create a multi-functional water and feeding center using a tall, multi-level Victorian chandelier frame with staggered arm heights. Mount three wide, shallow teacups onto the highest arms using clear exterior silicone adhesive to serve as elevated drinking basins. Attach four deeper teacups with saucers to the lower, wider arms to hold solid foods such as peanuts, black oil sunflower seeds, and fruit slices. Ensure that the upper water cups do not sit directly above the lower seed trays, preventing accidental splashing and seed spoilage. Suspend the complete assembly using a heavy-gauge braided wire cable anchored to a strong tree limb. The varying elevation levels allow different bird species to feed simultaneously at their preferred perching heights.

Idea 6: The Wrought Iron Lattice Saucer Tray
Execution Process
Build a heavy-duty, rustic feeding station using a curved wrought iron chandelier frame paired with oversized ceramic saucers and deep mugs. Thread a stainless steel eye nut onto the top central rod of the iron frame, ensuring all structural joints are tight. Bolt five broad floral saucers onto the iron arm plates using rubber washers and stainless steel machine screws to prevent ceramic cracking. Glue a deep vintage teacup to the center of each saucer using waterproof structural adhesive, leaving the surrounding saucer rim open as a wide landing perch. Spray the exposed iron frame with a rust-inhibiting clear coat to protect the metal from outdoor corrosion. Hang the heavy station from a reinforced wooden beam using a rated carabiner and chain assembly.
Idea 7: The Petite Demitasse Chandelier Station
Assembly Technique
Construct a lightweight feeder ideal for smaller songbirds using a petite Victorian chandelier frame fitted with delicate demitasse teacups. Remove all electrical fittings and light sockets, replacing the top loop with a secure outdoor hanging hook. Apply waterproof clear silicone adhesive to the bases of six small demitasse cups and saucers, fixing them firmly onto the narrow chandelier arm platforms. The smaller diameter of demitasse cups deters larger nuisance birds while providing ideal perching dimensions for finches and chickadees. Hang the lightweight assembly near garden foliage or outdoor window frames using a slim brass chain. Fill three cups with fine nyjer seed and three with small suet balls, creating an efficient feeding station with a delicate visual profile.

Idea 8: The Floral Scroll Centerpiece Feeder
Setup Method
Transform a wide, flat-profile Victorian chandelier frame into an expansive garden centerpiece by mounting a central ceramic bowl surrounded by outer teacups. Attach a large, shallow floral serving bowl directly to the bottom central hub of the chandelier using a heavy-duty threaded bolt and rubber gaskets. Secure four matching floral teacups onto the surrounding arm plates using exterior epoxy glue. The large central bowl serves as a primary landing platform for larger birdseed capacity, while the outer teacups hold specialized treats like mealworms, jelly, or water. Hang the complete multi-compartment unit from a tall garden tripod or strong tree branch, ensuring it remains level by adjusting the top mounting chain links accordingly.
Idea 9: The Gothic Bronze Mixed-Media Tower
Execution Process
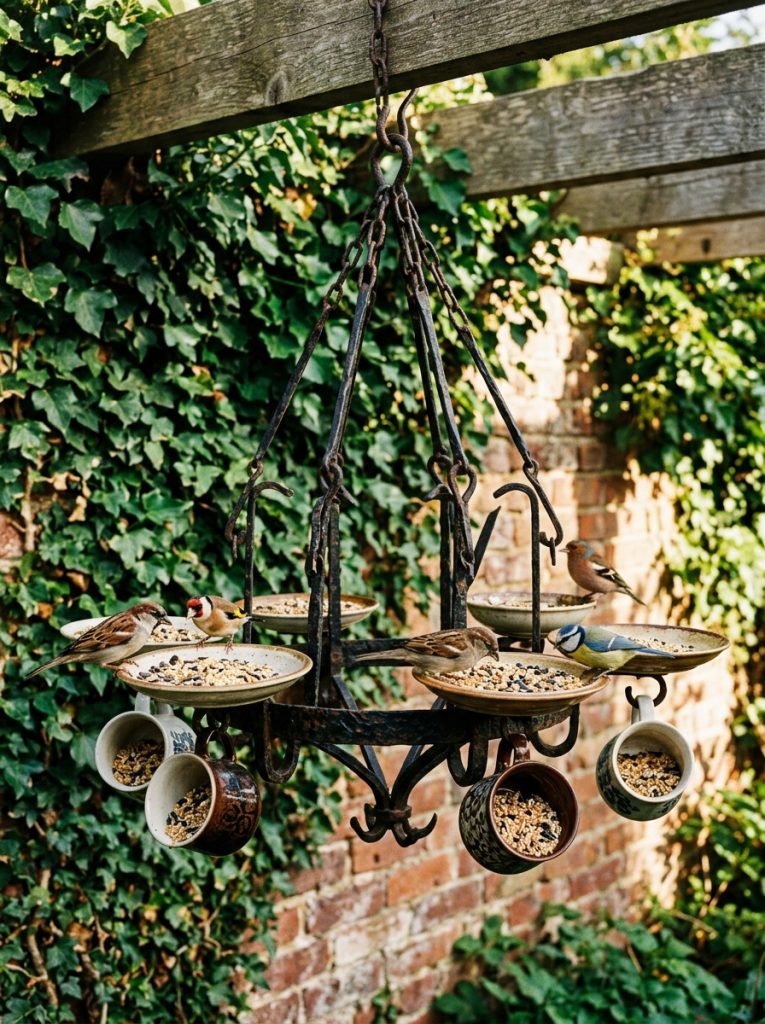
Design a dramatic garden feature by pairing a dark bronze Victorian chandelier frame with mismatched, highly detailed vintage teacups. Strip the internal wiring and sand all bronze arm plates to improve surface adhesion. Secure five unique, colorful teacups and saucers to the arm plates using dark-tinted marine epoxy, aligning the handles radially outward for aesthetic balance. Wire small glass or ceramic accent beads beneath each arm using weather-resistant copper wire to enhance the visual weight of the gothic scrollwork. Suspend the tower from an outdoor porch hook or heavy tree limb using a dark bronze chain. Fill each cup with distinct food options to cater to various local bird populations while adding rich texture to the yard.

Idea 10: The Solar-Illuminated Vintage Tea Station
Step-by-Step Guide
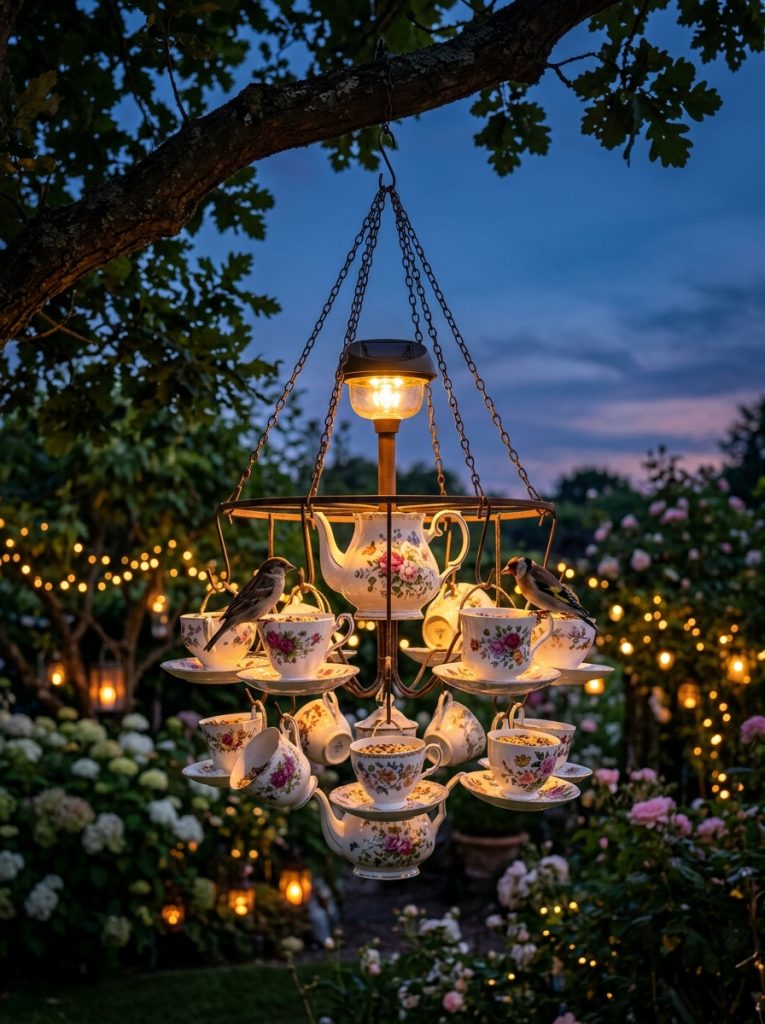
Incorporate subtle nighttime lighting into a multi-teacup feeder by integrating solar-powered accents onto a central chandelier column. Assemble a four-arm Victorian chandelier feeder using waterproof epoxy to attach four floral teacups and saucers onto the arm plates. Mount a compact, waterproof solar garden light fixture into the top central column where the main wiring harness was originally located. Ensure the solar panel faces upward to receive direct sunlight throughout the day. Hang the completed assembly in an open garden area using a heavy-duty swivel hook to prevent wind twisting. The cups hold seeds and water for wild birds during daylight hours, while the central solar light automatically illuminates the vintage porcelain patterns at dusk.
Common Beginner Mistakes and How to Avoid Them
Building a chandelier teacup feeder requires attention to mechanical balance and material selection to prevent failure outdoors. A frequent error among beginner builders is failing to remove old electrical wiring, which traps water inside the chandelier tubing and causes rapid internal rusting. Always completely strip internal wires and seal open pipe ends with waterproof silicone. Another common mistake is using standard indoor craft glue or basic hot glue, which degrades quickly under UV exposure and rain, leading to detached teacups. Use only exterior-grade two-part marine epoxy or 100% waterproof silicone sealants designed for non-porous ceramic and metal bonding. Additionally, drilling porcelain without cooling water causes ceramic cracking; always maintain a continuous stream of cold water over diamond drill bits during drilling. Finally, hanging a heavy, unbalanced feeder on a weak hook can cause tipping, so always verify balance and use load-rated mounting hardware.
Practical Tips for Better Results
Achieving professional durability and aesthetic quality involves key preparation details during assembly. Before applying epoxy or silicone adhesives, wipe down all metal arm plates and ceramic teacup bases with isopropyl alcohol to remove hidden oils and dust. Allow all adhesive bonds to cure completely in a warm, dry environment for at least forty-eight hours before hanging the unit outside or introducing seed weight. When selecting chandelier frames, choose cast iron, solid brass, or aluminum materials over thin stamped tin, as heavier metals withstand wind movement better. Install a heavy-duty barrel swivel between the top hanging chain and the anchor hook; this allows the feeder to rotate smoothly in high winds without unscrewing the mounting hardware. Clean the ceramic teacups regularly with hot water and mild soap to prevent mold growth and maintain bird health.
Styling, Presentation, or Organization Ideas
Integrating a Victorian chandelier feeder into your landscape design enhances the overall visual harmony of your home decor and garden beds. Position the station at eye level near outdoor seating areas, dining patios, or large window vistas to maximize birdwatching opportunities. Surround the hanging area with climbing flowering vines, such as clematis or morning glories, allowing the green foliage to frame the vintage metal scrollwork naturally. Select teacups with color patterns that complement nearby flowering plants, or use monochrome white porcelain for a clean, minimalist style contrast against dark iron frames. Grouping the chandelier feeder alongside classic garden elements like stone birdbaths, wooden benches, or iron arbors creates a cohesive Victorian aesthetic. Adding decorative copper wire wraps or glass bead accents along the frame arms provides extra sparkle and visual interest year-round.
Budget or Time Planning
Planning your materials and time effectively keeps costs low while ensuring a successful DIY creative project. Sourcing vintage chandeliers and mismatched floral teacups from thrift stores, flea markets, or yard sales offers budget ideas that keep total expenses minimal. Standard hardware items such as marine epoxy, stainless steel eye bolts, and hanging chains can be acquired affordably from local home improvement centers. Expect the hands-on assembly process to take approximately two to three hours, divided across separate work sessions. Dedicate the first hour to stripping electronics, cleaning surfaces, and drilling drainage holes in the ceramic cups. Spend the second session applying adhesives, balancing arms, and attaching hanging hardware. Allowing two full days for complete adhesive curing ensures structural safety before final outdoor installation.
Creative Expansion and Advanced Inspiration
Once you master the basic assembly techniques, explore advanced custom modifications to expand your outdoor garden features. Incorporate small copper wire perches or miniature suet cages suspended directly from the chandelier scrollwork loops beneath each teacup arm. Advanced crafters can spray paint vintage chandelier frames with specialized weather-resistant finishes, such as hammered bronze, distressed white, or matte black, to match specific home exterior palettes. Convert upper chandelier tiers into mini planter trays by filling select cups with shallow-rooted succulents or trailing ivy alongside the birdseed stations. Integrating small decorative copper rain chains from the lower arms down to ground stakes anchors the fixture visually while guiding rainwater cleanly away from the feeding surfaces during storms.