10 DIY Necktie Project Ideas
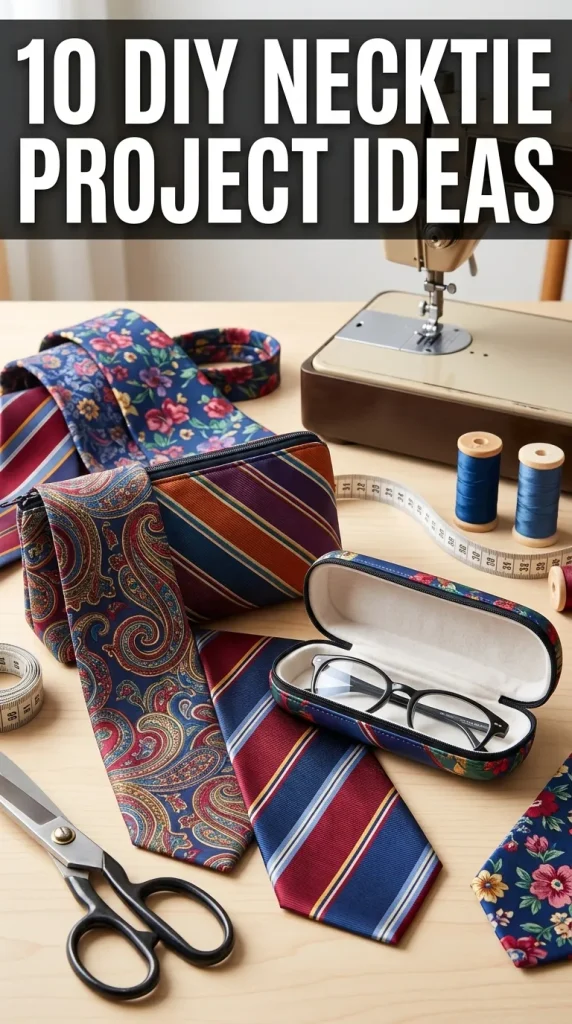
Old neckties are often stored away after they are no longer worn, yet their durable fabric, colorful patterns, and unique textures make them excellent materials for creative DIY projects. Instead of discarding outdated or damaged ties, they can be transformed into practical home decor, fashion accessories, gifts, and organization solutions. This Pinterest-style guide explores ten beginner-friendly necktie craft ideas that combine creativity with sustainability. Each project is designed to be simple enough for new crafters while offering attractive results suitable for modern homes and handmade gifts. Throughout this tutorial, you will learn how to prepare your materials, choose suitable tools, complete each project step by step, and improve the final presentation. These creative ideas help reduce fabric waste while encouraging practical crafting skills that can be adapted for different decorating styles and personal preferences.
Why DIY Necktie Projects Are Trending
DIY necktie crafts continue to gain popularity because they transform forgotten clothing into useful and decorative handmade items. Pinterest ideas featuring fabric recycling appeal to people looking for budget-friendly projects that also support sustainable living. Neckties are available in a wide variety of colors, textures, and patterns, making them suitable for many creative applications without requiring expensive materials. Their long, narrow shape naturally fits projects such as wreaths, pillows, bookmarks, table decorations, and storage accessories. Many of these tutorials require only basic sewing or gluing skills, making them accessible for beginners who want to explore fabric crafting. These projects also encourage personalization because each finished item reflects the unique colors and patterns of the original ties. The combination of affordability, creativity, and practical value explains why necktie DIY inspiration remains popular across home decor and handmade craft communities.
Materials and Preparation
Successful necktie projects begin with careful preparation and organized materials. Gather clean neckties in different colors and fabric textures, fabric scissors, sewing needles, matching thread, fabric glue, measuring tape, straight pins, an iron, ironing board, rotary cutter if available, cutting mat, ruler, and recycled cardboard for templates. Wash or dry clean the neckties before beginning if necessary to remove dust or wrinkles. Iron each tie so the fabric lies flat, making measuring and cutting easier. Plan the color arrangement before assembling decorative pieces to achieve a balanced appearance. Prepare a spacious work surface with good lighting and organize all materials within easy reach. If sewing is required, practice stitches on fabric scraps first. Proper planning reduces mistakes, improves cutting accuracy, and creates more polished handmade results.
Necktie Patchwork Throw Pillow
How to Create
Transform several colorful neckties into a decorative patchwork pillow that adds texture and personality to a sofa, chair, or reading corner. Carefully remove the stitching from each necktie and press the fabric flat with an iron. Cut the fabric into equal-sized panels or strips depending on the desired pattern. Arrange the pieces on a table until the colors and prints create a balanced design before sewing them together. Once the front panel is complete, attach it to a plain backing fabric, leaving one side open for inserting a pillow form. Sew the remaining edge closed after inserting the filling. This beginner-friendly project combines modern design with recycled materials while creating a practical piece of home decor. Selecting complementary patterns instead of identical prints gives the pillow visual interest without appearing cluttered, making it suitable for both contemporary and traditional interiors.
Colorful Necktie Table Runner
Step-by-Step Guide
Create a distinctive table runner by joining several neckties into one continuous decorative fabric piece. Begin by arranging ties from narrow to wide ends, alternating colors and patterns for visual balance. Trim overlapping sections where necessary and pin the ties together before sewing straight seams. Reinforce the stitching to ensure durability during regular use. Once assembled, press the completed runner flat and finish the edges neatly to prevent fraying. The finished table runner works beautifully on dining tables, console tables, or buffet cabinets, providing an interesting conversation piece made entirely from recycled materials. This DIY project requires only basic sewing techniques and offers an affordable way to refresh seasonal table decoration. Neutral dishware and simple centerpieces allow the colorful necktie patterns to become the primary decorative feature.
Woven Necktie Wall Hanging
How to Make
Old neckties can be woven into an attractive wall hanging that introduces texture and color to a room. Start by selecting ties with coordinating shades and similar fabric weight. Attach the top ends securely to a wooden dowel or branch using strong knots or stitching. Weave additional neckties horizontally through the hanging ties, alternating over and under each vertical strip to create a woven pattern. Adjust the spacing evenly while maintaining consistent tension throughout the project. Leave the pointed ends visible for added texture or trim them evenly for a cleaner appearance. Hang the finished piece above a desk, entry table, or reading nook as unique handmade decoration. This project demonstrates how recycled fabric can become modern wall art while requiring only simple weaving techniques that are easy for beginners to learn.
Fabric Necktie Storage Basket
Setup Method
Convert neckties into a sturdy decorative basket suitable for organizing craft supplies, remote controls, toiletries, or office accessories. Begin by wrapping long neckties around thick rope or cotton cord while securing them with fabric glue or stitching. Coil the wrapped rope tightly into a circular base, attaching each new row securely as the basket grows. Continue building upward by stacking additional coils until the desired height is reached. Press each layer firmly into place before moving to the next section to maintain an even shape. The finished basket combines organization with creative fabric recycling while adding warmth to shelves or countertops. Using neckties in similar color families creates a cohesive appearance, while mixing bold patterns results in a playful decorative accent suitable for creative workspaces.
Necktie Christmas Ornament Collection
Execution Process
Create reusable holiday ornaments by transforming colorful neckties into festive decorative shapes. Trace simple templates such as stars, trees, hearts, or bells onto doubled necktie fabric before cutting matching pieces. Sew or glue the edges together, leaving a small opening for lightweight stuffing if dimension is desired. Insert ribbon loops before sealing the final edge so each ornament can be hung easily. Embellish the ornaments with small fabric bows, buttons, or stitched details while avoiding excessive decoration that hides the necktie patterns. Display them on a holiday tree, decorative branches, or seasonal wreaths. These handmade ornaments offer a meaningful way to preserve sentimental neckties while creating lasting holiday decorations that can be reused every year with minimal maintenance.
Stylish Necktie Plant Holder
How to Create
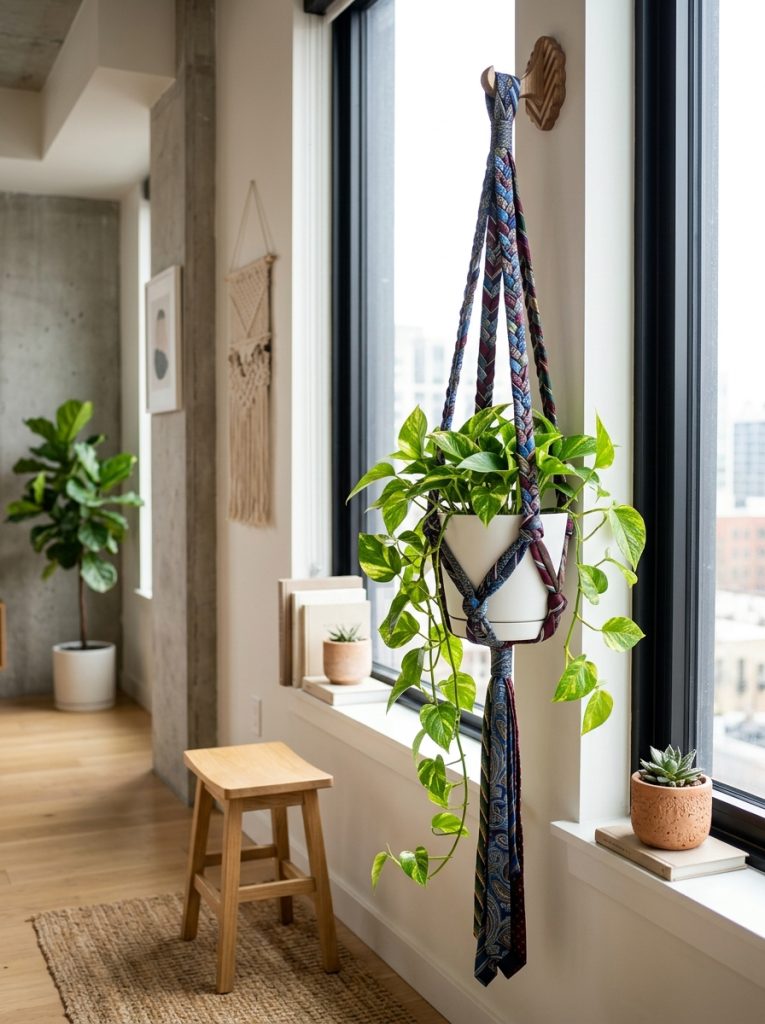
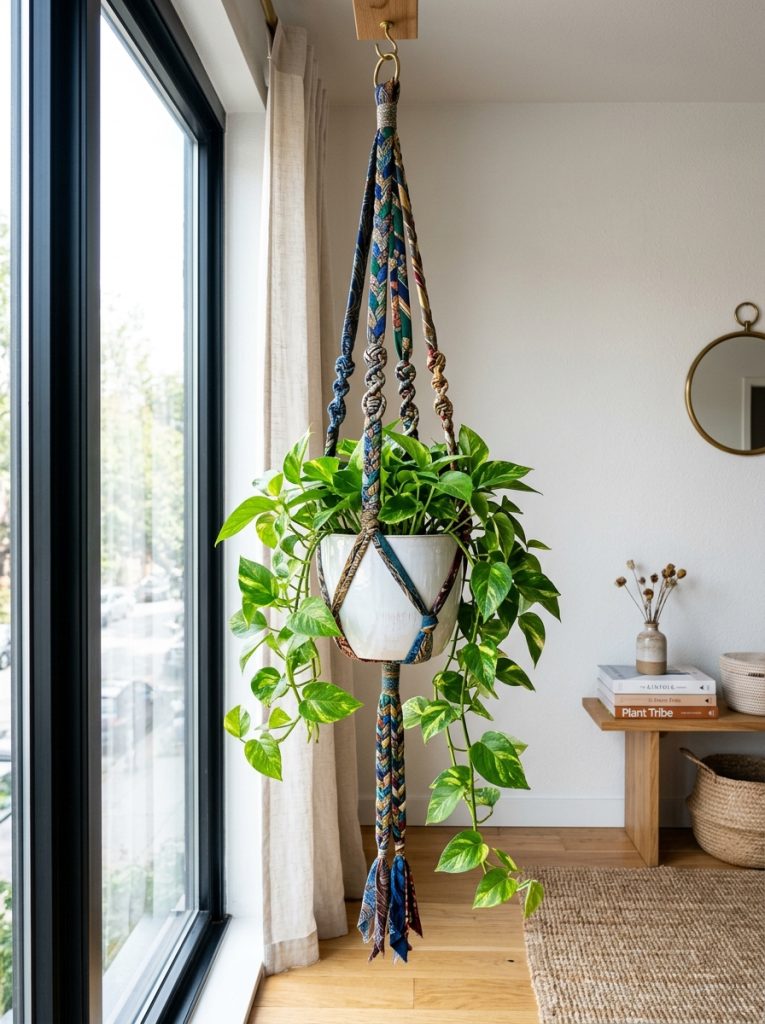
Strong necktie fabric can be repurposed into decorative plant hangers for lightweight indoor pots. Select several sturdy ties and braid them together to increase strength while creating visual texture. Secure the braided strands with tight knots at both ends and form a supportive cradle beneath the flowerpot using evenly spaced loops. Test the weight carefully before hanging the finished holder from a ceiling hook or wall bracket. Decorative knots and coordinated tie colors contribute to an attractive handmade appearance without requiring advanced crafting skills. This project works especially well with trailing plants placed near windows where the colorful fabric complements natural greenery. The finished holder adds vertical interest to interior spaces while demonstrating a practical use for recycled clothing materials.
Handmade Necktie Headband
Step-by-Step Guide
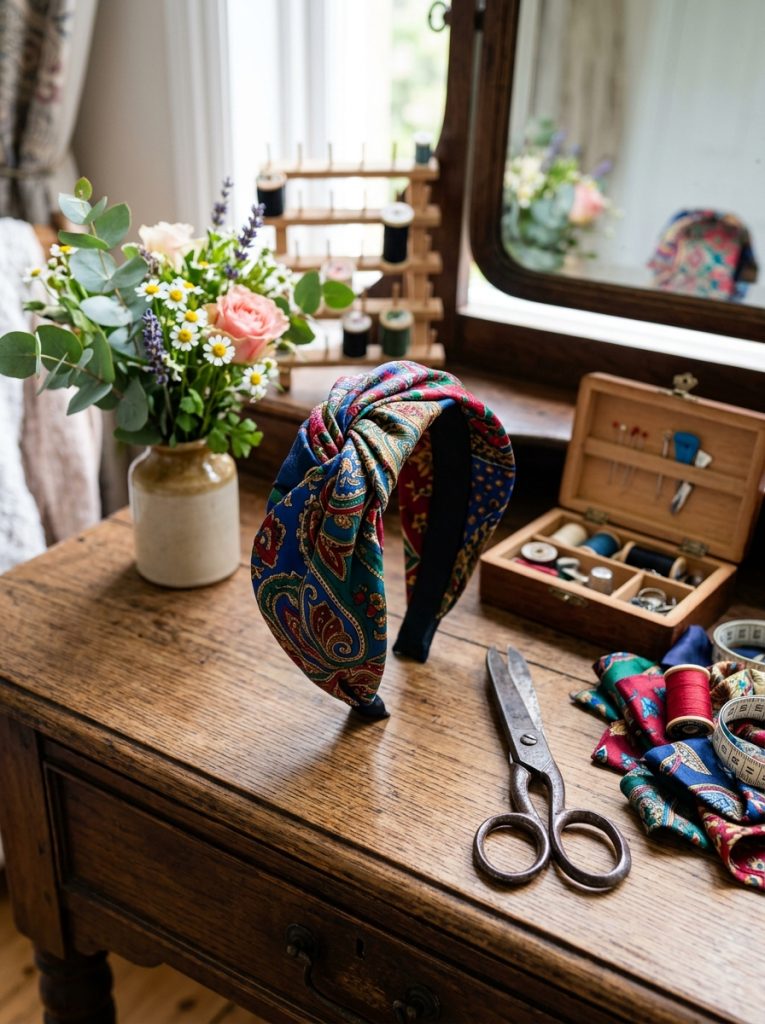
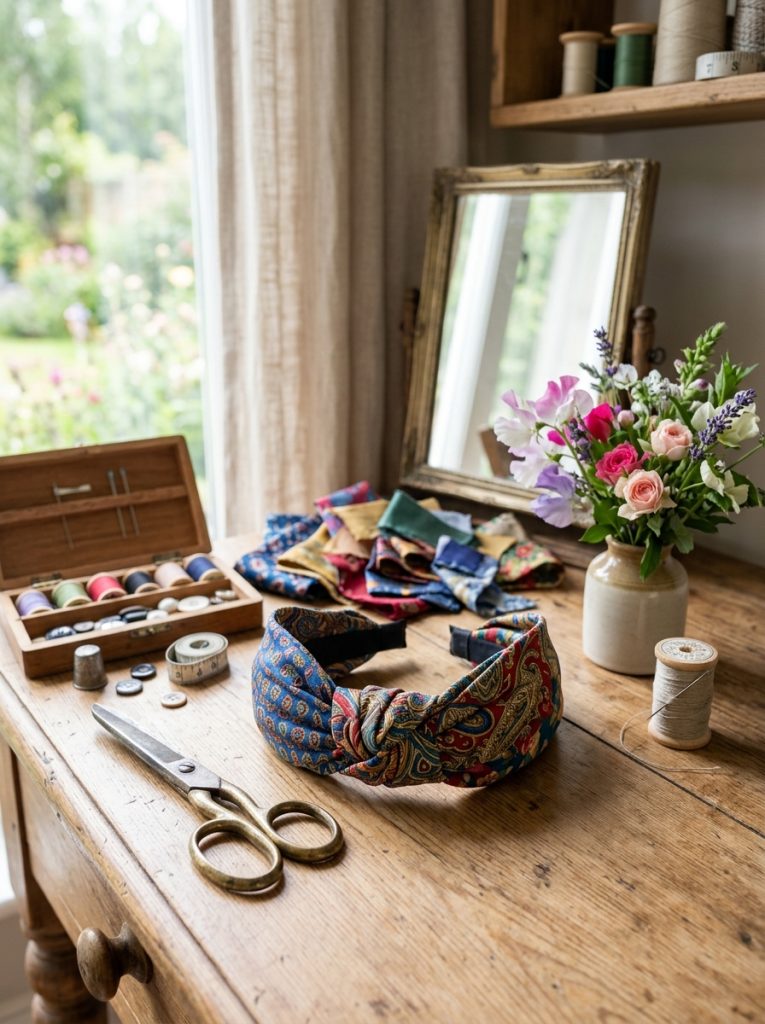
Transform a single necktie into a comfortable fabric headband suitable for everyday wear. Remove the inner lining if necessary and trim the tie to the preferred length. Fold the edges inward and sew them neatly to create a smooth finished band. Attach elastic to the back for flexibility or create a fabric knot design at the front for added style. Press the finished headband with an iron to create crisp edges and improve comfort during use. This beginner-friendly project requires minimal materials and provides an easy introduction to fabric sewing techniques. Coordinating patterned neckties with neutral clothing creates a balanced appearance while allowing the handmade accessory to stand out naturally.
Decorative Necktie Wreath
How to Make
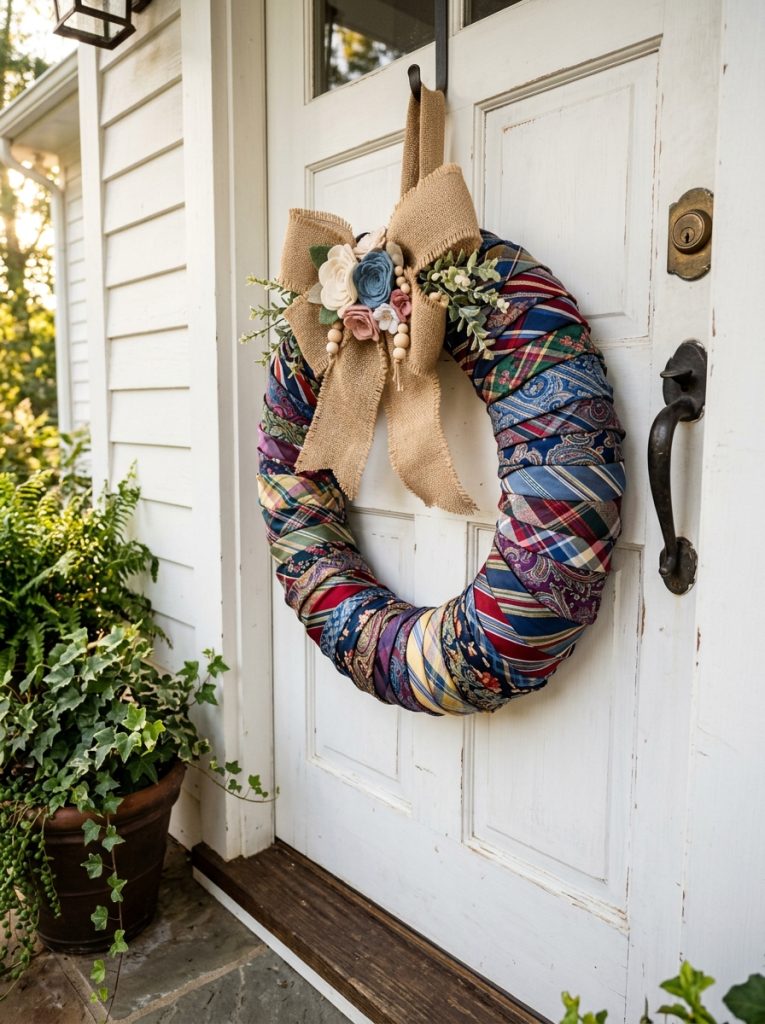
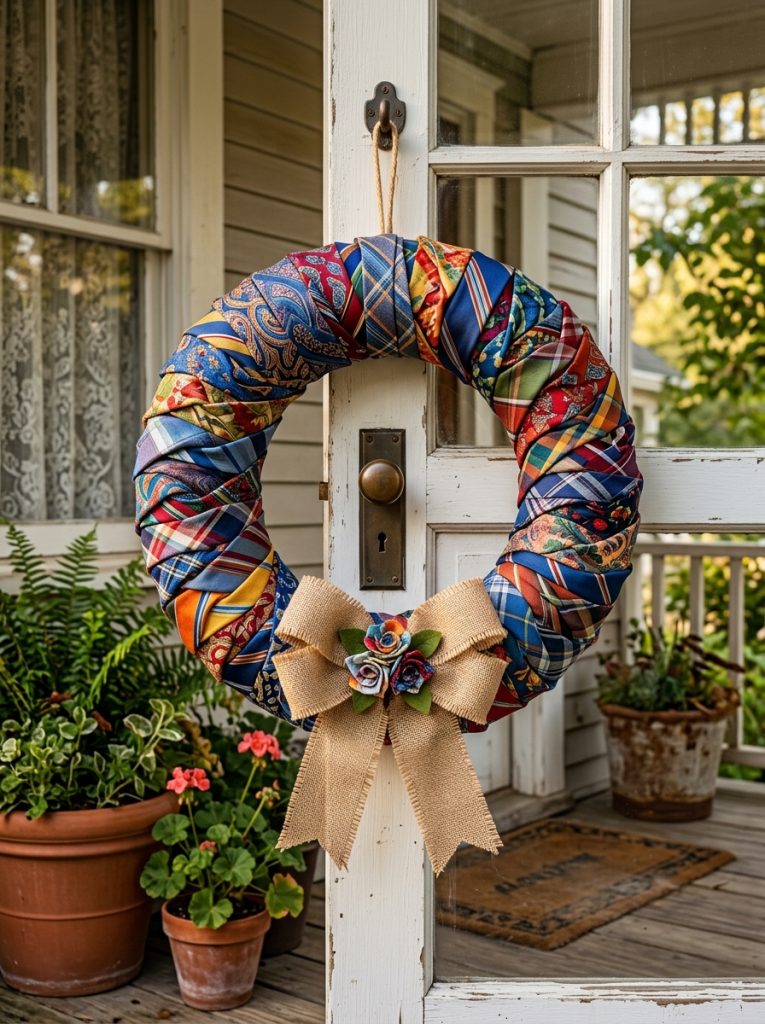
Design a reusable wreath using colorful neckties wrapped around a foam or wire wreath form. Begin by arranging the ties according to color before wrapping each one tightly around the frame. Overlap the fabric slightly to hide the base while securing loose ends with fabric glue or hidden stitches. Alternate prints and textures evenly throughout the wreath to maintain visual balance. Finish the project with a simple burlap bow or small fabric flowers created from leftover necktie pieces. Hang the wreath on an interior door, office wall, or craft room entrance where it adds personality without overwhelming surrounding decor. This creative project demonstrates how everyday clothing can become attractive seasonal or year-round decoration through thoughtful planning and careful assembly.
Necktie Covered Notebook
Execution Process
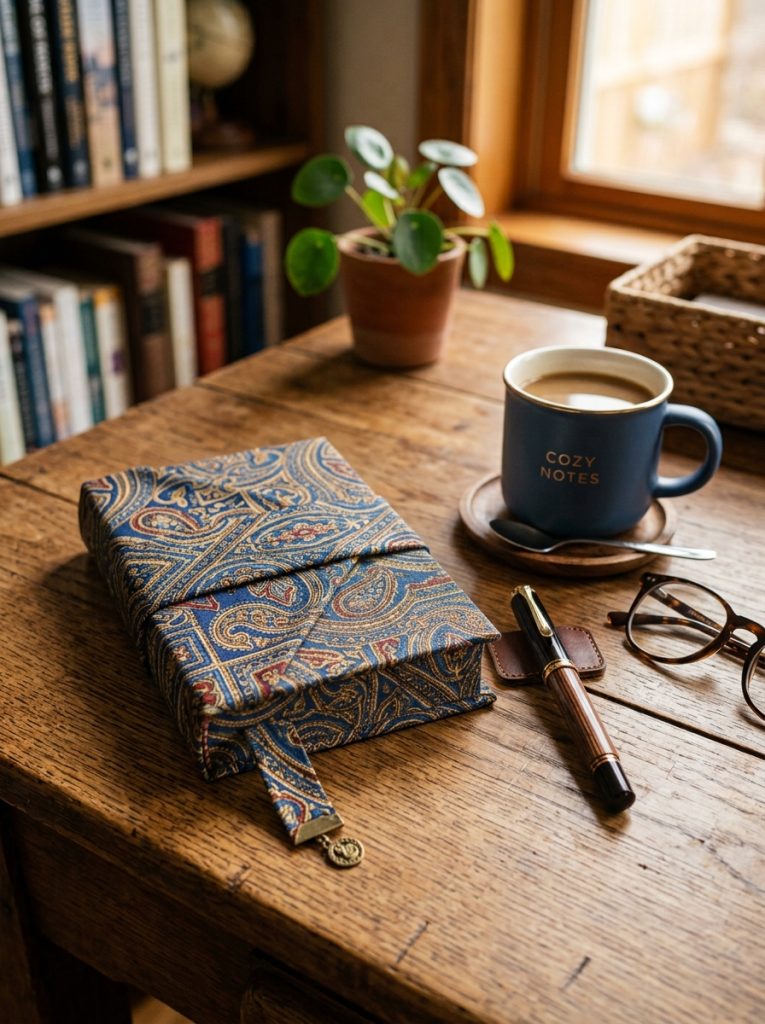
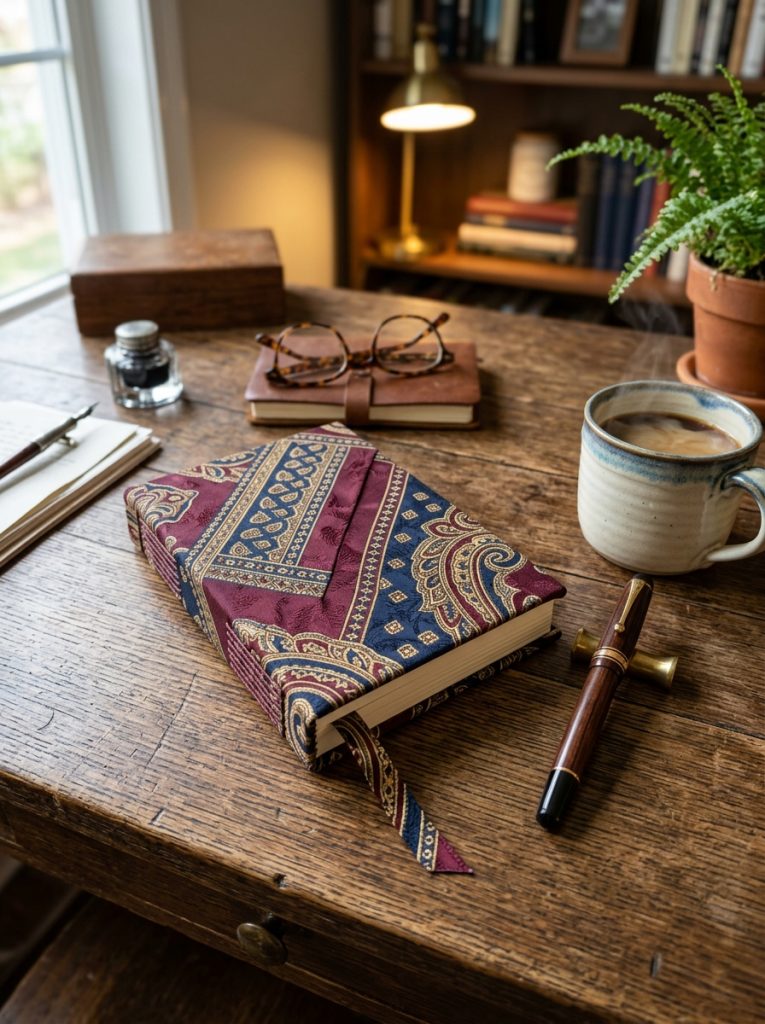
Refresh an ordinary notebook by covering it with colorful necktie fabric. Carefully remove the notebook cover measurements before cutting the fabric slightly larger than required. Wrap the necktie material around the front, back, and spine while smoothing wrinkles as you glue or sew it into place. Fold excess fabric neatly inside the covers to produce clean edges and reinforce corners for durability. Allow the adhesive to dry completely before using the notebook. This project is practical for journals, planners, recipe books, or sketchbooks while introducing a personalized handmade appearance. Coordinating the notebook with matching bookmarks or pen holders creates a complete organization set suitable for home offices, classrooms, or creative workspaces.
Necktie Fabric Garland
How to Create
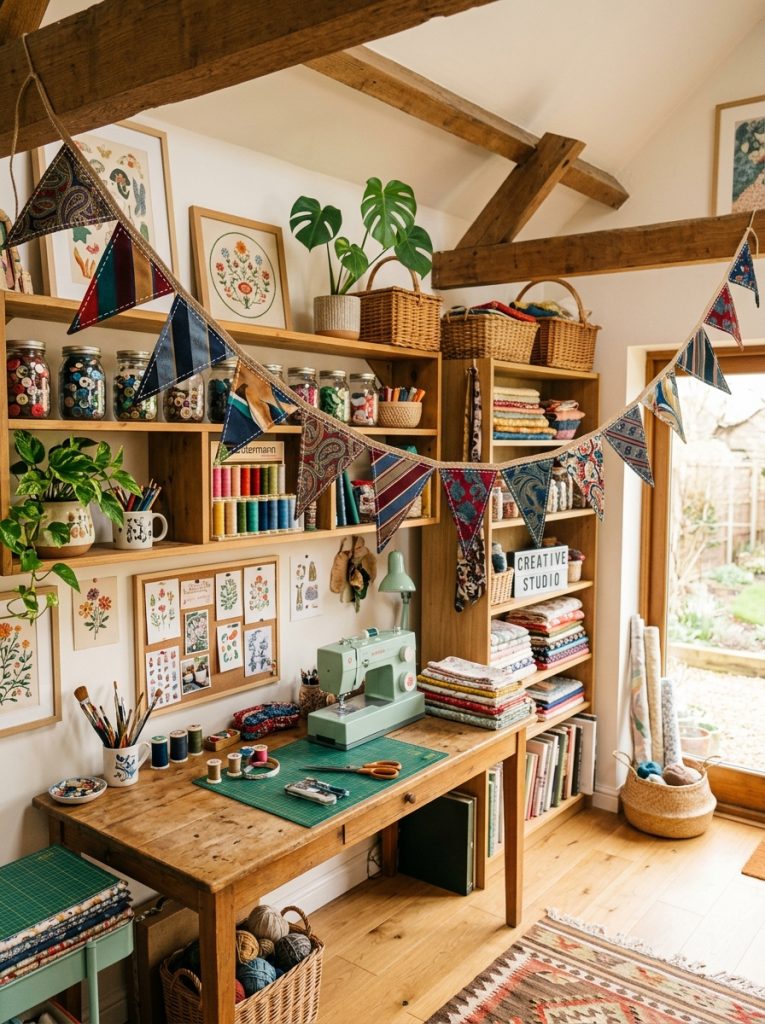
Create a decorative garland by cutting neckties into coordinated fabric pennants or strips and attaching them to sturdy cotton cord. Arrange the colors evenly before sewing or gluing each piece onto the cord with consistent spacing. Mix patterned and solid sections to achieve visual rhythm without overcrowding the design. Hang the completed garland across shelves, fireplaces, windows, party tables, or craft rooms for year-round decoration. Lightweight construction makes installation simple while allowing the garland to be stored easily between uses. This easy project is suitable for beginners because it involves straightforward measuring, cutting, and assembly techniques. The finished decoration adds color and texture while making creative use of recycled materials that might otherwise remain unused.
Common Beginner Mistakes and How to Avoid Them
One of the most common mistakes is cutting neckties before measuring the project layout. Always plan dimensions carefully to avoid wasting usable fabric. Another frequent problem is mixing fabrics with very different thicknesses, which can make sewing uneven and reduce durability. Iron every necktie before cutting to improve accuracy and prevent wrinkles from affecting measurements. Avoid applying excessive fabric glue because it can soak through delicate materials and leave visible marks. Beginners should also test stitches on scrap fabric before sewing the final project, especially when working with slippery silk ties. Organizing materials before beginning helps maintain efficiency and prevents misplaced pieces. Careful preparation, patient assembly, and accurate measurements consistently produce cleaner and more professional handmade results.
Practical Tips for Better Results
Choose neckties with complementary colors when combining several fabrics in one project. Keep scissors sharp to achieve clean edges and reduce fraying during cutting. Reinforce seams that will receive frequent handling, such as baskets, pillows, or headbands, to improve durability. Store leftover fabric sections in labeled containers because smaller pieces can be reused for future creative ideas. Photograph finished projects in natural daylight to evaluate balance, color coordination, and overall presentation before displaying them. If using patterned neckties, distribute bold prints evenly throughout the design to create visual harmony. Taking extra time during preparation often results in better craftsmanship and a more polished appearance without increasing project costs significantly.
Styling, Presentation, and Organization Ideas
Present necktie crafts in coordinated groups to create a cohesive decorative display rather than placing individual items randomly throughout a room. Pair colorful fabric projects with neutral wood, ceramic, or woven storage containers to highlight the unique textile patterns. Decorative pillows, baskets, and wall hangings work especially well together in reading corners or home offices where they contribute both comfort and organization. Handmade notebook covers and storage accessories can be arranged neatly on desks to maintain a tidy workspace while adding personality. Keeping decorative colors consistent throughout a room helps each project contribute to the overall aesthetic. Thoughtful organization ensures handmade items feel intentionally designed rather than simply recycled.
Budget and Time Planning
Most necktie DIY projects require only recycled materials and basic sewing supplies, making them affordable for beginners. Planning multiple projects together allows efficient use of leftover fabric and reduces waste. Start with smaller projects such as notebooks or headbands before progressing to larger items like baskets or pillows that require additional sewing time. Allocate separate sessions for measuring, cutting, assembling, and finishing to avoid rushing important details. Store reusable templates and fabric scraps for future tutorials so setup becomes faster with each project. Careful planning helps manage both time and materials while encouraging higher-quality results. Even a small collection of old neckties can produce several attractive handmade decorations without exceeding a modest crafting budget.
Creative Expansion and Advanced Inspiration
After completing these beginner-friendly projects, explore more advanced techniques by combining neckties with denim, canvas, linen, or reclaimed wood for mixed-material creations. Experiment with quilting methods, fabric weaving, patchwork designs, or layered wall art to expand your crafting skills. Collections of matching projects, such as pillows, baskets, and table runners, create coordinated home decor that reflects careful planning and consistent design. Seasonal themes can also be incorporated by selecting color palettes appropriate for spring, autumn, or holiday decoration. Keeping notes on measurements, stitching methods, and successful layouts makes future creative projects easier to reproduce and refine. Continuous experimentation encourages confidence while transforming ordinary recycled neckties into distinctive handmade pieces suitable for modern home decor and practical organization.