10 Fall Craft Ideas

Autumn is a season filled with rich colors, natural textures, and opportunities for creative projects that celebrate changing weather and cozy living spaces. Fall crafts provide an enjoyable way to decorate homes, personalize seasonal displays, and spend quality time creating handmade decorations with simple materials. Many Pinterest ideas focus on projects that are beginner friendly, budget conscious, and easy to customize for different decorating styles. Whether you enjoy rustic accents, minimalist style, or modern design, fall crafts can be adapted to match your personal preferences. This article presents ten practical DIY ideas with clear tutorial-style guidance, preparation advice, and creative inspiration. Each project explains materials, planning, and step-by-step methods that help transform everyday supplies into attractive seasonal decoration while encouraging organization, creativity, and thoughtful craftsmanship throughout the autumn season.
Why Fall Crafts Continue to Inspire Creative Projects
Fall craft projects remain among the most popular Pinterest ideas because they combine creativity with practical home decor. Natural materials such as leaves, pinecones, branches, pumpkins, and seasonal flowers are widely available, making many projects affordable and accessible. DIY crafts also allow people to create personalized decorations instead of relying on mass-produced items. Beginners appreciate simple tutorials that use common tools while experienced crafters enjoy expanding projects with additional details and handmade touches. Many fall decorations also serve multiple purposes by organizing entryways, decorating dining tables, or enhancing seasonal gatherings. Their versatility makes them suitable for homes, classrooms, offices, and outdoor spaces. The combination of aesthetic appeal, budget ideas, and creative freedom explains why autumn projects continue to inspire seasonal decoration every year.
Materials and Preparation
Successful fall crafts begin with thoughtful planning and organized materials. Gather basic supplies such as scissors, craft glue, paintbrushes, acrylic paint, twine, ribbon, burlap, hot glue, cardstock, wooden pieces, mason jars, fabric scraps, and protective work surfaces. Natural materials including pinecones, acorns, colorful leaves, dried flowers, branches, and miniature pumpkins can often be collected outdoors after ensuring they are clean and completely dry. Before beginning any DIY project, sketch your design, select a consistent color palette, and prepare all materials in advance. Organizing supplies into small containers reduces interruptions during the creative process. Measuring available display space beforehand also helps determine the appropriate size for each decoration. Careful preparation leads to cleaner results and makes every step-by-step project easier to complete.
Rustic Leaf Garland
How to Create
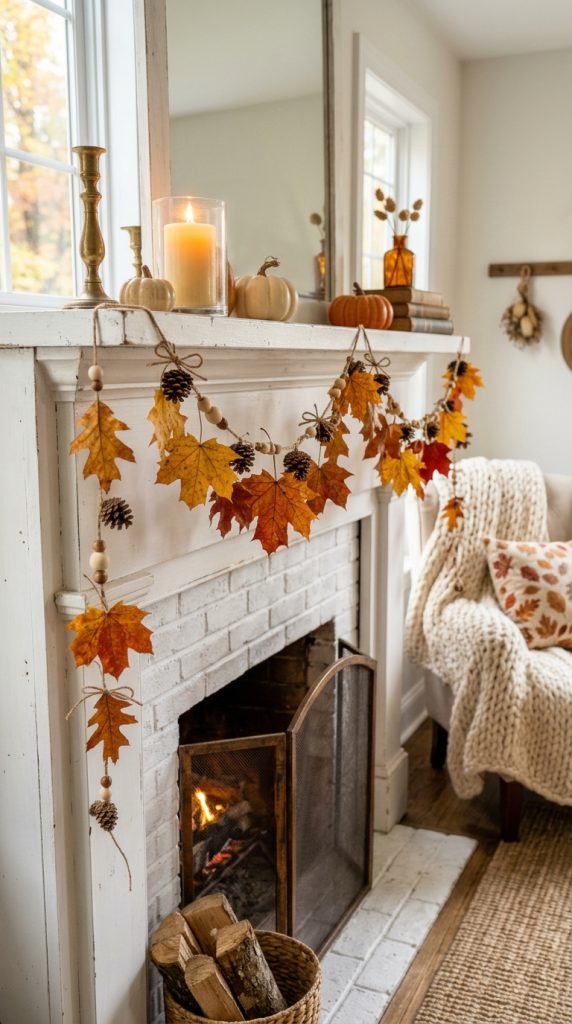
A handmade leaf garland adds seasonal warmth to mantels, shelves, windows, or stair railings while highlighting the beauty of autumn colors. Begin by selecting artificial or preserved fabric leaves in several shades of red, orange, yellow, and brown. Arrange the leaves before attaching them to twine using hot glue or by threading them with a needle. Space each leaf evenly to create a balanced appearance across the entire garland. Small pinecones, wooden beads, dried orange slices, or miniature fabric pumpkins can be added between leaf clusters for additional texture. After assembly, gently shape the leaves so they overlap naturally and produce fullness. This easy project works well with rustic, farmhouse, minimalist style, and modern design interiors because the colors complement many decorating themes. The finished garland provides attractive decoration that can be reused throughout the entire fall season.
Painted Pumpkin Centerpiece
Step-by-Step Guide
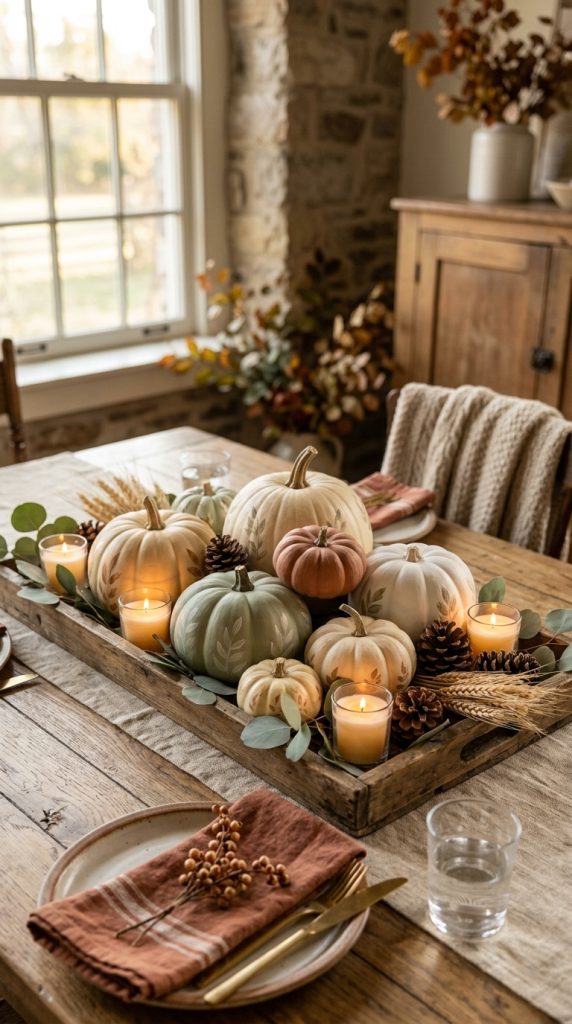
A painted pumpkin centerpiece creates an elegant focal point without requiring carving. Select real or artificial pumpkins with smooth surfaces and clean them thoroughly before painting. Apply a primer if needed, then use neutral, metallic, or soft earth-tone colors that coordinate with existing home decor. Once the paint dries, decorate the pumpkins with simple patterns, leaves, or subtle geometric details using fine brushes. Arrange several pumpkins of different sizes on a wooden tray with candles, pinecones, dried branches, and seasonal greenery. Varying heights creates visual balance while maintaining a cohesive design. This beginner friendly DIY project allows endless customization through color selection and decorative accents. The centerpiece works equally well on dining tables, coffee tables, entry consoles, or kitchen islands and remains an attractive seasonal display throughout autumn.
Mason Jar Candle Holders
Setup Method
Glass mason jars become charming fall candle holders with only a few decorative additions. Clean the jars thoroughly before wrapping the exterior with burlap, lace, twine, or fabric ribbon secured using craft glue. Decorative leaves, acorns, cinnamon sticks, or small pinecones can be attached around the center to create layered texture. Place battery-operated candles or traditional candles safely inside depending on your intended display location. Several decorated jars arranged together create visual interest through varying heights and spacing. Position them on wooden trays, floating shelves, or outdoor tables to introduce warm seasonal lighting. This handmade decoration combines practical function with attractive design while using inexpensive materials commonly found in craft supplies. Careful spacing between decorative elements keeps the jars balanced and enhances their rustic appearance.
Pinecone Flower Display
Execution Process
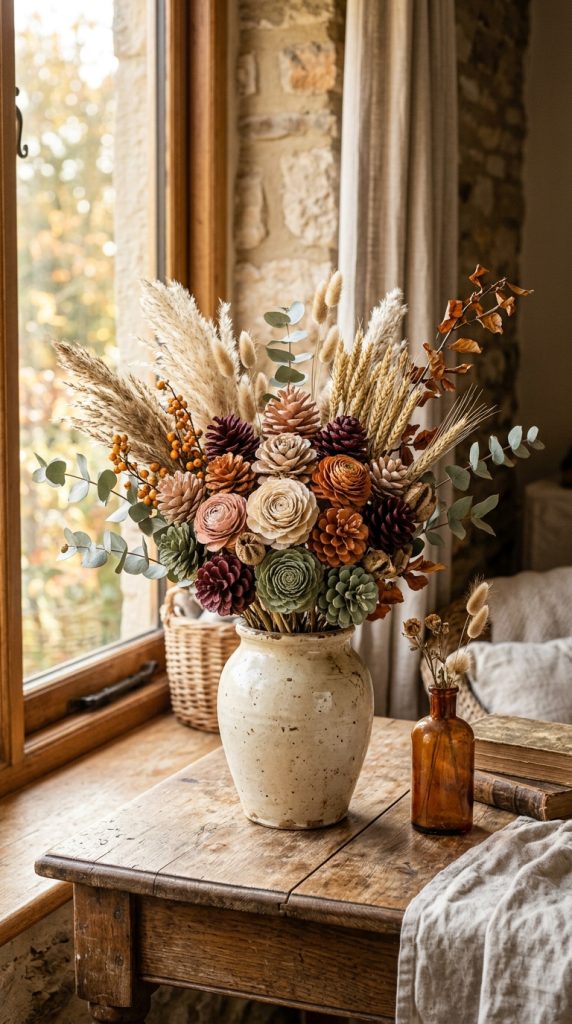
Pinecones naturally resemble layered flower petals and can become beautiful floral decorations with simple painting techniques. Select pinecones of different sizes, remove loose debris, and allow them to dry completely before painting. Apply acrylic paint to the outer edges of the scales using soft autumn colors or realistic floral shades. Attach painted pinecones to wooden skewers or floral wire to create stems. Arrange them inside recycled jars, baskets, ceramic vases, or wooden boxes filled with dried moss for stability. Mixing different pinecone sizes creates the appearance of a varied bouquet. Additional dried grasses, wheat stems, or preserved eucalyptus complete the arrangement. This creative project introduces natural textures while requiring only basic materials and simple planning. The finished display serves as long-lasting home decor throughout the season.
Cozy Fabric Pumpkin Collection
How to Make
Fabric pumpkins offer a soft decorative alternative that complements living rooms, bedrooms, and reading corners. Choose cotton, linen, burlap, velvet, or textured fabric in seasonal colors and cut circles according to your preferred pumpkin size. Stitch or glue around the edges before filling each piece with fiber stuffing until rounded. Pull the opening tightly together to form the pumpkin shape, then wrap strong thread around the stuffed fabric several times to create natural sections. Insert a short branch or wooden stem at the center and secure it with glue. Small fabric leaves tied with twine complete the appearance. Display pumpkins in baskets, wooden trays, or shelves mixed with candles and books. This beginner friendly tutorial produces reusable handmade decoration that remains attractive year after year.
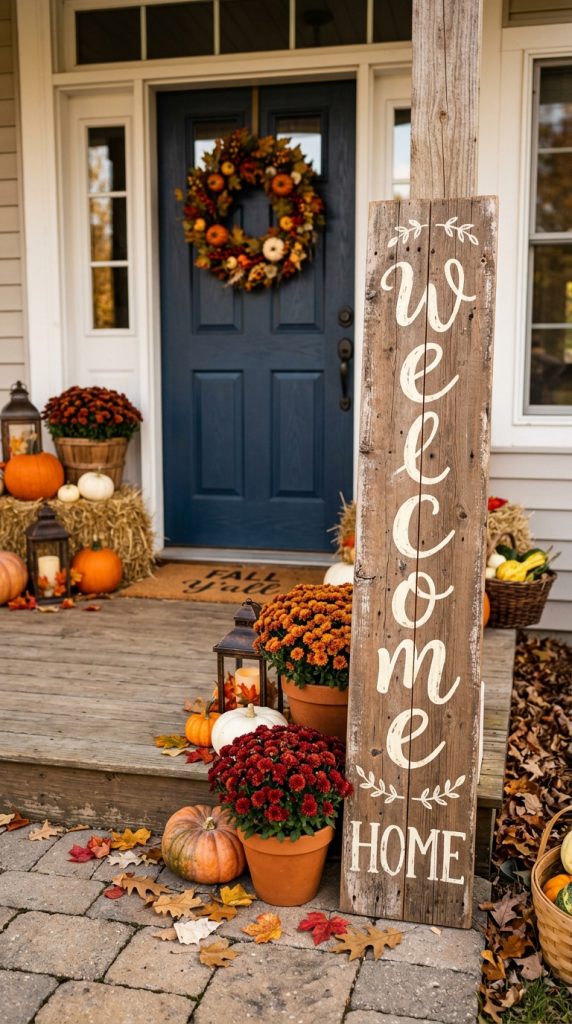
Wooden Welcome Sign
How to Create
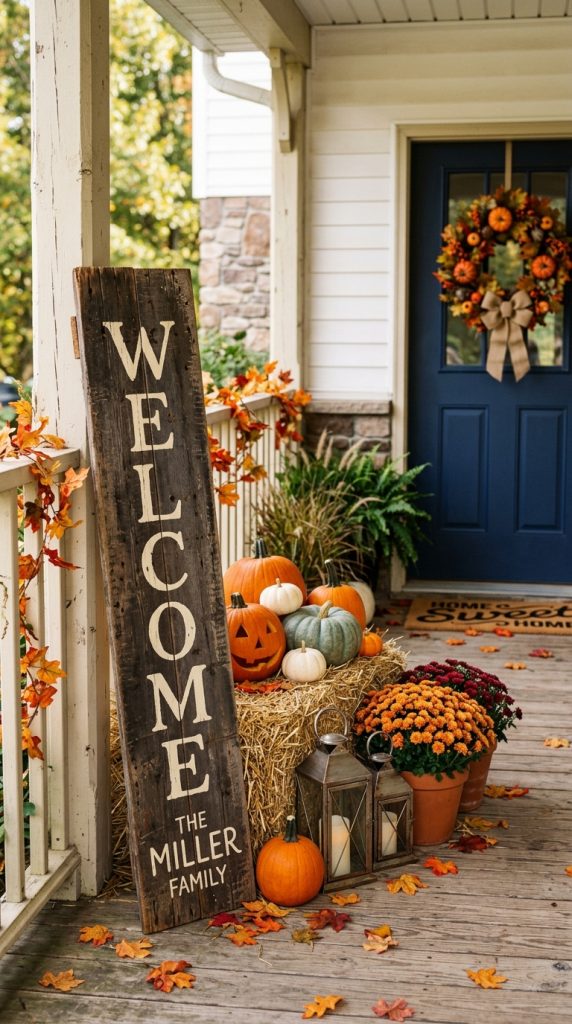
A seasonal wooden welcome sign provides an inviting accent for porches, entryways, or indoor hallways. Begin with a smooth wooden board and lightly sand the surface before applying paint or wood stain. Sketch lettering using a pencil or stencil to maintain consistent spacing and alignment. Paint the words carefully using contrasting colors that remain easy to read from a distance. Decorative elements such as painted leaves, pumpkins, acorns, or branches can frame the lettering without overwhelming the design. Finish with a protective sealant if the sign will be displayed outdoors. Lean the completed sign beside the front door or hang it securely using durable hardware. This DIY project combines creativity with practical decoration while allowing complete personalization through colors, fonts, and seasonal artwork.
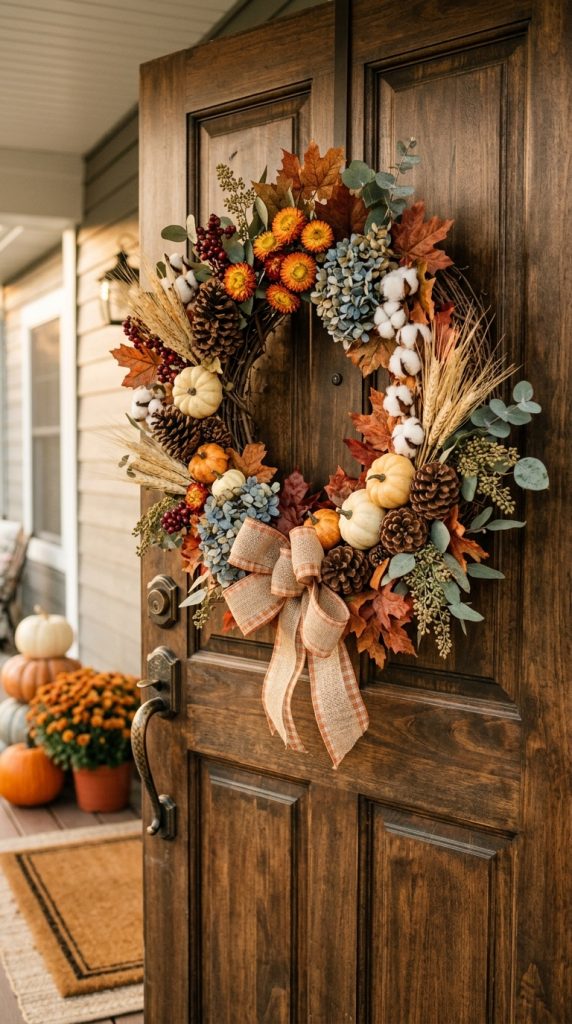
Autumn Wreath with Natural Elements
Step-by-Step Guide
A handmade fall wreath creates a welcoming entrance while showcasing seasonal textures. Begin with a grapevine, wire, or foam wreath base depending on your preferred style. Attach clusters of preserved leaves, dried flowers, pinecones, wheat, berries, and small pumpkins using floral wire or hot glue. Arrange larger elements first before filling remaining spaces with smaller decorative pieces to achieve balanced composition. Limit the color palette to complementary autumn shades for a cohesive appearance. Fluff leaves and branches periodically while assembling to create natural fullness without overcrowding the design. Hang the completed wreath using ribbon or twine on front doors, interior walls, or above fireplaces. This creative project combines organization, planning, and artistic inspiration while producing reusable seasonal home decor.
Decorative Acorn Bowl
How to Make
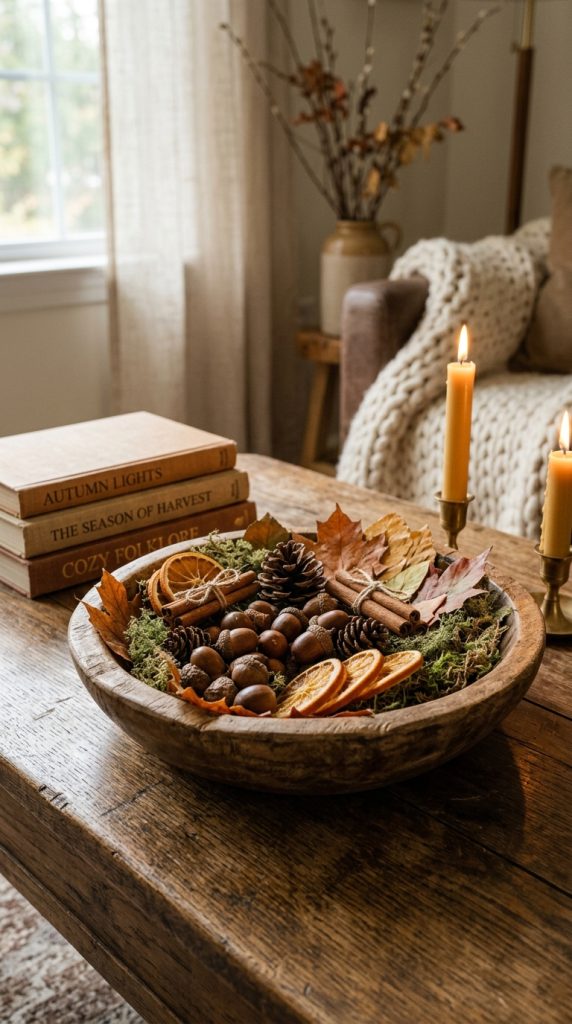
Collected acorns can become an elegant decorative display when arranged thoughtfully inside attractive containers. Wash and dry the acorns completely before sealing them with clear craft varnish to preserve their natural appearance. Fill shallow wooden bowls, ceramic dishes, or glass containers with acorns mixed alongside miniature pinecones, dried seed pods, cinnamon sticks, or preserved leaves. Layer materials gradually to create depth and variation rather than placing identical items together. Position the bowl on coffee tables, bookshelves, dining tables, or office desks where it introduces seasonal texture without occupying excessive space. This easy project requires minimal preparation while celebrating natural materials gathered during autumn walks. Coordinating the container with surrounding furniture enhances visual harmony throughout the room.
Framed Pressed Leaf Art
Setup Method
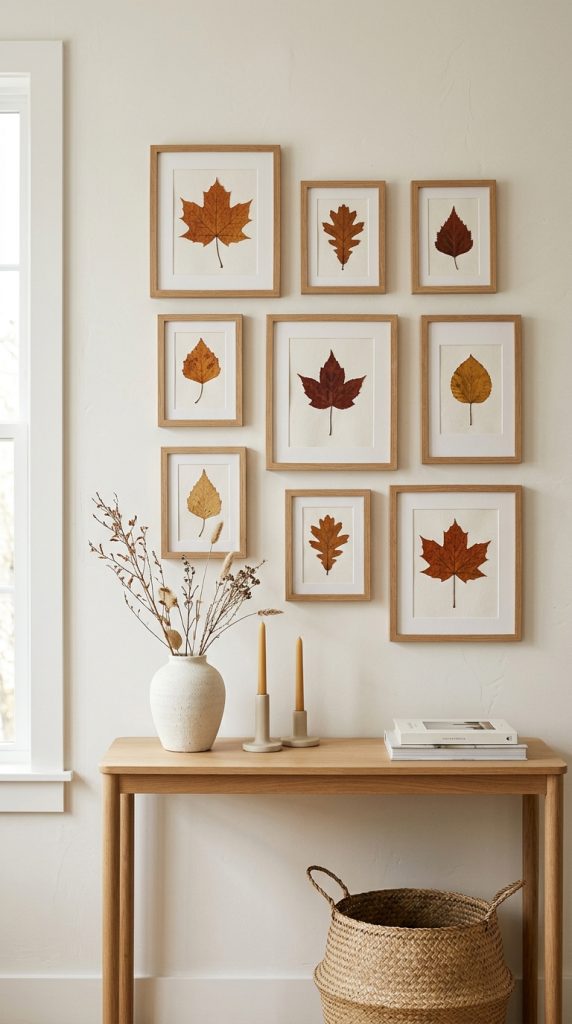
Pressed leaf artwork transforms seasonal foliage into elegant wall decoration suitable for many interior styles. Collect colorful leaves that remain relatively flat and free from tears before pressing them between heavy books for several days. Once dry, arrange the leaves on neutral cardstock while experimenting with different layouts before permanent attachment. Secure each leaf carefully using acid-free adhesive to preserve delicate edges. Place the completed arrangement inside simple wooden or black frames that complement modern design and minimalist style interiors. Display several matching frames together to create a coordinated gallery wall celebrating autumn colors. This handmade project encourages thoughtful planning while preserving seasonal beauty long after leaves have fallen from the trees.
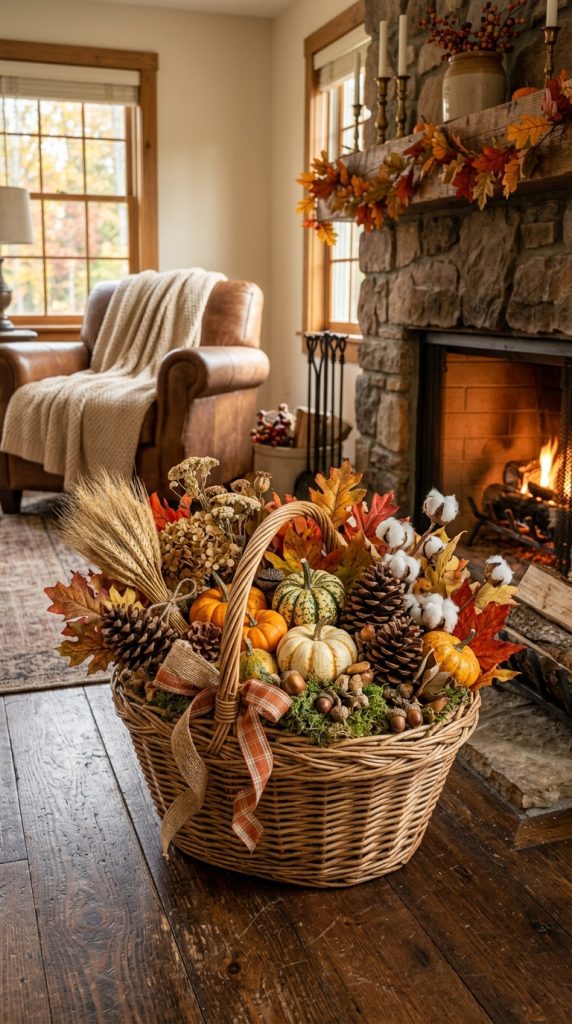
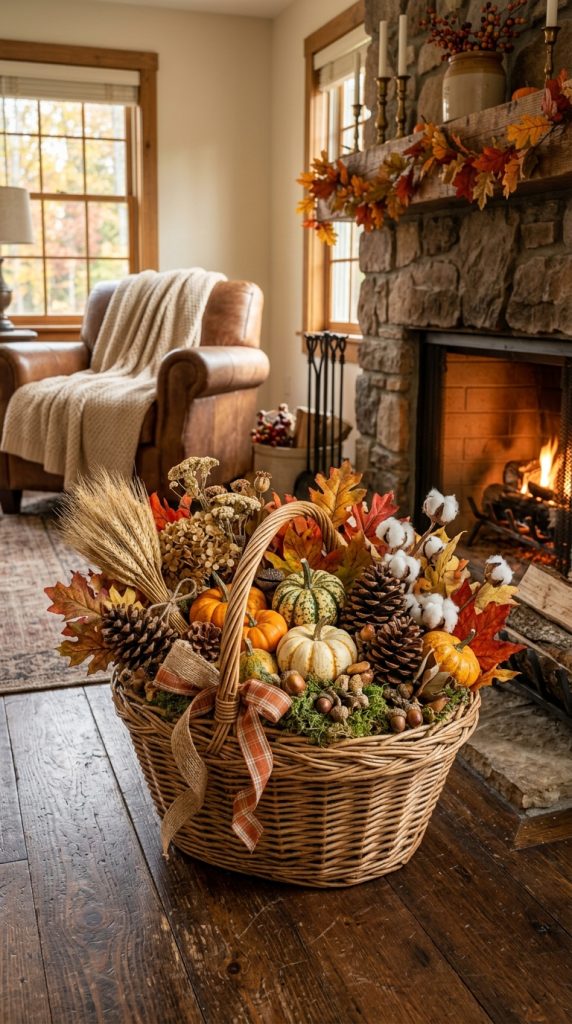
Harvest Basket Arrangement
Execution Process
A harvest basket combines multiple natural elements into one versatile seasonal display suitable for indoor or covered outdoor spaces. Choose a woven basket that matches your decorating style and line the bottom with burlap or fabric for added texture. Arrange miniature pumpkins, pinecones, dried flowers, wheat bundles, preserved leaves, and decorative branches beginning with the tallest pieces at the back. Fill smaller gaps using acorns or moss to create a balanced composition without empty spaces. Twine bows or simple fabric ribbons add subtle finishing details without distracting from the natural materials. Place the completed basket near entryways, fireplaces, dining tables, or kitchen counters where it provides welcoming autumn decoration. Careful layering creates depth and maintains an organized, professional appearance.
Common Beginner Mistakes and How to Avoid Them
Many beginners rush into projects without organizing materials beforehand, resulting in uneven progress and unnecessary interruptions. Another common mistake involves using wet natural materials that later shrink, discolor, or develop mold. Always clean and dry collected leaves, pinecones, branches, and acorns before incorporating them into handmade decorations. Overcrowding decorative elements can also reduce visual balance, making projects appear cluttered rather than intentional. Limiting colors to a coordinated seasonal palette produces a more refined aesthetic. Measuring display areas before crafting prevents oversized decorations that do not fit their intended locations. Reading each tutorial completely before beginning allows better planning and minimizes avoidable errors during construction.
Practical Tips for Better Results
Preparing all materials before starting helps maintain steady progress and improves organization throughout every creative project. Test paint colors on scrap surfaces before applying them to finished decorations. Work in thin layers when painting or gluing to achieve smoother finishes and reduce drying time. Keep natural materials grouped by size and color while assembling arrangements to simplify design decisions. Photograph partially completed projects from different angles to identify uneven spacing or missing details before final assembly. Store completed decorations in sturdy containers with protective tissue between seasons to preserve their appearance. Small improvements in planning and craftsmanship consistently produce cleaner, longer-lasting DIY results.
Styling and Display Inspiration
Coordinating multiple fall crafts creates a cohesive seasonal atmosphere throughout the home. Repeat similar colors, textures, and natural materials across different rooms instead of introducing unrelated themes. Combining wood, woven baskets, glass jars, linen fabrics, and dried plants establishes visual continuity while maintaining warmth and simplicity. Group decorations in odd numbers to create balanced arrangements on shelves or tables. Mixing tall, medium, and low elements adds depth without overwhelming available space. Neutral backgrounds help handmade decorations become the focal point while supporting both rustic and modern design aesthetics. Thoughtful placement transforms individual projects into an organized seasonal decorating collection.
Budget and Time Planning
Most fall DIY projects can be completed affordably by combining collected natural materials with basic craft supplies already available at home. Creating a materials checklist before shopping helps prevent duplicate purchases and unnecessary spending. Completing several similar projects during one crafting session also reduces preparation time because tools and supplies remain organized. Larger decorations such as wreaths and welcome signs require additional drying time, while smaller crafts like decorative bowls or candle holders can often be finished in one afternoon. Scheduling projects over several weekends makes seasonal decorating manageable while allowing adequate time for careful craftsmanship and finishing details.
Creative Expansion and Advanced Inspiration
After mastering these beginner friendly projects, experiment with combining multiple techniques into larger seasonal displays. Handmade garlands can connect with wreaths, matching centerpieces can coordinate with decorative signs, and fabric pumpkins can complement harvest baskets to establish a unified decorating theme. Introduce layered textures by combining wood, glass, woven fibers, preserved botanicals, and painted accents while maintaining a limited color palette. Seasonal organization also becomes easier when decorations are designed to work together across several rooms. Continuing to explore new Pinterest ideas and adapting tutorials with original details encourages creativity while building practical crafting skills. Over time, each completed project contributes to a personalized collection of handmade autumn decoration that can be enjoyed year after year.