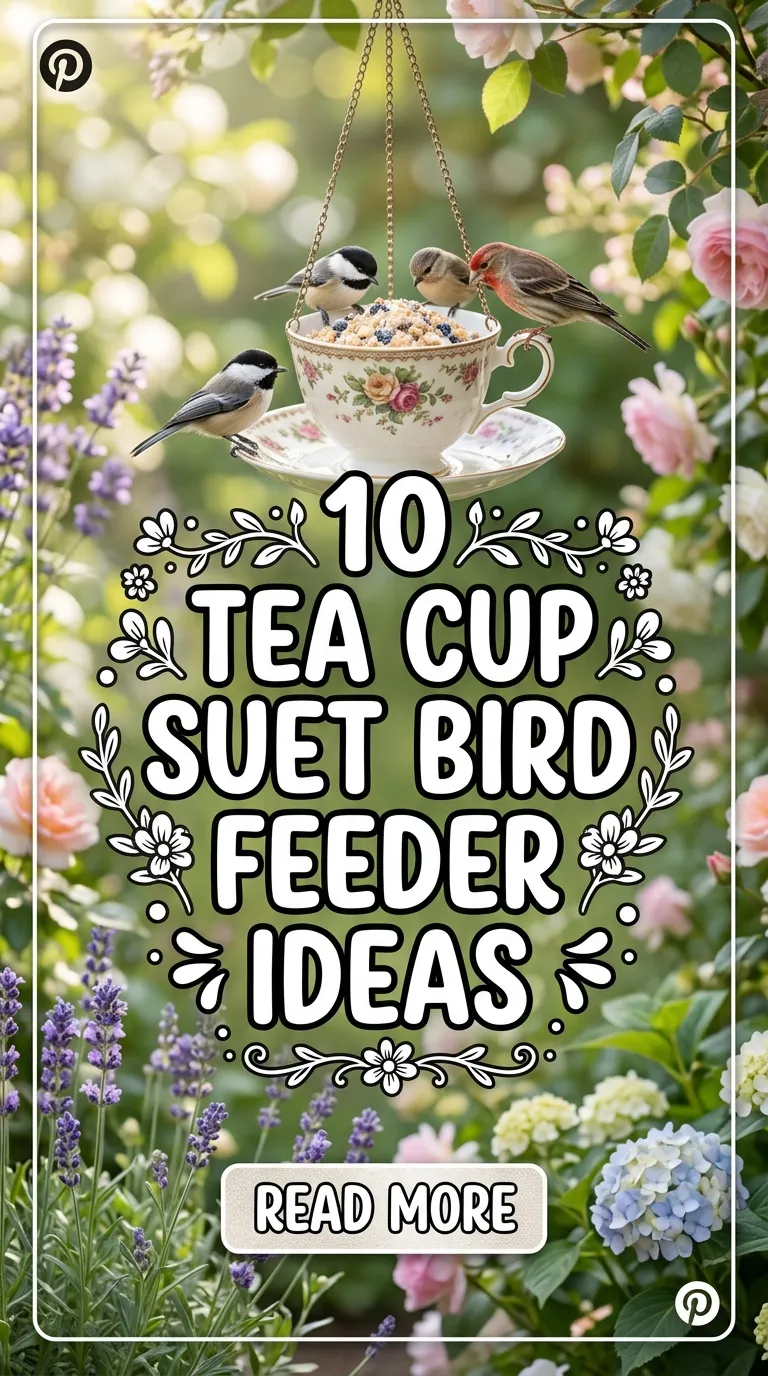
10 Tiered Cake Stand & Teacup Multi-Level Bird Feeders

Combining decorative ceramic tableware with outdoor garden functionality provides an engaging way to build unique outdoor features. Constructing a tiered cake stand and teacup multi-level bird feeder gives homeowners an actionable method to upcycle vintage china, polished porcelain, or classic stoneware into a multi-layered wildlife feeding hub. Readers will learn how to select proper materials, prepare delicate ceramic surfaces, drill structural mounting points safely, and assemble a stable vertical feeding station step by step. This project offers practical value by providing dedicated platform space for various birdseed types, water, and fruit, attracting a wider variety of backyard songbirds. Understanding the mechanics of central rod alignment, load distribution, and weatherproofing ensures the finished feeder withstands outdoor elements while serving as an attractive focal point in any garden landscape.
Why This Idea Is Trending or Useful
Multi-level ceramic garden features are increasingly popular across online visual platforms because they blend nostalgic cottage charm with modern eco-friendly outdoor living. Upcycling vintage cake stands and teacups offers high practical value by transforming unused household items into functional, durable backyard bird feeding stations. The vertical structure provides distinct design relevance, creating an eye-catching focal point that adds height, texture, and color to flower beds or patio containers. This DIY project has immense appeal for crafters who enjoy handmade garden accents that look custom-made without requiring high expenditure. The straightforward assembly technique makes this project accessible for beginners, requiring only basic household tools and simple hardware. By offering multiple tiers, gardeners can separate seed varieties, water, and suet, effectively catering to different bird species simultaneously within a compact footprint.
Materials and Preparation
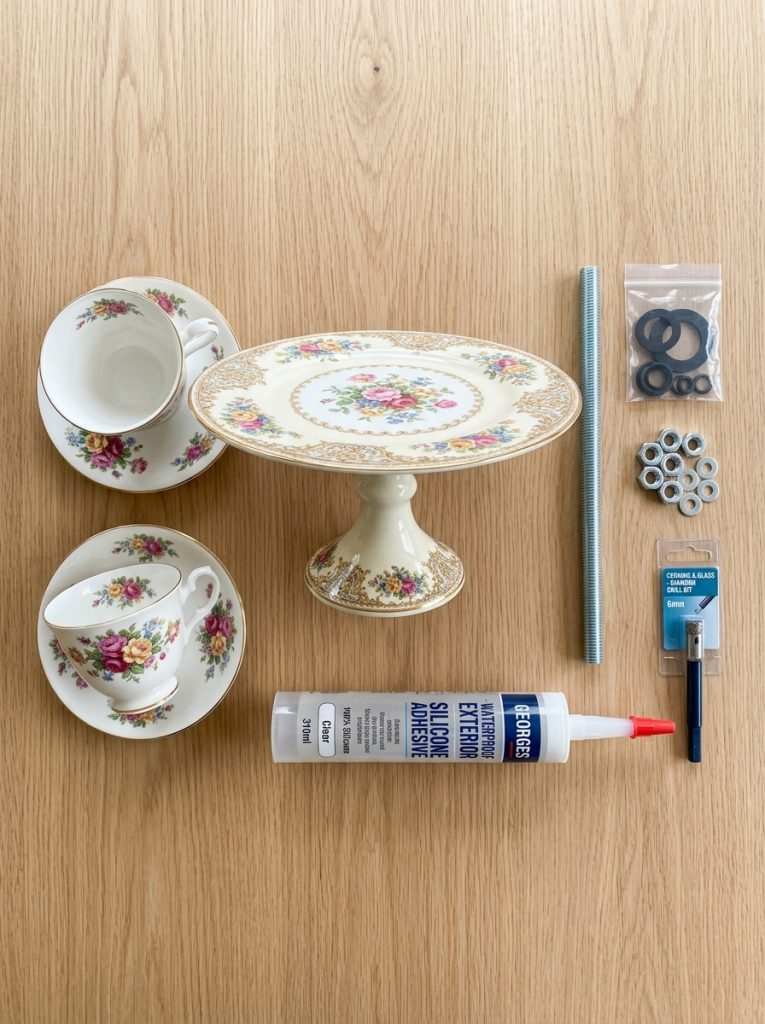
Proper preparation and material selection are essential steps before beginning the assembly of a multi-level ceramic bird feeder. Gather a two-tier or three-tier ceramic cake stand, two to three vintage teacups with matching saucers, a threaded steel rod, rubber washers, metal nuts, and a sturdy wooden mounting post. Specialized tools include a power drill equipped with a diamond core drill bit, a spray bottle filled with water for cooling, and heavy-duty exterior waterproof silicone adhesive. Clean all ceramic surfaces thoroughly with warm soapy water to eliminate surface grease and dust, ensuring maximum adhesion for sealants. Measure the central drill points precisely on each plate, saucer, and teacup base before starting to drill. Plan the structural layout on a flat workspace beforehand to test the height proportions, weight balance, and visual symmetry.
Main Ideas Section
Idea 1: The Cascading Trio Afternoon Tea Station
Execution Process
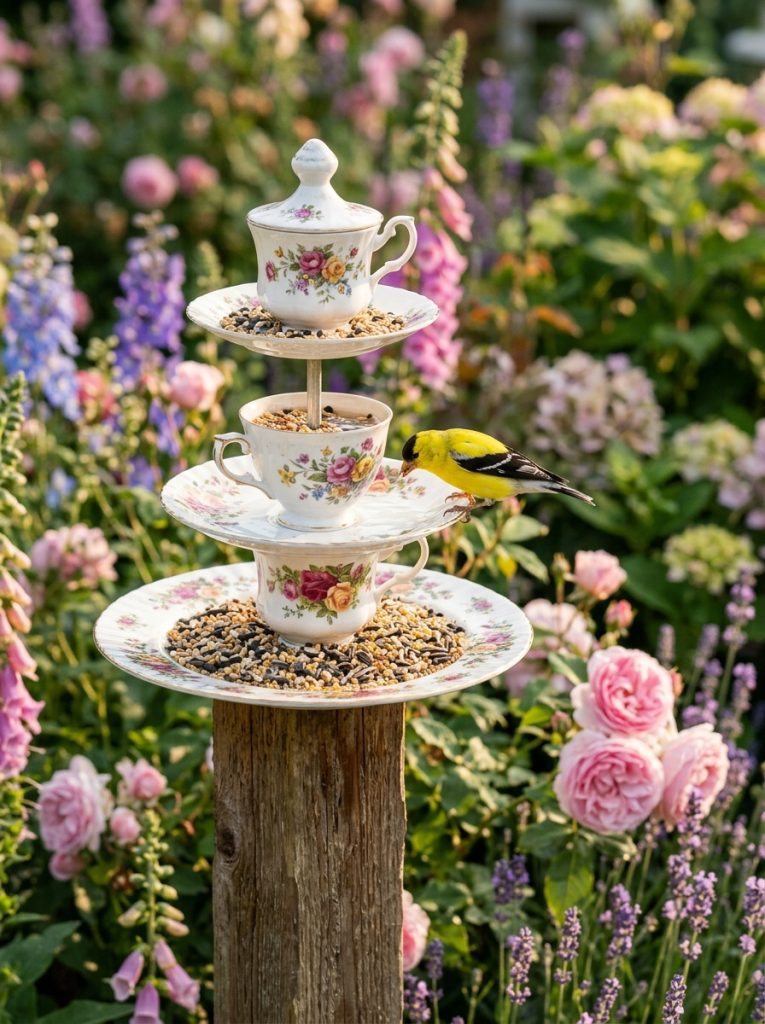
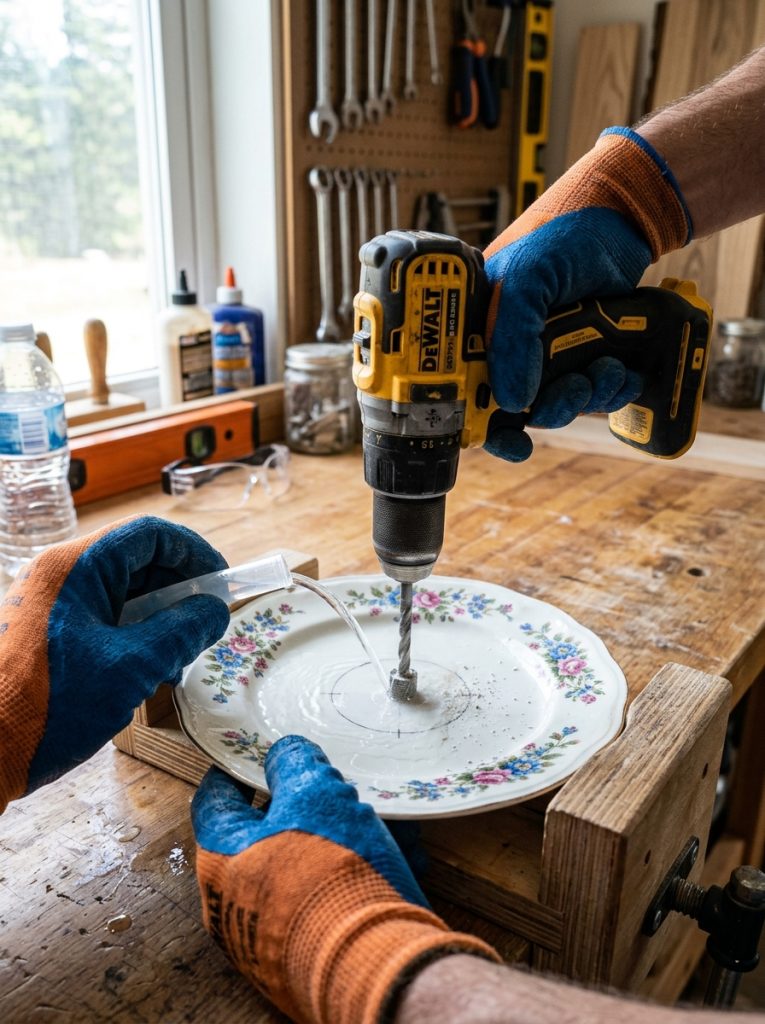
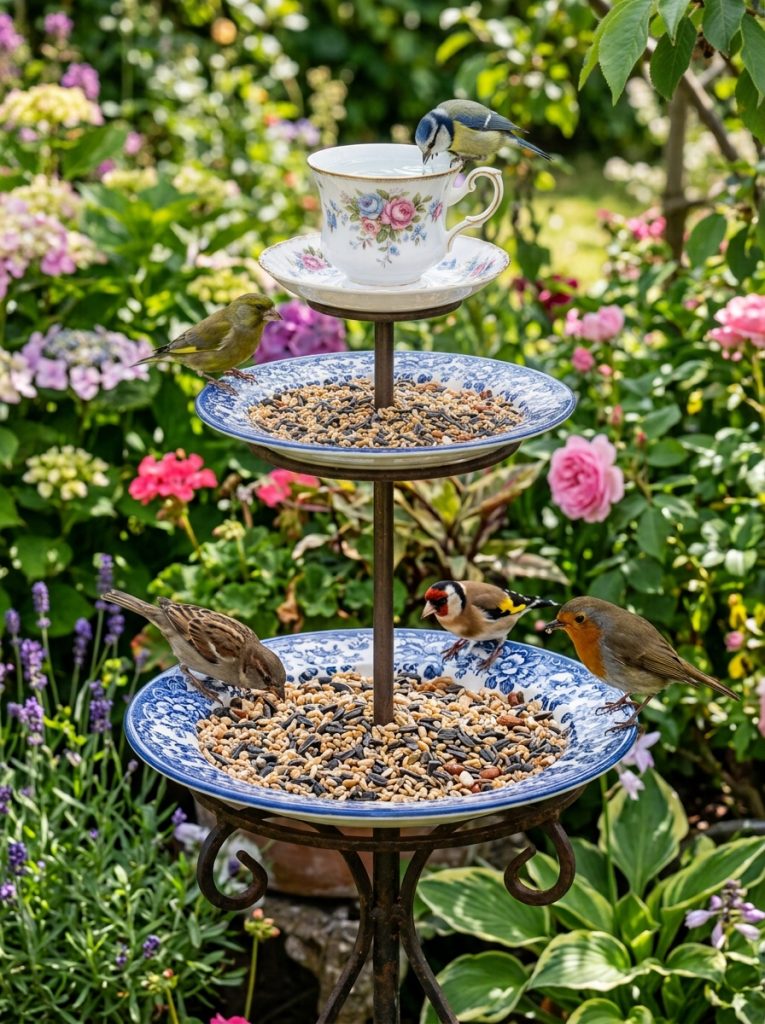
Build a multi-level feeding structure by combining a two-tier ceramic cake stand with a central top-mounted floral teacup. Begin by drilling a clean central hole through the top teacup, the upper smaller cake plate, and the larger base plate using a diamond drill bit kept wet with cool water. Insert a fully threaded steel rod upward through a heavy wooden mounting block, securing the bottom cake plate tightly with a rubber washer and hex nut. Thread the central ceramic spacer post onto the rod, followed by the upper cake plate, securing it in place with another washer assembly. Crown the entire structure with the teacup, driving the top cap nut down to press all layers together firmly. Fill the broad bottom plate with mixed wild birdseed, place mealworms on the middle tier, and pour fresh drinking water into the top teacup.
Idea 2: The Offset Cantilever Double Teacup Tower
Step-by-Step Guide
Construct an asymmetrical feeding station that maximizes landing perches for small songbirds using two teacups secured on opposite sides of a tiered cake stand. Position a solid three-tier ceramic stand as your primary structural frame, anchoring the lower threaded post to a broad wooden base block. Before assembling the middle tier, glue two vintage teacups onto their matching saucers using waterproof exterior epoxy, tilting each cup slightly outward at a fifteen-degree angle. Mount these cup-and-saucer sets onto opposing sides of the middle cake plate using clear construction adhesive, balancing the overall weight distribution. The top plate remains open for fruit slices or suet nuggets, while the tilted side teacups keep seeds dry during light rain. The lower base platter catches falling hulls, keeping surrounding garden beds tidy.
Idea 3: The Crowned Glassware Umbrella Feeder
Assembly Technique
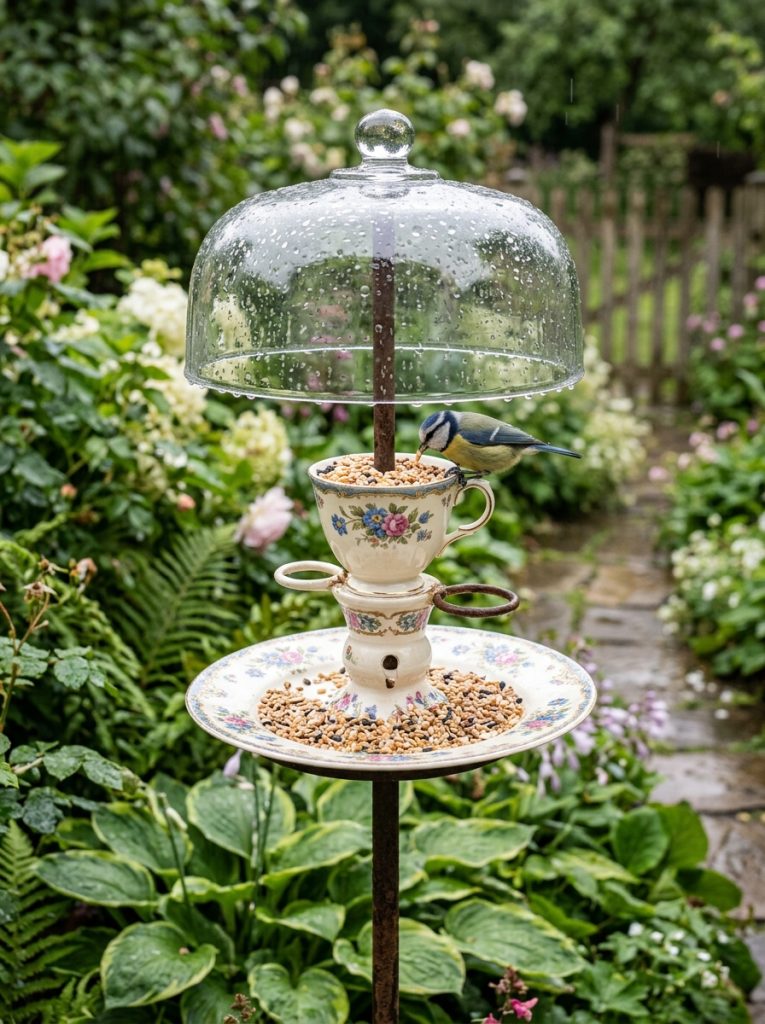
Design a weather-protected feeding station by mounting an inverted clear glass cake stand dome directly above a ceramic teacup stack. Slide a central threaded rod through a heavy wooden post, anchoring a large ceramic base plate flat against the wood surface with stainless steel washers. Stack a medium ceramic platter directly above it using a metal spacer, then mount an upright floral teacup in the center of the middle platter. Invert a small glass cake dome or deep rimless platter over the top of the threaded rod to act as a protective canopy shield. Secure the glass canopy with a rubber-lined cap nut, ensuring it overhangs the teacup beneath it. This setup keeps birdseed inside the teacup and middle platter completely dry during rainy weather while allowing clear visibility for birdwatching.
Idea 4: The Four-Corner Teacup Rim Perch
Setup Method
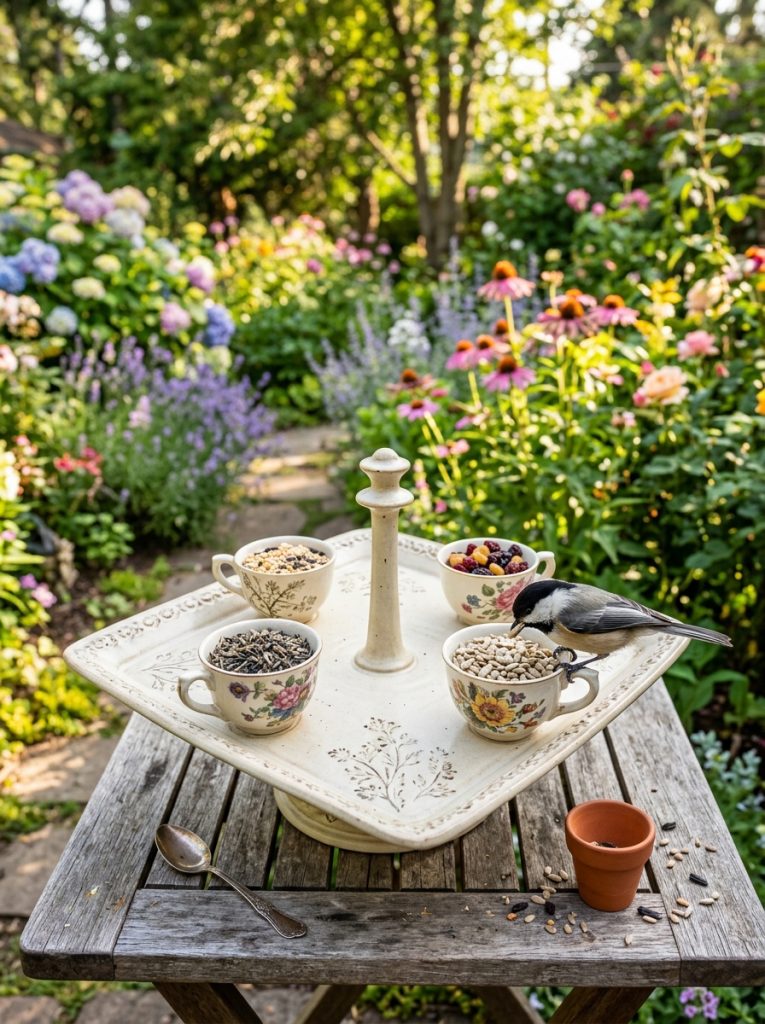
Transform a wide, square three-tier cake stand into a high-capacity bird sanctuary by mounting four small demitasse teacups around the perimeter of the middle tray. Drill four evenly spaced holes along the outer edge of the middle ceramic platter, as well as one primary hole through the absolute center. Assemble the central vertical column using a threaded rod, rubber gaskets, and decorative brass spacers between the bottom, middle, and top platters. Fasten the four demitasse teacups to the drilled perimeter holes on the middle tray using short brass machine screws fitted with rubber seals. Fill each perimeter teacup with a different specialized food source, such as thistles, sunflower hearts, crushed peanuts, and dried fruit, transforming the cake stand into a versatile tasting buffet for diverse bird species.
Idea 5: The Spiraled Saucer Crescent Feeder
Execution Process
Construct an artistic, spiraling feeder by staggering three ceramic cake platters and three teacups at varying rotational angles along a central axis. Thread a long metal rod into a pre-drilled square timber post anchored firmly in garden soil. Install the base cake plate horizontally, then stack a ceramic spacer, an offset saucer, and an upright teacup shifted thirty degrees to the right. Repeat this process for the second and third tiers, shifting each subsequent layer thirty degrees further to create a sweeping spiral effect from bottom to top. Tighten the top hardware to compress the rubber washers between each porcelain layer, locking the angled orientation securely in place. The staggered platforms provide unobstructed flight paths for birds alighting on any tier while creating a striking geometric garden accent.
Idea 6: The Pedestal Bowl and Teacup Fountain Integration
Step-by-Step Guide
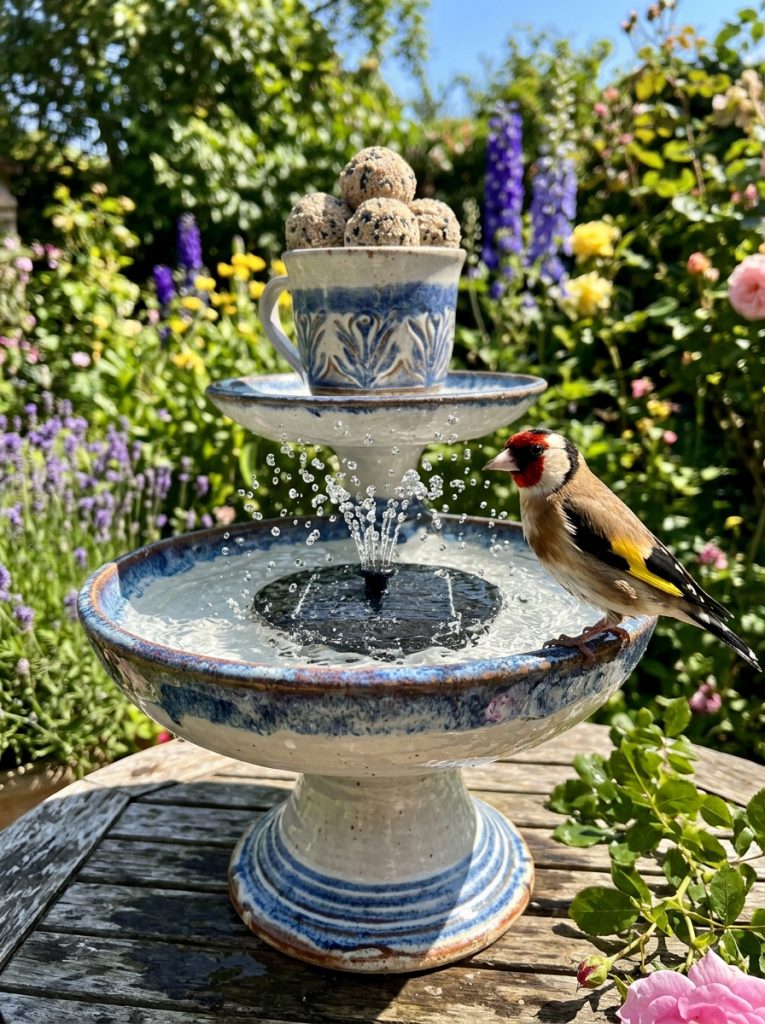
Integrate a small solar-powered water fountain into a multi-tiered cake stand feeder to create a combined bathing and feeding oasis. Secure a deep ceramic pedestal cake stand or wide rimmed platter as the foundation base onto a pressure-treated wooden stake. Mount a smaller inverted bowl in the center to raise the second tier plate higher, creating a deep central basin around the perimeter. Glue a floral teacup securely onto the center of the top tier plate using marine-grade adhesive, and place a compact solar fountain pump inside the middle basin. Fill the base platter with birdseed, the middle basin with circulating fresh water, and the top teacup with suet balls. The sound of moving water attracts birds quickly, while the distinct levels keep seeds separate from splashing water.
Idea 7: The Inverted Umbrella Hanging Canopy
Assembly Technique
Assemble a hanging multi-level feeder using a inverted ceramic cake stand plate as an upper weather baffle above stacked teacups. Pass an eye-bolt down through an inverted, wide ceramic plate that acts as an umbrella hood to deflect rain and block squirrels. Beneath the hood, thread a central rod through two upright teacups, each glued flat to its matching saucer, separated by short brass tubing spacers. Secure the bottom nut against a thick rubber washer below the lowest saucer to lock the entire assembly together tightly. Attach a sturdy hanging chain to the top eye-bolt, suspending the completed unit from a strong tree branch or shepherd hook. The wide top platter protects the lower teacup seed trays from rainfall while allowing songbirds easy, sheltered perching access.
Idea 8: The Tea-Party Centerpiece Dual-Station
Setup Method
Fabricate a wide, symmetrical dual-feeding station by pairing two matching two-tier cake stands side-by-side onto a single horizontal timber beam. Mount a sturdy wooden crossbar across the top of a vertical garden post, forming a stable T-frame structure. Drill central mounting holes through both cake stands and attach them to opposite ends of the horizontal beam using lag screws and rubber washers. In the center of each top plate, glue an upright vintage porcelain teacup using waterproof construction epoxy. Use one complete cake stand assembly exclusively for dry seed mixes and mealworms, while utilizing the second assembly for fresh drinking water and jam for orioles. This wide double setup accommodates larger flocks simultaneously while maintaining balanced weight across the timber crossbar.
Idea 9: The Minimalist Stoneware Tiered Tray
Execution Process
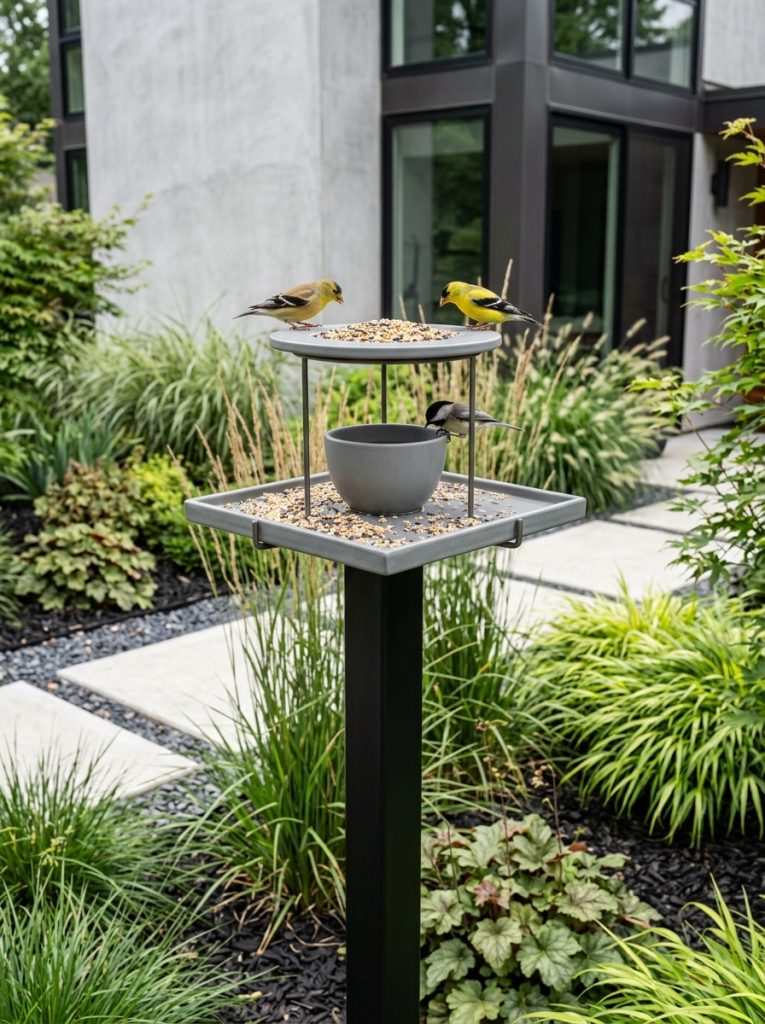
Create a contemporary, minimalist style bird feeder using modern matte stoneware cake plates and monochrome ceramic teacups. Select a plain two-tiered neutral stoneware platter set and drill clean central holes through both plates and two matching handle-less tea cups. Slide a dark coated metal rod through the assembly, placing one upside-down teacup between the lower platter and upper platter to act as a sleek structural pedestal. Place the second teacup upright on the top platter, locking the entire unit together using low-profile black lock nuts and rubber washers. Mount the minimalist assembly onto a square black wooden post in a modern garden setting. The clean architectural lines and matte finish provide a modern aesthetic while offering two broad, easy-to-clean feeding surfaces for local wildlife.
Idea 10: The Rustic Timber-Cored Chandelier Stack
Step-by-Step Guide
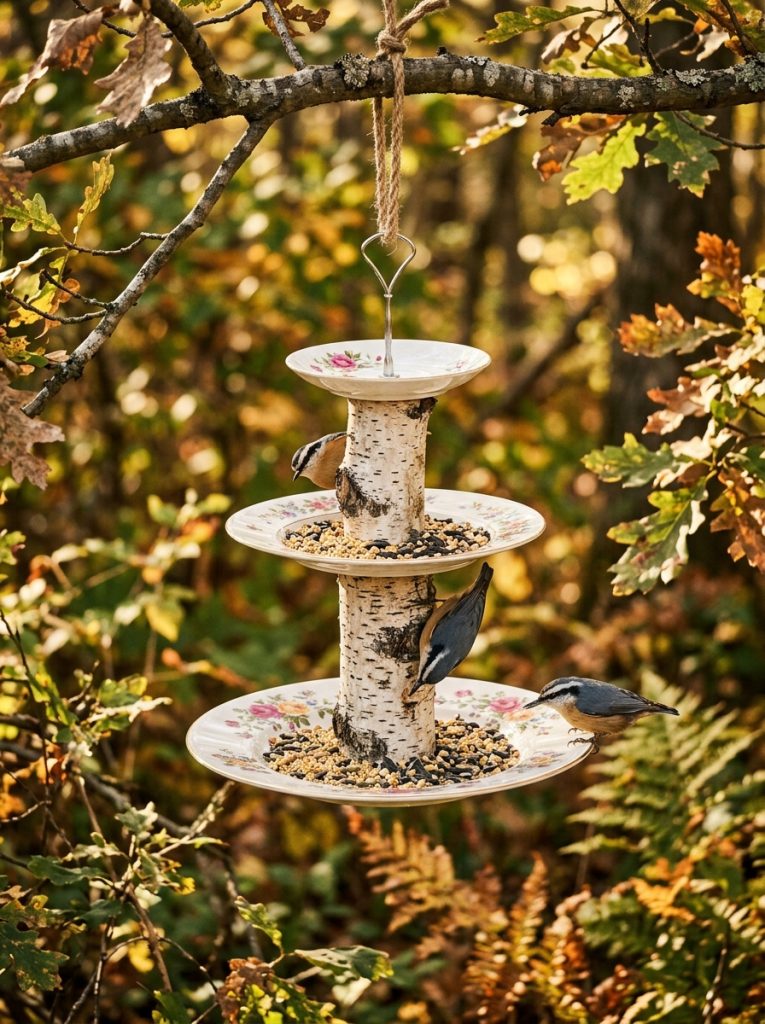
Combine natural rustic wood textures with delicate porcelain by inserting natural branch segments between ceramic cake platters and teacups. Drill central vertical pilot holes through three smooth, bark-on birch or cedar branch logs cut to four-inch lengths. Thread a steel rod through a large bottom cake plate, a birch log spacer, a middle saucer, another log spacer, and a top floral teacup. Tighten the hardware at both ends so the wood spacers press firmly against the ceramic plates, creating strong friction joints. Mount the completed chandelier-style stack onto a matching natural timber post set deep into a garden border. The natural bark spacers provide excellent gripping bark for clinging bird species like nuthatches and woodpeckers as they access seeds from the ceramic trays.
Common Beginner Mistakes and How to Avoid Them
Constructing ceramic garden features requires careful technique to avoid structural failure or broken materials. A primary mistake beginners make is using high-speed steel drill bits instead of diamond-tipped masonry or glass bits when drilling china. Standard bits generate excessive heat and stress, causing delicate plates and teacups to shatter instantly. Always drill at slow speeds with light pressure, keeping the bit submerged in a pool of cold water to absorb heat. Another common error is over-tightening the central hardware without using flexible rubber washers. Metal nuts pressed directly against rigid porcelain create pressure points that crack ceramic plates over time, especially during freeze-thaw weather cycles. Always place neoprene or rubber gaskets between metal hardware and ceramic surfaces. Finally, avoid using water-soluble glues or indoor craft adhesives, which break down rapidly when exposed to humidity and rain; use exterior marine epoxy or 100% silicone sealants instead.
Practical Tips for Better Results
Achieving long-lasting durability and optimal bird attraction involves several practical adjustments during preparation and assembly. Prior to applying adhesives or sealants, wipe all ceramic contact zones thoroughly with isopropyl alcohol to remove hidden grease and manufacturing residues. When assembling threaded rod structures, apply a thread-locking compound to the final top and bottom nuts to prevent wind vibrations from loosening the frame over time. Install the finished feeder near natural cover, such as shrubs or small trees, giving birds a safe retreat from predators while keeping the station clearly visible for viewing. Place the wooden post at least twelve to eighteen inches deep into well-compacted soil, or secure it in concrete if installing in high-wind zones. Clean the ceramic platters and teacups regularly with warm water and mild dish soap to remove seed hulls and prevent fungal growth.
Styling, Presentation, or Organization Ideas
Integrating a multi-tiered ceramic bird feeder into garden decor enhances the visual appeal of outdoor living spaces. Position the feeder as a central accent within a perennial flower bed, choosing ceramic colors that complement surrounding blooms like purple coneflowers, white hydrangeas, or yellow black-eyed Susans. Surround the base of the wooden mounting post with low-growing ground covers or decorative river rocks to blend the structural support naturally into the landscape. Color-coordinate your vintage china choices to match your garden style, utilizing pastel florals for classic cottage designs or bold graphic ceramics for eclectic spaces. Grouping two feeders of varying heights creates dynamic vertical interest along garden pathways or near patio seating areas. Adding natural wood or stone elements near the base softens the transition between structural ceramics and the natural outdoor environment.
Budget or Time Planning
Executing a DIY tiered cake stand feeder project is highly cost-effective when planned efficiently. Sourcing vintage cake stands, plates, and teacups from thrift stores, garage sales, or flea markets keeps material expenses minimal compared to buying commercial garden statuary. Basic hardware components like threaded steel rods, nuts, rubber washers, and exterior sealants can be acquired affordably at local hardware stores. The entire construction process typically requires two to three hours of active crafting time, excluding adhesive drying periods. Allocate time across two separate working sessions: dedicate the first session to measuring, surface cleaning, and drilling ceramic components, then reserve the second session for final hardware assembly and outdoor installation. Allowing adhesives to cure fully for twenty-four to forty-eight hours ensures maximum joint strength before exposing the feeder to outdoor weather.
Creative Expansion and Advanced Inspiration
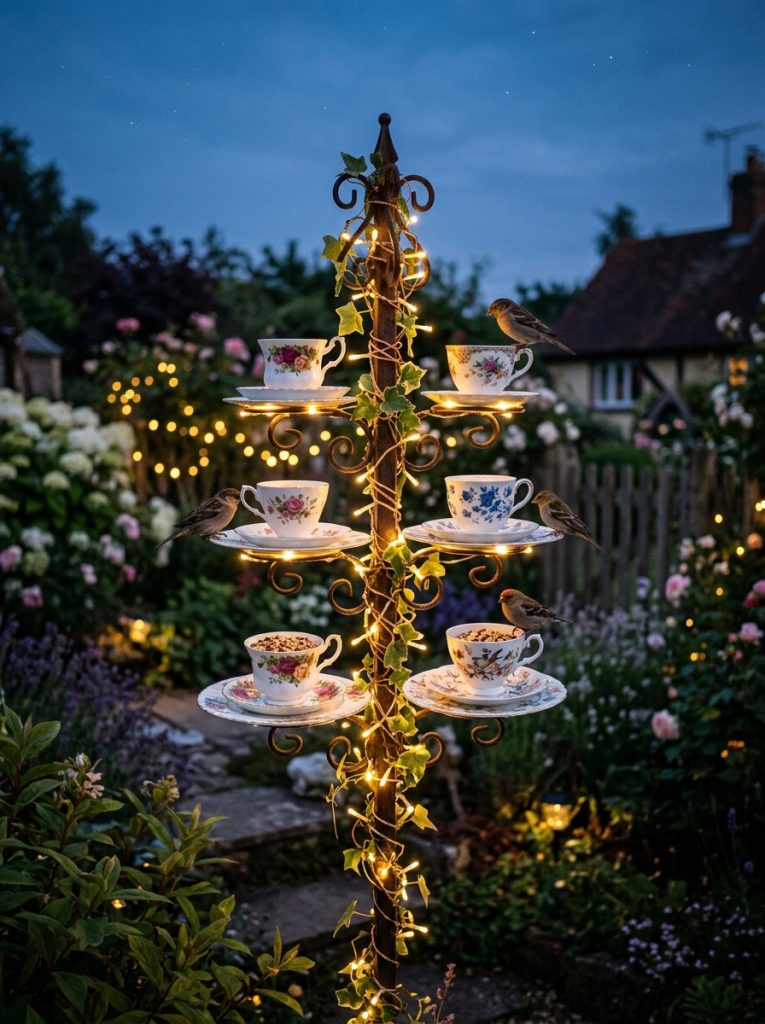
After completing a basic multi-level ceramic feeder, advanced makers can explore creative modifications to expand functionality and visual interest. Wrap delicate solar-powered LED wire lights around the central rod or beneath the cake platters to softly illuminate the porcelain patterns during evening hours. Mount small brass hanging hooks beneath the lower ceramic platter to suspend suet cages, hummingbird feeders, or decorative glass drops for extra versatility. Combine different ceramic styles, such as mixing mid-century modern platters with Victorian floral teacups, to create eclectic art pieces. Advanced woodworkers can craft custom-carved timber posts featuring integrated climbing vines or geometric patterns to elevate the support structure itself. Transforming additional household ceramics into matching water bowls or seed scoops creates a cohesive, handcrafted garden decor theme throughout your outdoor living area.