10 DIY Necktie Project Ideas
Old neckties can be transformed into a wide variety of creative and practical DIY projects that add personality to home decor, accessories, and handmade gifts. Instead of leaving unused ties in storage or discarding them, many crafters repurpose their unique fabrics, patterns, and colors into decorative items with everyday value. Pinterest ideas frequently showcase necktie crafts because they combine sustainability, creativity, and beginner-friendly techniques using simple materials and tools. Whether the ties are made from silk, cotton, polyester, or woven blends, each offers interesting textures that work well for sewing, gluing, weaving, and decorative assembly. This guide presents ten original DIY necktie project ideas that are realistic, easy to follow, and suitable for different skill levels. Each project emphasizes thoughtful planning, careful construction, and attractive presentation while helping readers create handmade pieces that fit modern design styles and creative home organization.
Why This Idea Is Trending or Useful
DIY necktie projects continue to appear among trending Pinterest ideas because they give forgotten clothing a completely new purpose. Vintage neckties often feature colorful prints, elegant textures, and durable fabrics that are difficult to find in ordinary craft materials. Repurposing them supports sustainable crafting while reducing waste and encouraging creative thinking. Many of these projects require only basic sewing supplies or simple adhesives, making them accessible even for beginners with limited crafting experience. Their versatility allows finished creations to become practical home decor, storage solutions, fashion accessories, seasonal decorations, or personalized gifts. Since every tie has its own pattern and texture, each completed project becomes unique. This combination of affordability, creativity, and functionality explains why necktie crafts remain popular across DIY tutorials and modern handmade inspiration boards.
Materials and Preparation
Successful necktie projects begin with proper preparation and organized materials. Gather several clean neckties, fabric scissors, sewing needles, matching thread, measuring tape, straight pins, fabric glue for no-sew options, a ruler, chalk or washable fabric marker, ironing board, and a protective work surface. Wash or dry-clean ties when appropriate before beginning, then iron them carefully to remove wrinkles and improve accuracy during cutting. Examine each tie for stains, worn areas, or loose stitching and plan designs around sections in good condition. Sketch project layouts before making permanent cuts to minimize waste and maximize usable fabric. Organizing materials before starting each creative project keeps the process efficient and beginner friendly. Careful preparation ensures neat construction while helping every handmade project achieve professional-looking results suitable for Pinterest inspiration.
Idea 1: Necktie Patchwork Pillow Cover
How to Create
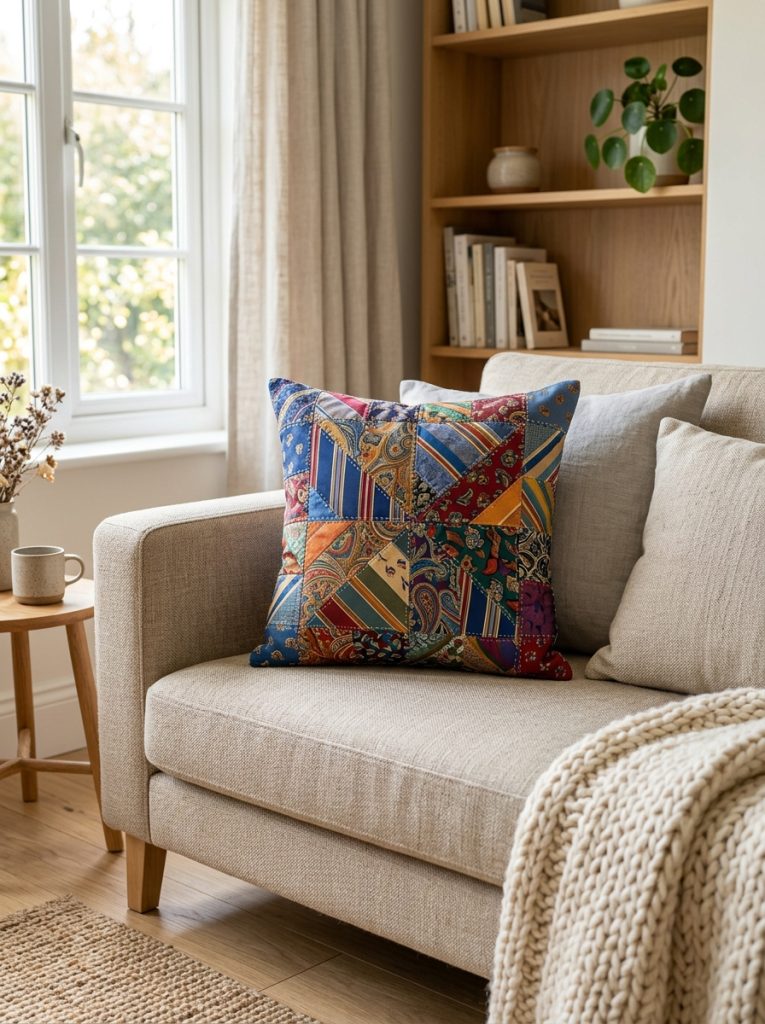
Transform a collection of colorful neckties into a decorative patchwork pillow cover that adds texture and personality to living spaces. Begin by removing the seams from each tie to create flat fabric panels. Iron every piece until smooth, then trim sections into matching strips or geometric shapes according to your preferred layout. Arrange the pieces on a fabric backing before sewing them together to maintain balanced color placement. After completing the patchwork panel, attach a plain fabric backing using simple straight stitches and insert a pillow form through a concealed opening. Reinforce all seams to improve durability during everyday use. This beginner friendly DIY project allows different tie patterns to create an attractive mosaic effect suitable for modern design, vintage decor, or eclectic interiors. The finished pillow becomes a practical handmade decoration inspired by creative Pinterest ideas while giving old neckties meaningful new purpose.
Idea 2: Woven Necktie Table Runner
Step-by-Step Guide
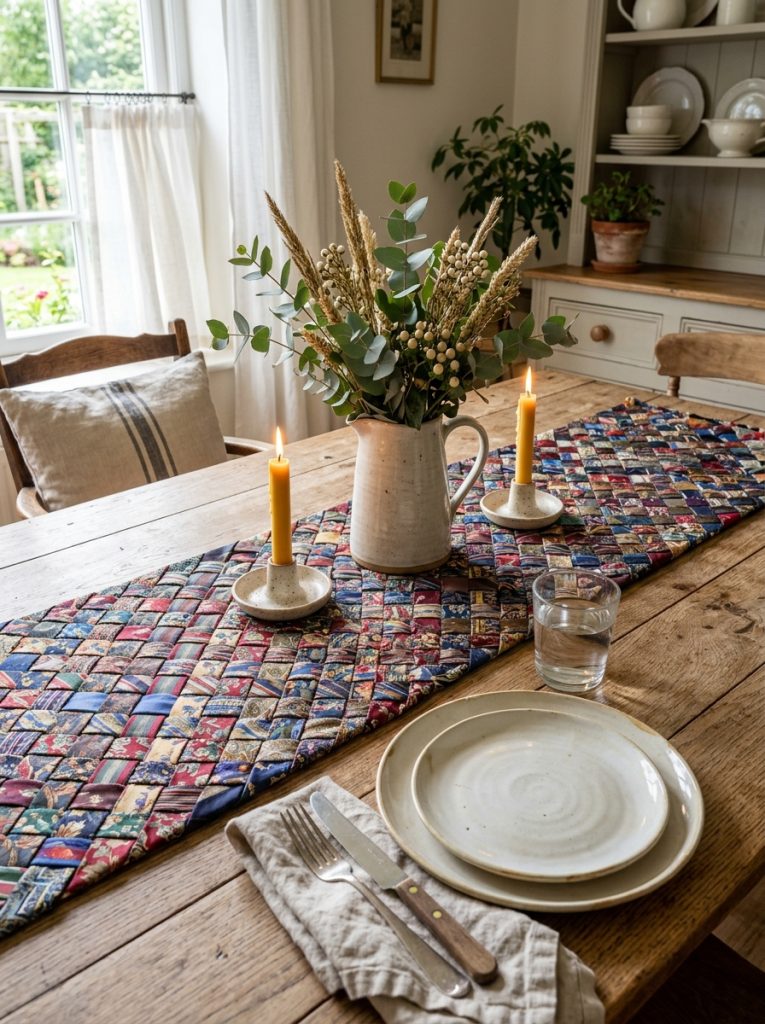
A woven table runner combines elegant necktie fabrics into a functional centerpiece for dining tables or sideboards. Lay several flattened neckties side by side and weave additional ties horizontally through them to create a balanced basket-weave pattern. Secure each intersection using careful stitching or discreet fabric adhesive to prevent shifting during use. Trim excess fabric evenly around the edges before adding a fabric border for a polished finish. Matching thread helps maintain a clean appearance without distracting from the colorful woven design. This project encourages thoughtful planning because balanced color placement significantly improves the overall presentation. Beginners can practice weaving with fewer ties before expanding the pattern into a longer runner. The completed project complements farmhouse, rustic, or modern home decor while demonstrating how recycled materials can become elegant handmade table decoration.
Idea 3: Decorative Necktie Wreath
How to Make
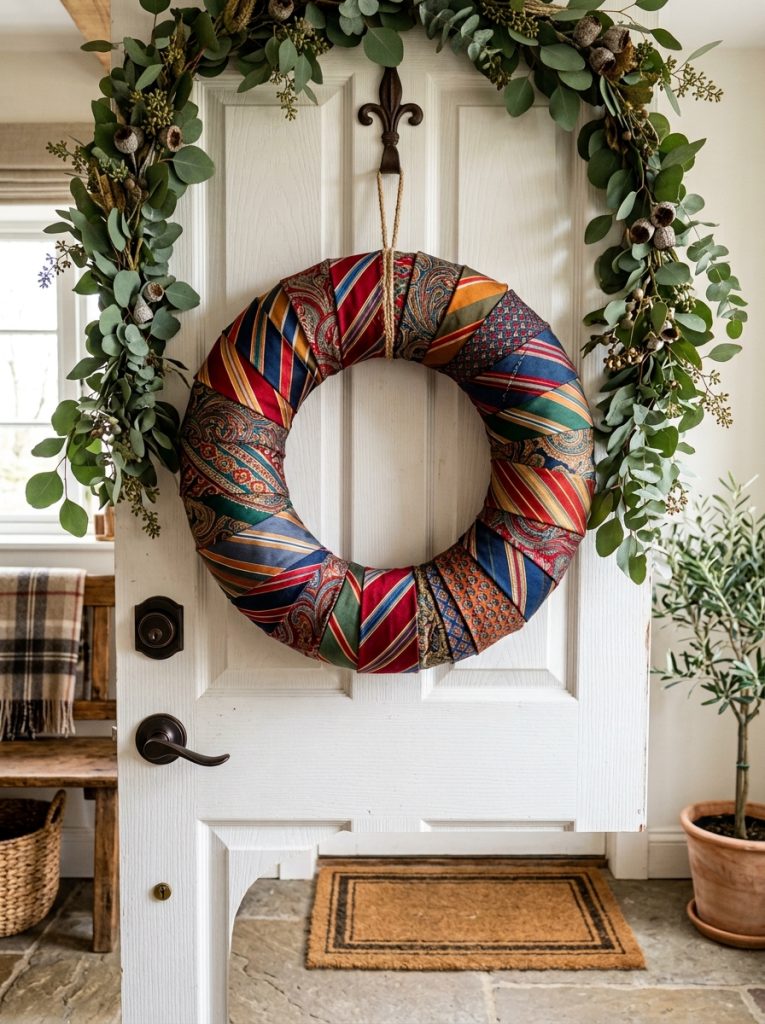
Create a welcoming wreath by wrapping neckties around a circular foam or wire wreath form. Start by arranging the ties according to color, texture, or pattern before attaching them to the frame. Wrap each tie tightly around the base while overlapping sections slightly to conceal the foundation completely. Secure loose ends neatly at the back using stitching or hidden fabric adhesive. Decorative bows made from additional tie fabric can be added as simple focal points without overwhelming the overall design. This easy project requires very little cutting, making it suitable for beginners who want to preserve the original tie patterns. The finished wreath works as year-round home decor or can be customized seasonally by adjusting color combinations. It reflects popular Pinterest inspiration while celebrating creative handmade decoration using repurposed textiles.
Idea 4: Fabric-Covered Storage Basket
Setup Method
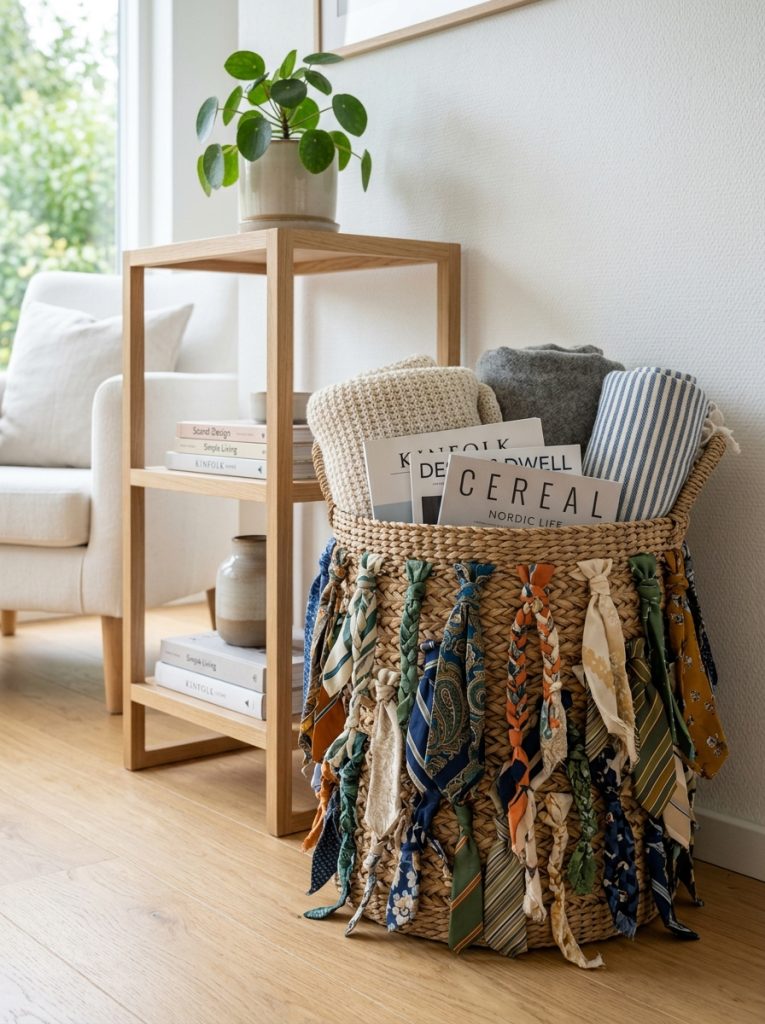
Old neckties can provide colorful fabric accents for plain storage baskets, creating decorative organization solutions for craft rooms, offices, or bedrooms. Flatten the neckties and cut them into manageable strips before wrapping them around the outer surface of a woven basket. Alternate patterns and colors evenly to create visual balance while covering the entire exterior. Secure the fabric using strong fabric glue or neat hand stitching, ensuring every edge lies flat. Finish the top edge with folded tie fabric for a cleaner appearance and increased durability. This project demonstrates how decorative textiles can upgrade ordinary storage while remaining practical for everyday use. The completed basket is ideal for organizing magazines, craft materials, blankets, or accessories while adding handmade character to minimalist or traditional home decor inspired by Pinterest ideas.
Idea 5: Necktie Plant Pot Wrap
Execution Process
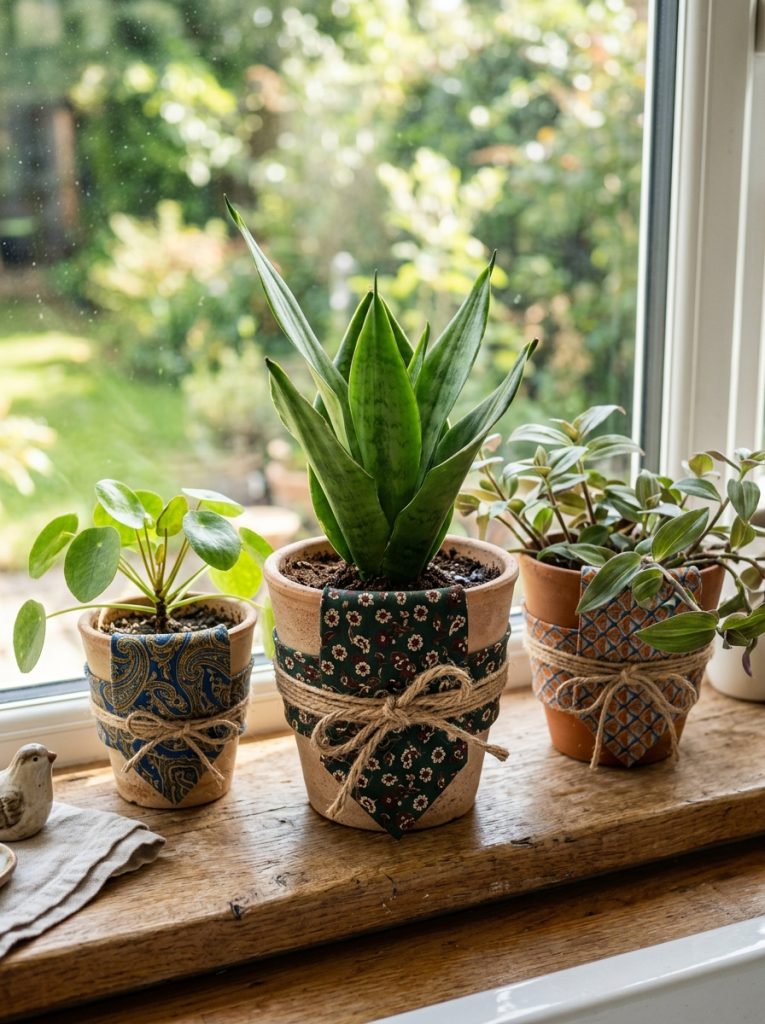
Refresh simple flower pots by creating removable decorative wraps from patterned neckties. Measure the circumference of each pot before selecting ties that provide enough fabric to cover the surface comfortably. Wrap the tie around the container, folding excess fabric neatly underneath to create a smooth finish. Secure the wrap with decorative twine, buttons, or fabric bands rather than permanent glue, allowing seasonal changes when desired. Coordinating several wrapped pots using complementary colors creates an attractive display for indoor plants or herbs. This project requires minimal materials and very little crafting experience, making it ideal for beginners seeking quick DIY inspiration. The finished planters add warmth and texture to shelves, windowsills, and tabletops while transforming overlooked neckties into practical handmade decoration.
Idea 6: Handmade Necktie Coasters
How to Create
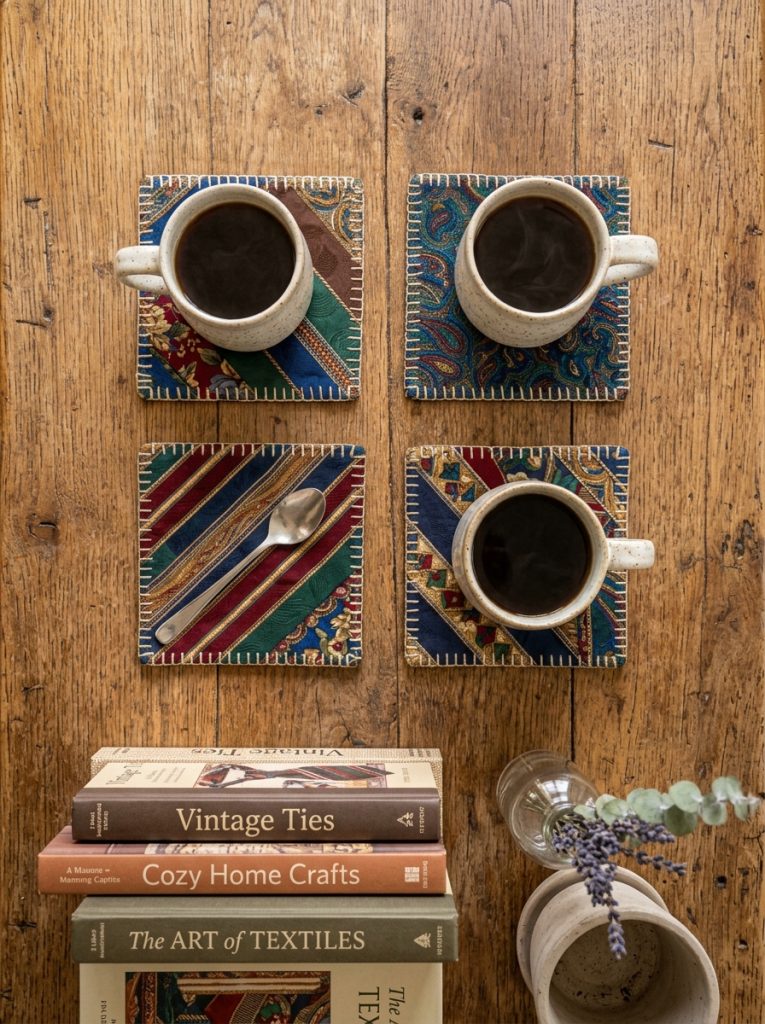
Fabric coasters made from neckties provide both function and decorative appeal for coffee tables and dining areas. Begin by cutting matching squares or circles from flattened neckties while avoiding damaged fabric sections. Layer each piece over felt or cotton batting to create gentle cushioning and absorb moisture effectively. Stitch around the edges using simple straight or decorative stitches to secure the layers together. Trim the edges evenly for a clean finish and press each coaster lightly before use. Creating a coordinated set using complementary tie patterns enhances presentation and organization during entertaining. These handmade coasters protect furniture surfaces while showcasing recycled materials in an elegant and beginner friendly creative project inspired by Pinterest tutorials and sustainable crafting.
Idea 7: Necktie Wall Art Canvas
Step-by-Step Guide
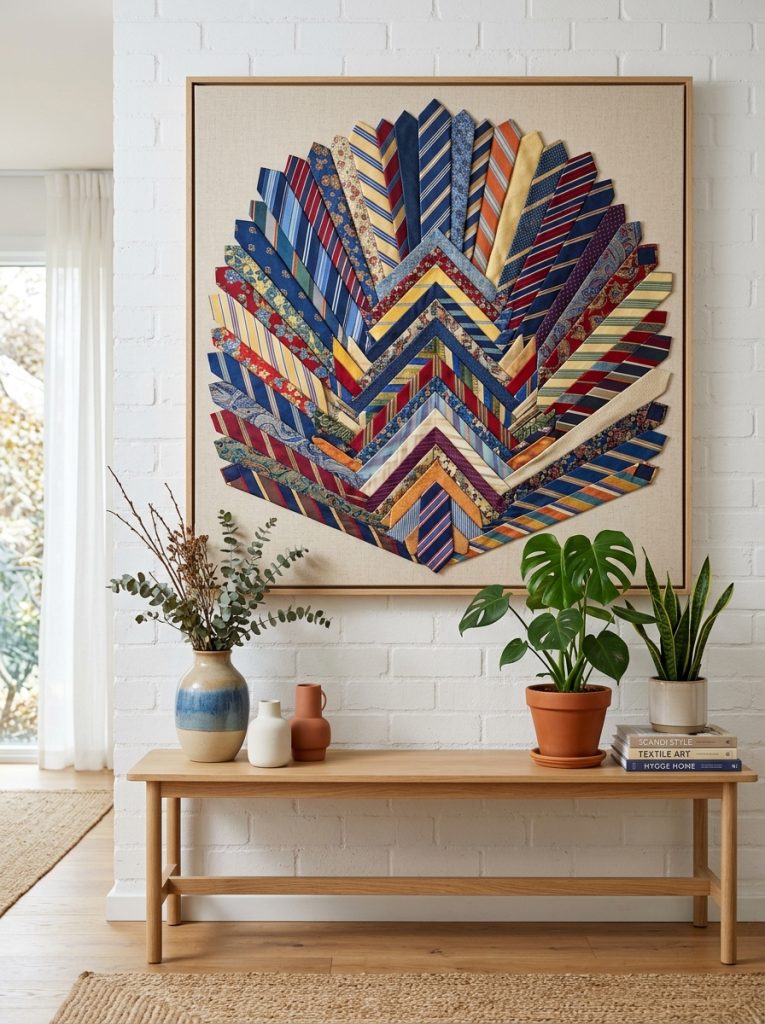
Design a striking piece of wall art by arranging neckties across a stretched canvas in geometric or fan-shaped patterns. Begin by testing several layouts before making permanent attachments, ensuring balanced spacing and color distribution throughout the design. Secure each tie neatly with fabric adhesive or stitching around the back of the canvas to maintain a clean front surface. Layer shorter tie sections where additional texture is desired without overcrowding the composition. Neutral canvas backgrounds allow patterned fabrics to stand out naturally while maintaining modern design principles. Display the finished artwork in home offices, entryways, or creative workspaces as a unique handmade focal point. This project encourages experimentation with organization, symmetry, and creative presentation while remaining practical for beginners interested in decorative DIY projects.
Idea 8: Necktie Key Holder Organizer
How to Make
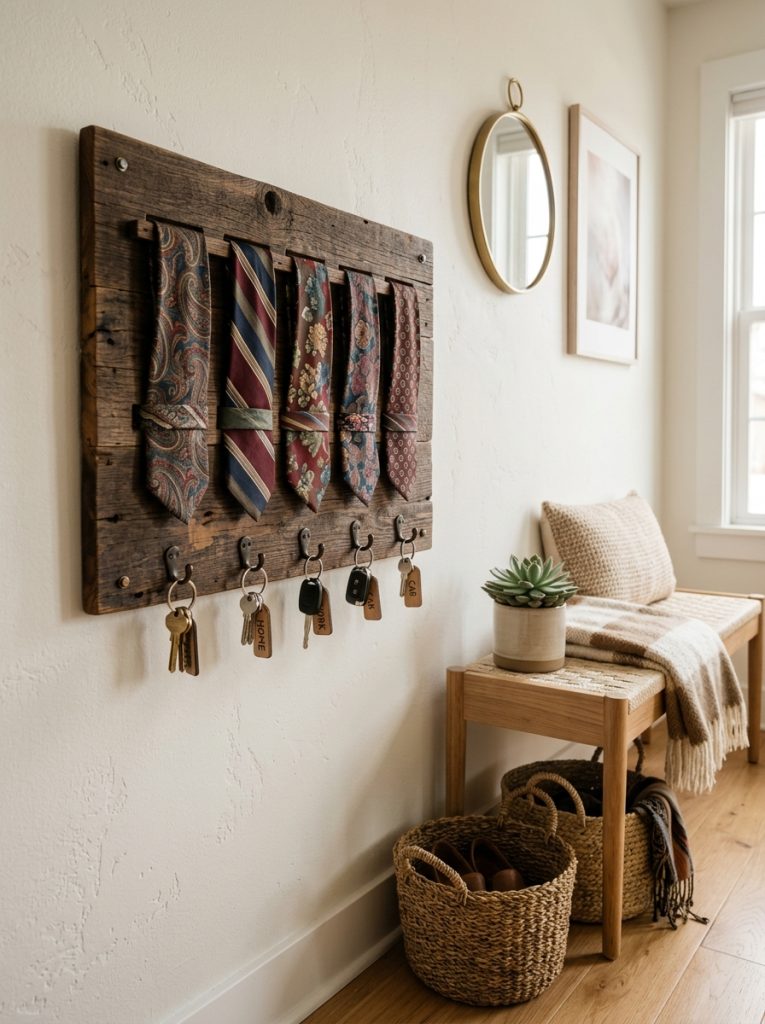
A wall-mounted key organizer made from recycled neckties offers a functional solution for entryway organization. Attach flattened tie sections vertically onto a wooden board or fabric-covered backing using secure stitching or adhesive. Fold portions of each tie into loops capable of holding lightweight key rings or small accessories. Position the loops evenly to maintain balance and accessibility. Decorative buttons or wooden labels can identify individual holders without distracting from the fabric patterns. Mount the completed organizer near the front door where keys remain easy to locate. This easy project combines organization with attractive decoration while making practical use of colorful neckties that might otherwise remain unused. It also complements modern home decor through thoughtful planning and creative handmade design.
Idea 9: Necktie Gift Bow Collection
Setup Method
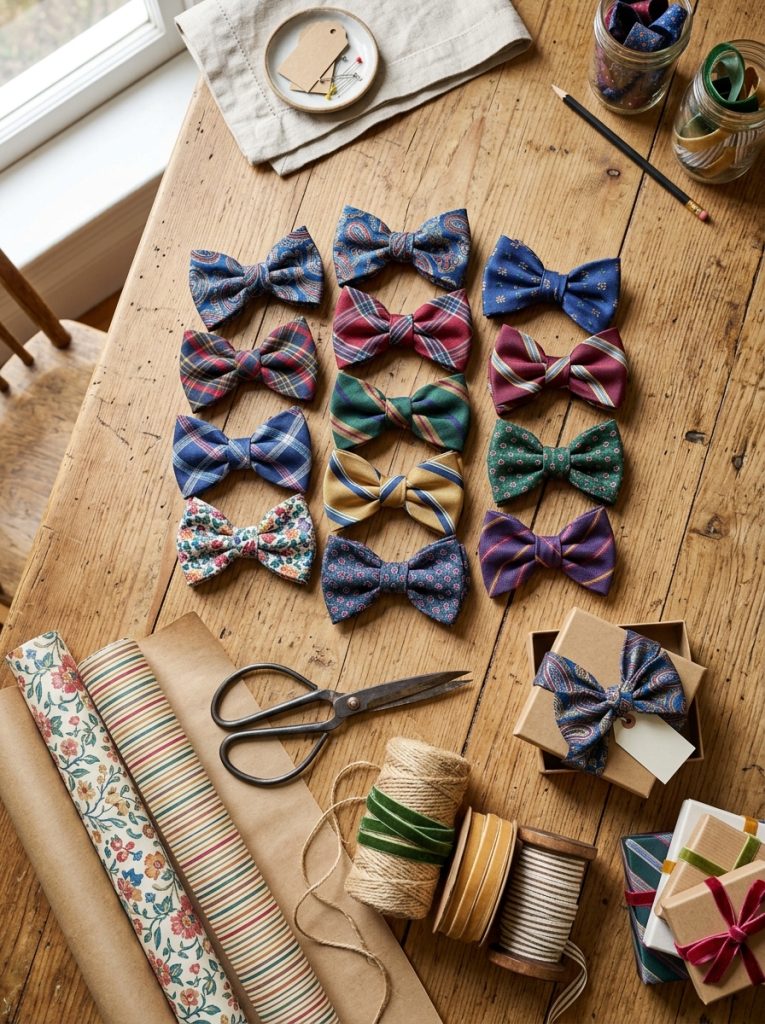
Transform old neckties into reusable decorative bows for gift wrapping and seasonal decoration. Cut tie fabric into long strips and fold each strip into layered loops that resemble traditional ribbon bows. Secure the center tightly using matching thread before trimming the ends into angled points for a polished finish. Different tie fabrics create distinctive textures that make every bow unique. Store completed bows inside divided containers for future celebrations, allowing repeated use throughout the year. These fabric bows reduce disposable wrapping waste while providing elegant handmade decoration suitable for birthdays, anniversaries, and holidays. The project requires simple folding techniques and minimal materials, making it an enjoyable beginner friendly craft inspired by practical Pinterest ideas.
Idea 10: Necktie Fabric Garland
Execution Process
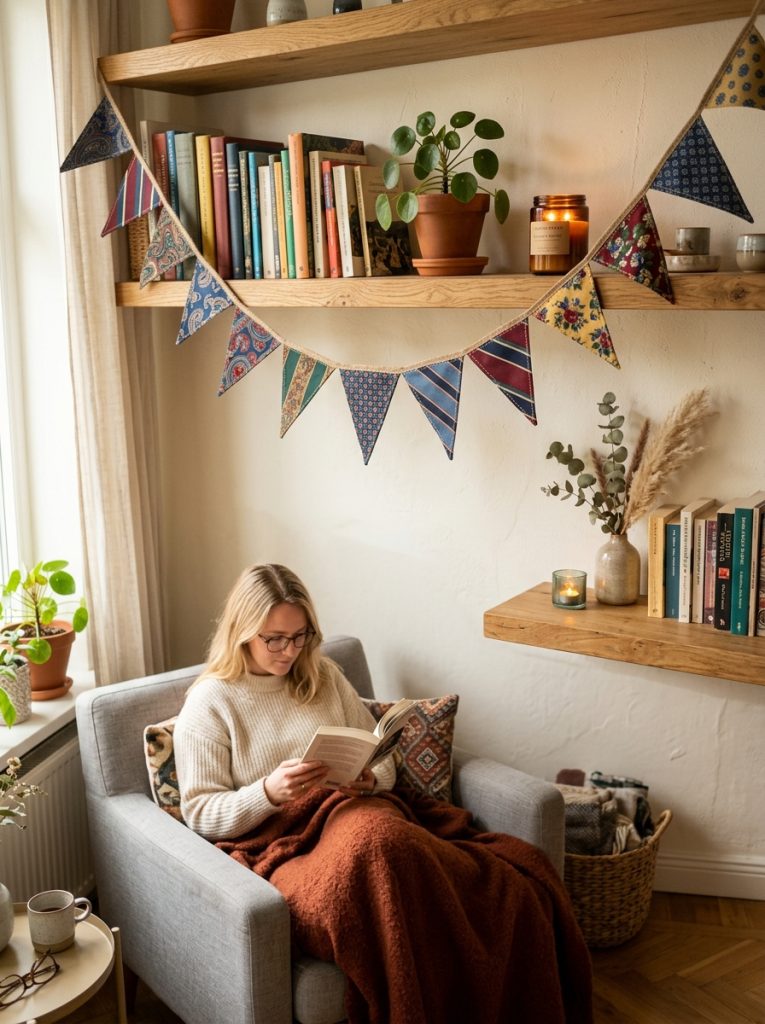
A decorative garland crafted from necktie fabric adds color and texture to shelves, reading corners, or celebration spaces. Cut neckties into matching pennants, triangles, or rectangular flags while preserving interesting fabric patterns whenever possible. Fold the top edge of each piece over sturdy cotton cord and secure it with stitching or fabric glue. Maintain equal spacing between flags to create a balanced finished design. Combining different textures and coordinated colors creates visual interest without appearing cluttered. The completed garland can remain displayed throughout the year or be adapted for seasonal themes by selecting different fabric combinations. This beginner friendly project highlights creativity while demonstrating how small fabric scraps can become attractive handmade decoration suitable for modern home decor and Pinterest inspiration.
Common Beginner Mistakes and How to Avoid Them
Many beginners begin cutting neckties without examining the internal construction, resulting in uneven fabric pieces or unnecessary waste. Always remove stitching carefully before flattening ties for larger projects. Another common mistake is skipping ironing, which makes measuring and sewing less accurate. Avoid using excessive fabric glue because it may soak through delicate materials and create visible marks. Planning the arrangement before permanent assembly helps balance colors and patterns effectively. Test stitching on leftover fabric scraps before working on finished pieces, especially when using silk or lightweight materials. Careful preparation and patience allow every creative project to achieve cleaner results while preserving the unique appearance of each necktie.
Practical Tips for Better Results
Organizing neckties by color, texture, and fabric type before starting improves project planning and simplifies design decisions. Sharp fabric scissors produce cleaner cuts and reduce fraying along delicate edges. Reinforce high-stress areas with additional stitching whenever projects will receive regular use, such as pillow covers or baskets. Save leftover tie scraps because they often become useful accents for smaller crafts or repairs. Press completed projects lightly after construction to improve presentation and remove minor wrinkles. Maintaining an organized workspace also reduces mistakes while keeping materials easily accessible throughout every DIY tutorial. These practical habits help beginners consistently produce attractive handmade creations.
Styling, Presentation, or Organization Ideas
Finished necktie crafts fit naturally into many decorating styles depending on color selection and arrangement. Bright patterned fabrics create playful accents in creative spaces, while neutral ties complement minimalist home decor and modern interiors. Display patchwork pillows alongside solid-colored cushions to highlight their detailed textures. Arrange decorated baskets together on open shelving for coordinated organization. Wreaths, garlands, and wall art can become focal points when displayed against simple backgrounds that emphasize the fabric patterns. Grouping similar projects creates visual harmony throughout a room while reinforcing the handmade aesthetic often featured in Pinterest inspiration collections.
Budget or Time Planning
Most DIY necktie projects remain affordable because the primary materials are repurposed from clothing already available in many households or thrift stores. Basic sewing supplies, fabric glue, and simple hand tools are usually sufficient for completing most ideas. Small projects such as coasters, gift bows, or plant pot wraps often require less than one hour, while larger items like patchwork pillow covers or woven table runners may take several hours depending on complexity. Preparing all materials before beginning reduces interruptions and improves efficiency. Careful planning allows several projects to be completed during a single crafting session while minimizing material waste and unnecessary expense.
Creative Expansion and Advanced Inspiration
After gaining confidence with basic techniques, combine several necktie crafting methods into larger decorative collections that share coordinated colors and patterns. Matching pillow covers, baskets, garlands, and wall art can create a unified room theme while celebrating sustainable handmade design. Experiment with quilting techniques, fabric weaving, layered textures, or mixed-material projects that incorporate denim, linen, or reclaimed wood alongside necktie fabrics. Recording successful measurements and layout ideas in a project notebook simplifies future DIY tutorials and encourages continued creativity. These advanced approaches demonstrate how recycled neckties can become versatile materials for long-lasting home decor, organization, and personalized handmade projects inspired by modern Pinterest trends.