10 Cut Shirt Designs DIY Ideas
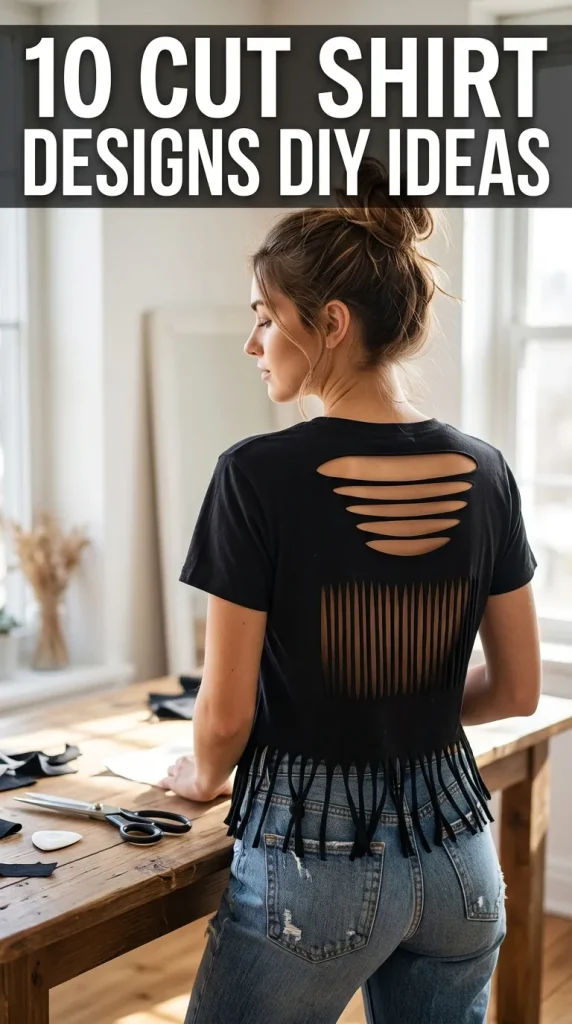
Cut shirt designs have become one of the most popular DIY fashion projects because they transform ordinary clothing into stylish, personalized pieces without requiring advanced sewing skills. A simple T-shirt can become a modern design with carefully placed cuts, knots, woven details, or fringe accents that suit different personal styles. Pinterest ideas continue to inspire beginners and experienced creators with creative projects that combine fashion, handmade craftsmanship, and budget-friendly customization. This guide explains practical techniques that are easy to follow while helping readers avoid unnecessary mistakes during the process. You will learn how to prepare your materials, plan each design, and complete ten unique cut shirt ideas using clear step-by-step methods. Every project focuses on creating clean, wearable results while encouraging creativity through simple modifications that fit modern casual fashion and aesthetic wardrobe inspiration.
Why This Idea Is Trending or Useful
DIY cut shirt projects continue to gain popularity because they combine creativity, affordability, and personal expression in one easy project. Instead of replacing old clothing, many people choose to redesign existing shirts into fashionable pieces suitable for casual wear, workouts, festivals, or summer outfits. Pinterest inspiration highlights modern design ideas that require only basic materials and minimal preparation, making them accessible for beginners. These projects also support sustainable habits by extending the life of clothing that might otherwise remain unused. Most techniques can be completed within a short period without specialized equipment, allowing anyone to experiment with different patterns and decorative effects. The wide variety of styles means every project can be adjusted to match minimalist style, bold decoration, or relaxed everyday fashion while remaining practical for different ages and skill levels.
Materials and Preparation
Before beginning any cut shirt project, prepare a clean workspace with good lighting and a flat cutting surface. Gather a cotton T-shirt, sharp fabric scissors, tailor’s chalk or washable fabric markers, a measuring tape, ruler, cutting mat, straight pins, and clips if needed for stability. Wash and dry the shirt first to remove shrinkage before making any cuts. Iron the fabric to eliminate wrinkles so measurements remain accurate throughout the creative project. Sketch the planned design lightly using chalk before cutting, especially for symmetrical patterns around the neckline, sleeves, or back. Planning each section carefully reduces mistakes and creates cleaner results. Testing cuts on an old practice shirt also helps beginners gain confidence before working on favorite garments. Careful preparation improves accuracy and ensures every DIY tutorial produces neat, wearable results.
Idea 1: Classic Fringe Hem Shirt
How to Create
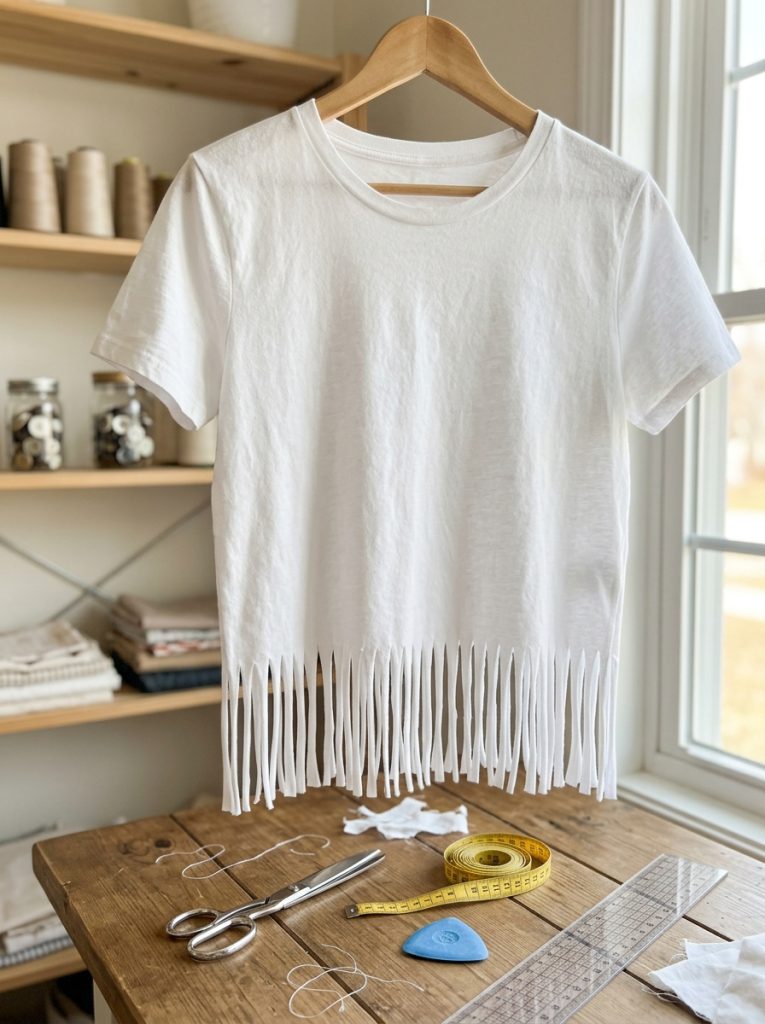
Transform a basic T-shirt into a relaxed fringe design by marking an even horizontal line several inches above the bottom hem. Using sharp fabric scissors, cut narrow vertical strips from the original hem to the marked guideline while keeping each strip similar in width. Stretch each fringe slightly after cutting so the fabric curls naturally for a finished appearance. The fringe can remain loose for casual style or be tied into simple knots for additional texture and decoration. This beginner friendly project works especially well with lightweight cotton shirts because the edges roll naturally without sewing. Maintain consistent spacing throughout the design to create balance and prevent uneven movement. Pairing the finished shirt with jeans or shorts creates an effortless modern look that fits many Pinterest ideas focused on casual fashion and handmade clothing customization.
Idea 2: Braided Back Cut Shirt
Step-by-Step Guide
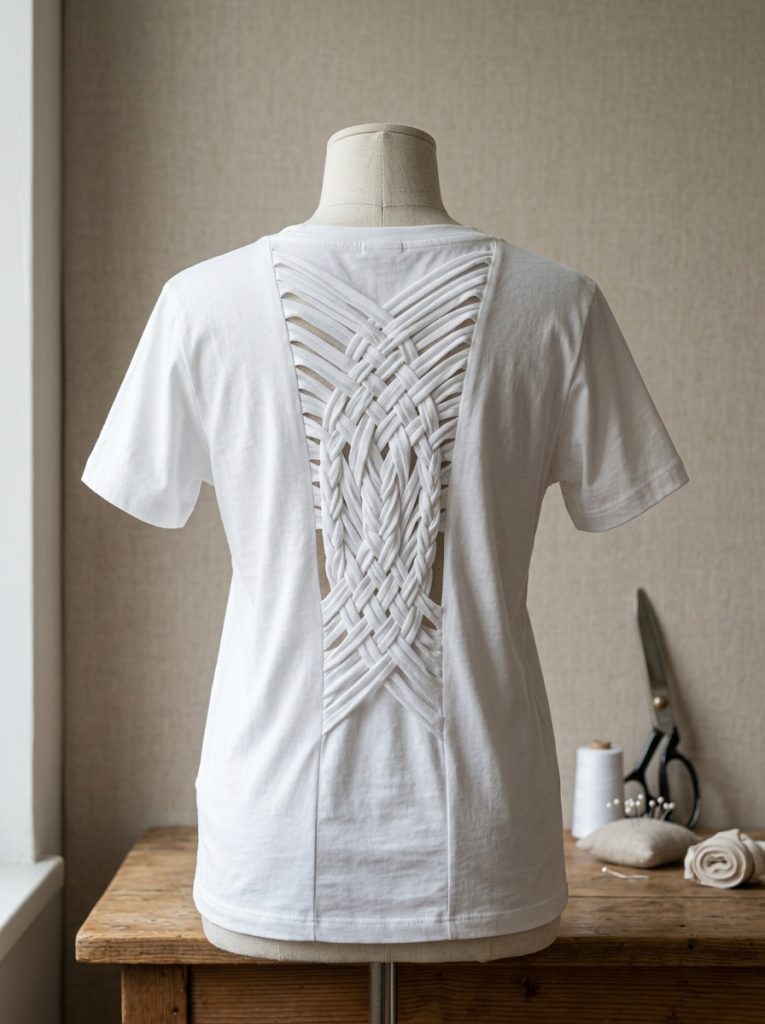
A braided back design creates visual interest while maintaining the original shape of the shirt from the front. Begin by drawing a centered vertical rectangle on the back panel, leaving generous fabric around the sides for support. Cut evenly spaced horizontal strips across the rectangle without cutting through the outer borders. Starting from the top, weave or braid the strips together by looping one through another until reaching the bottom. Pull gently to tighten each section while maintaining even tension throughout the pattern. The finished braid creates an attractive woven effect that appears detailed without requiring sewing skills. Smooth edges and symmetrical spacing improve the overall appearance and ensure comfortable wear. This creative project combines aesthetic appeal with simple execution, making it one of the most popular Pinterest inspiration ideas for beginners exploring DIY clothing transformation.
Idea 3: Shoulder Cut-Out Design
Setup Method
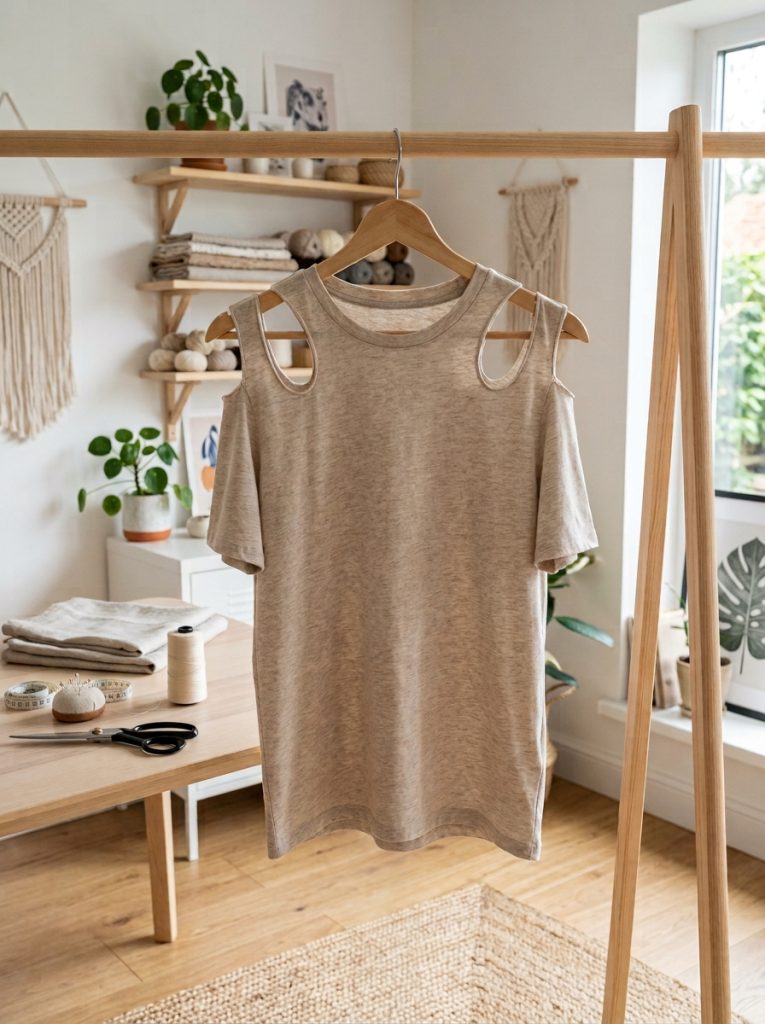
Create a fashionable shoulder cut-out by first identifying the natural shoulder seam and marking identical curved openings on both sides. Measure carefully before cutting to ensure symmetry and comfortable placement. Cut gradually using small scissor movements instead of long strokes, which provide better control over curved shapes. Try the shirt on after the initial cut to check positioning before enlarging the openings. If desired, add small decorative knots or narrow braided strips beside each cut-out for additional handmade detail. Keeping the openings moderate maintains durability while creating an attractive balance between coverage and style. This design works well on fitted or oversized shirts and complements modern minimalist style with clean lines rather than excessive decoration. Careful planning ensures the final design remains comfortable for everyday wear while reflecting current Pinterest trends.
Idea 4: Side Lace-Up Shirt
How to Make
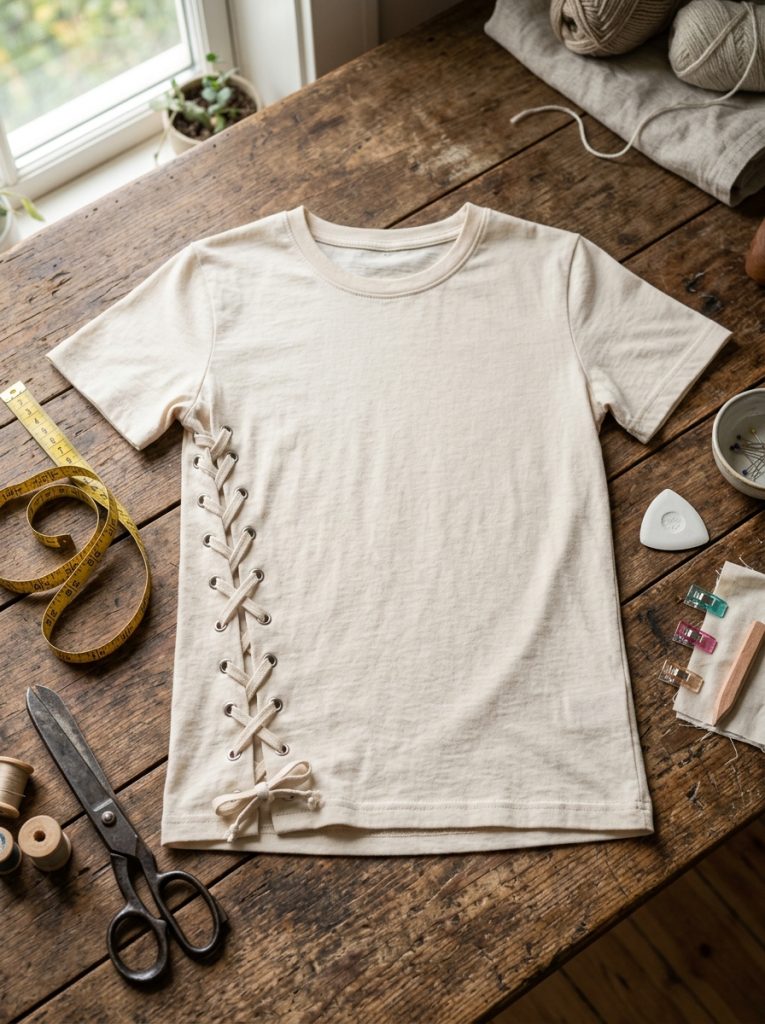
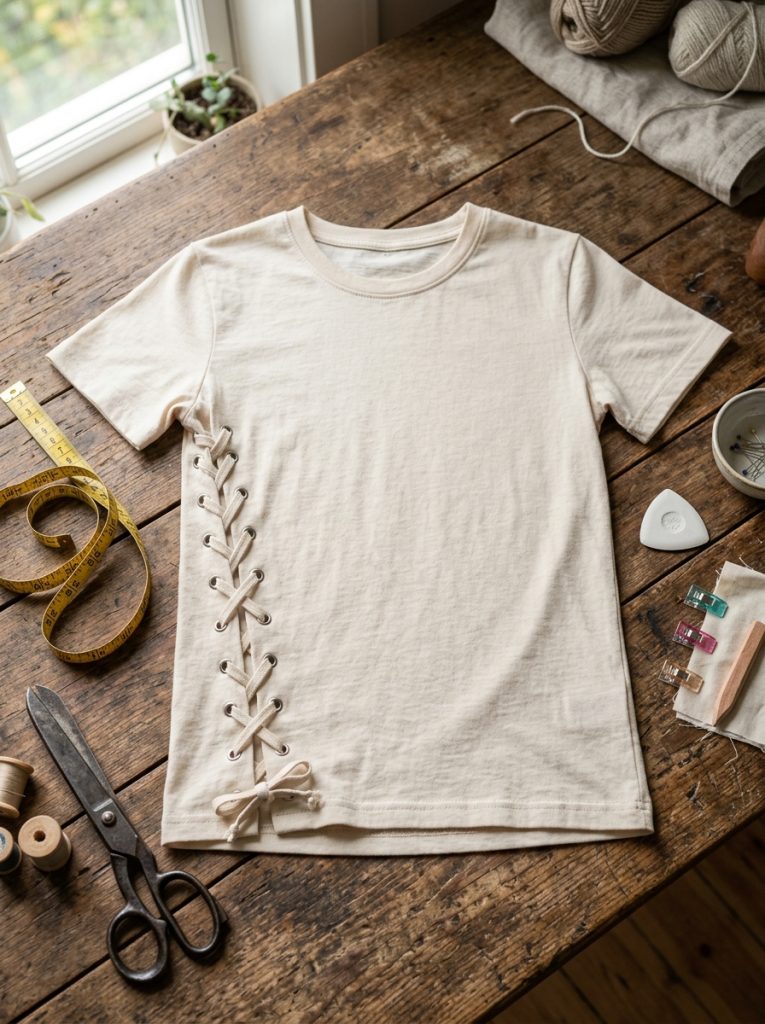
The side lace-up style transforms a plain shirt into a stylish piece with adjustable detailing. Begin by cutting narrow vertical openings along one side seam while leaving enough fabric between each opening for strength. Reinforce spacing by measuring equal distances before cutting. Thread a long fabric strip or matching jersey cord through the openings using a crisscross pattern similar to shoe laces. Tighten gradually until the desired fit is achieved without pulling excessively on the fabric. The lace-up feature allows the shirt to be adjusted for different body shapes while adding texture and visual interest. Smooth, evenly spaced openings create a professional appearance and improve durability during regular use. This DIY tutorial offers creative ideas for customizing oversized shirts into more fitted silhouettes while maintaining flexibility and comfort.
Idea 5: Geometric Back Panel Design
Execution Process
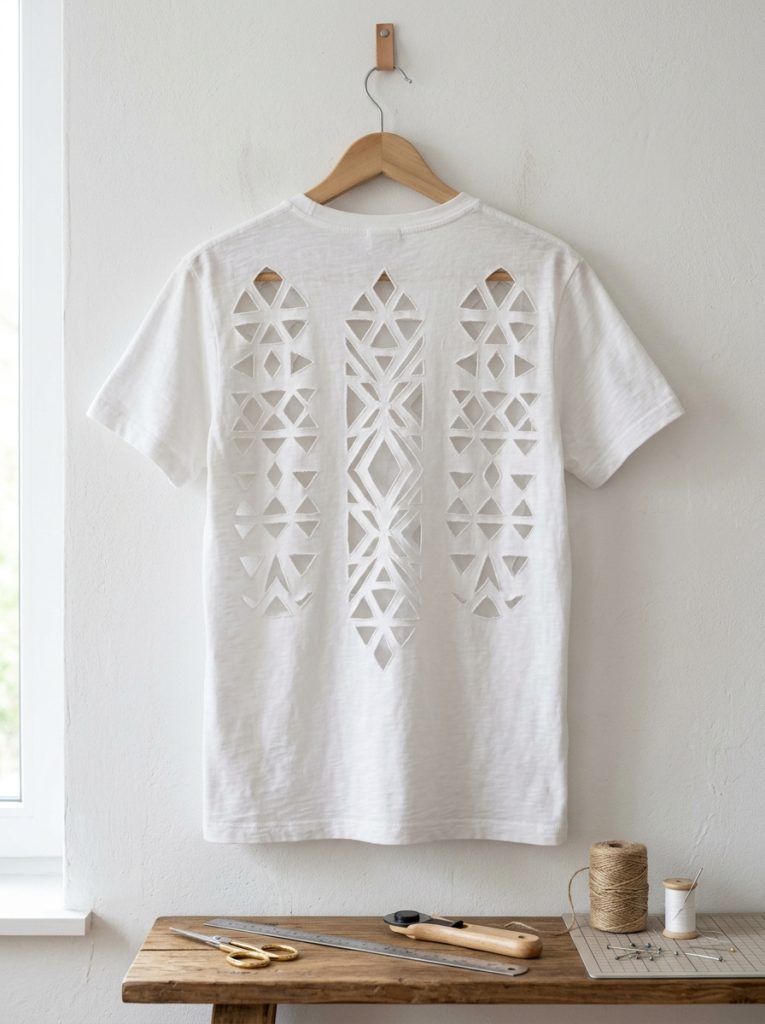
A geometric cut pattern creates an eye-catching centerpiece using carefully measured shapes instead of random cuts. Begin by drawing triangles, diamonds, or parallel lines across the back panel with tailor’s chalk. Measure every section using a ruler to maintain symmetry before making precise cuts with sharp scissors. Remove selected interior pieces while leaving connecting fabric strips intact to preserve structural support. Stretch the shirt gently after cutting so the fabric edges curl inward naturally, producing a cleaner finish without sewing. Simple geometric layouts often create stronger visual impact than highly complicated patterns because they emphasize clean modern design. This creative project encourages careful planning while introducing beginners to more advanced DIY techniques using only basic materials and accurate measurements.
Idea 6: Knotted Front Crop Shirt
How to Create
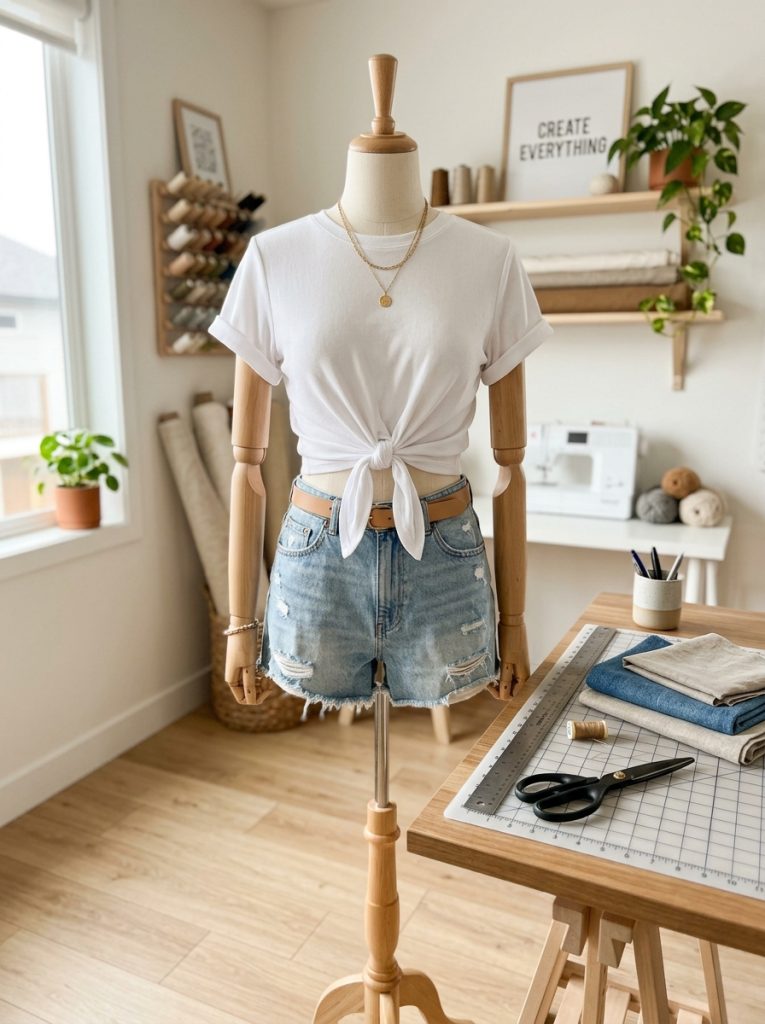
A front knot crop design offers a simple way to refresh oversized shirts without permanent shortening. Mark the desired cropped length before trimming the front portion slightly higher than the back. Cut a centered vertical slit at the front hem, creating two equal fabric tails. Tie these tails into a secure knot while adjusting the tension until the shirt sits comfortably. The knot naturally shapes the waistline and creates a balanced silhouette suitable for casual outfits. Beginners should remove fabric gradually because additional trimming is always possible after fitting. This project requires very few materials yet produces an updated appearance that works well with high-waisted skirts, shorts, or jeans. The finished design combines budget ideas with aesthetic fashion while demonstrating how small modifications can significantly change the overall look of a basic shirt.
Idea 7: Ladder Sleeve Pattern
Step-by-Step Guide
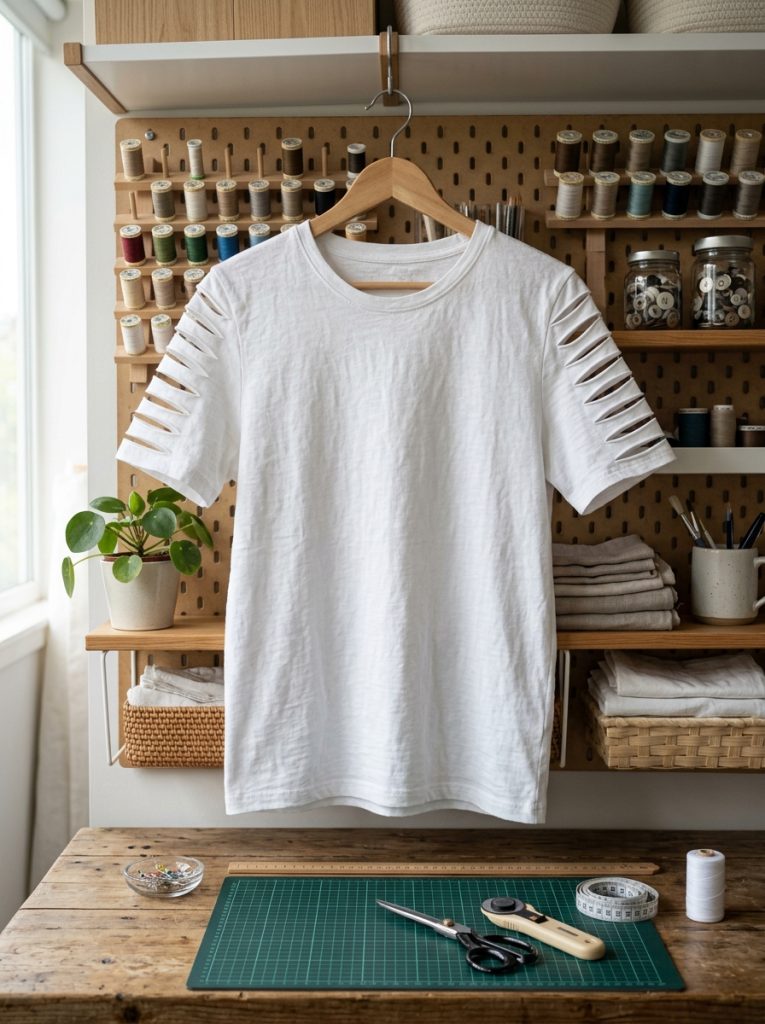
The ladder sleeve design adds decorative texture while keeping most of the shirt intact. Fold each sleeve flat and draw evenly spaced horizontal cutting lines across the outer section without reaching the seam edges. Carefully cut along each marked line, leaving narrow fabric bridges between the openings. Stretch the sleeve gently after cutting so the openings widen slightly and form a ladder-like pattern. Maintaining equal spacing creates a polished appearance and prevents uneven stretching during wear. This design introduces breathable ventilation while preserving overall comfort and durability. The technique works particularly well on lightweight cotton fabrics that naturally curl at the cut edges. It provides a practical balance between fashionable decoration and everyday functionality, making it a favorite DIY tutorial for beginner friendly clothing customization.
Idea 8: Heart Cut-Out Back Design
How to Make
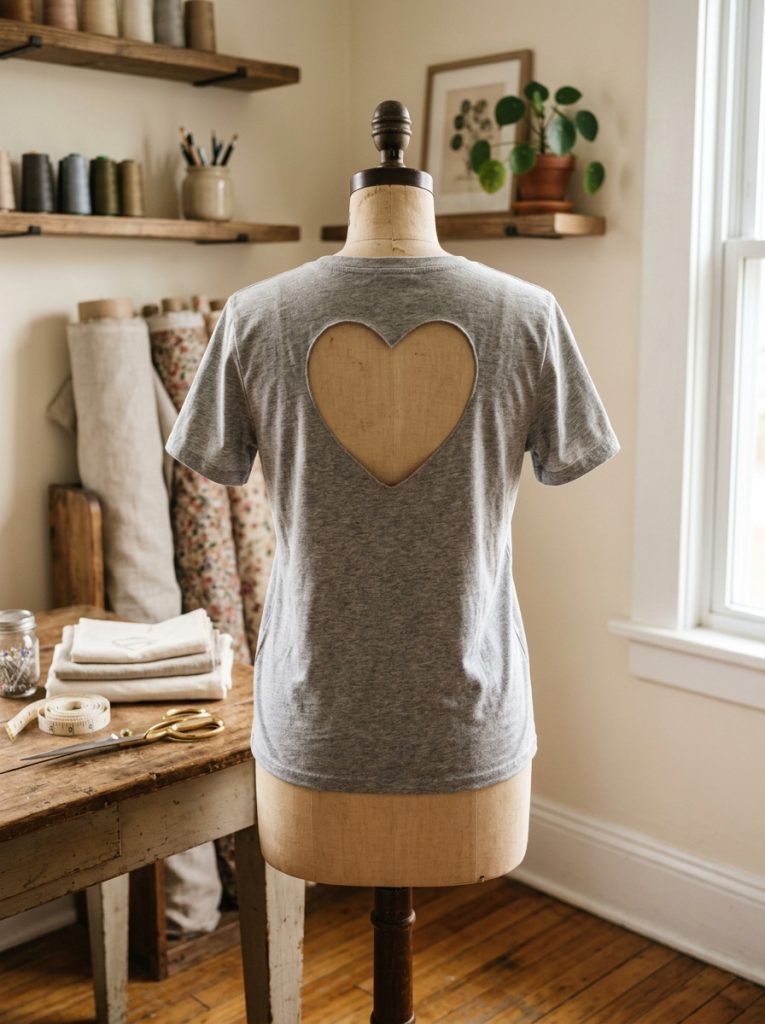
A heart-shaped cut-out creates a decorative focal point while maintaining a simple overall design. Fold the shirt vertically down the center so both halves remain perfectly aligned. Draw half of the heart along the fold before cutting carefully through both layers simultaneously. Opening the fabric reveals a symmetrical heart shape positioned in the center of the back. Smooth the edges gently and stretch the fabric slightly to reduce sharp cut lines. Beginners should begin with a smaller template because enlarging the opening later is easier than repairing an oversized cut. Decorative braided straps across the heart opening can also provide additional support while enhancing the overall aesthetic. This project combines handmade creativity with thoughtful planning and produces a unique personalized shirt suitable for casual fashion inspiration.
Idea 9: Woven Side Panel Shirt
Setup Method
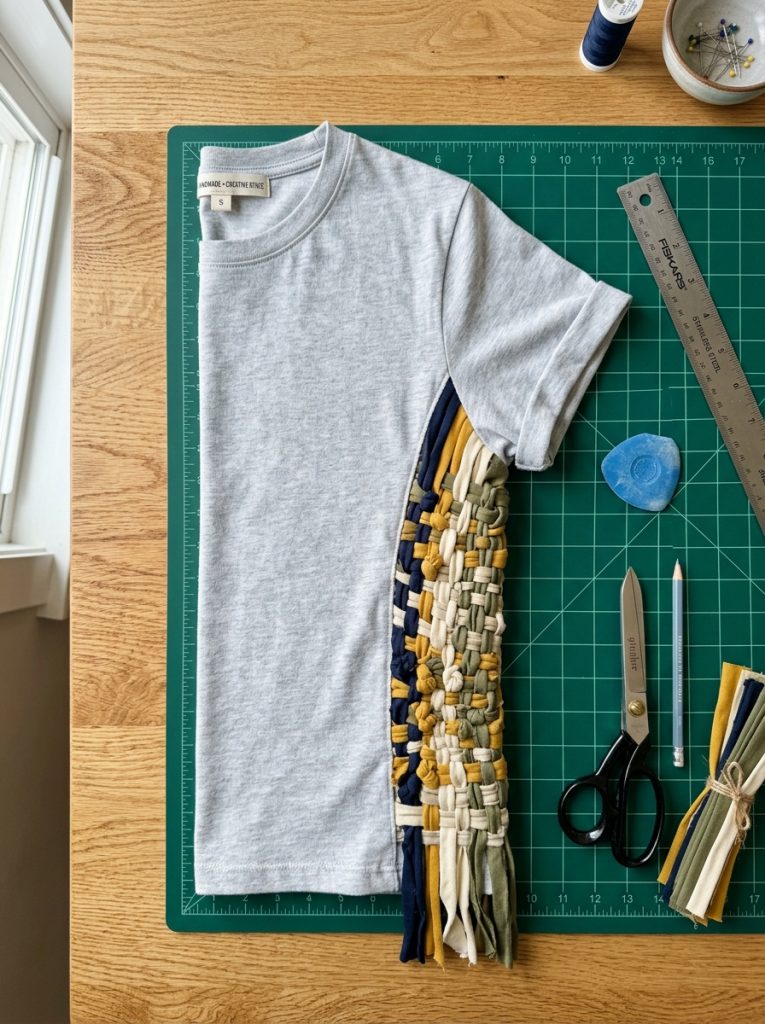
A woven side panel creates a detailed appearance using simple weaving rather than sewing. Draw two parallel vertical lines on one side of the shirt and cut evenly spaced horizontal slits between them. Leave enough surrounding fabric to preserve strength throughout the panel. Beginning at the top, weave each strip through the next in a repeating pattern until reaching the bottom. Pull gently after completing the weaving to tighten the design and create consistent spacing. This method introduces texture while preserving flexibility and comfort during movement. Accurate measurements remain important because uneven strip widths affect the final appearance. The finished shirt demonstrates how organization and careful planning contribute to creative ideas that appear much more advanced than the techniques actually required.
Idea 10: Off-Shoulder Wide Neck Shirt
Execution Process
Transform a crew neck shirt into an elegant off-shoulder style by drawing a wide curved neckline before making any cuts. Begin conservatively because additional trimming can always widen the opening later. Use smooth continuous cuts to prevent jagged edges, then stretch the neckline gently so the fabric rolls inward naturally. Test the fit after each adjustment to ensure the shirt remains comfortable without slipping excessively from the shoulders. Optional sleeve trimming can further enhance the relaxed style while maintaining balance throughout the design. This project requires minimal materials and is suitable for beginners seeking a quick yet noticeable clothing transformation. The finished result complements modern design trends by combining simplicity, comfort, and understated decoration into a wearable handmade fashion piece.
Common Beginner Mistakes and How to Avoid Them
Many first-time DIY creators cut too much fabric at once, making adjustments impossible later. Always begin with smaller openings and enlarge them gradually after testing the fit. Another common mistake involves skipping measurements, resulting in uneven designs that appear unbalanced. Using tailor’s chalk before cutting improves accuracy and allows corrections before permanent changes are made. Dull scissors often produce rough edges that weaken the fabric and reduce the quality of the finished project. Washing shirts before customization prevents unexpected shrinking after the design is complete. Beginners should also avoid working on unstable surfaces because shifting fabric affects precision. Taking time to plan each creative project carefully leads to cleaner, more durable results while improving confidence with future Pinterest ideas and handmade clothing tutorials.
Practical Tips for Better Results
Sharp fabric scissors remain one of the most valuable tools for producing clean, professional-looking cuts. Practice unfamiliar techniques on old shirts before customizing favorite clothing. Stretch freshly cut edges gently to create smooth rolled finishes that naturally improve appearance without additional sewing. Maintain consistent measurements using rulers and fabric markers instead of estimating distances by eye. Photograph the planned design before cutting so adjustments remain easy if changes become necessary during the project. Keep workspace lighting bright enough to identify chalk markings clearly throughout the process. Ironing the shirt before beginning eliminates wrinkles that distort measurements and pattern alignment. Careful organization of materials and thoughtful planning significantly improve the quality, durability, and overall aesthetic of every DIY clothing customization project.
Styling, Presentation, or Organization Ideas
Finished cut shirts can be styled in many different ways depending on the design and occasion. Pair fringe shirts with denim shorts for relaxed summer outfits, while geometric or braided designs complement fitted jeans and simple accessories. Layering contrasting tank tops beneath open-back or woven designs creates additional visual depth without overwhelming the shirt itself. Neutral-colored bottoms help decorative cuts remain the main focal point of the outfit. Organize completed DIY shirts by folding them carefully rather than hanging delicate woven sections that may stretch over time. Photograph each finished project against clean backgrounds with natural lighting to create attractive Pinterest inspiration images. Consistent styling and presentation highlight the handmade craftsmanship while making creative ideas easier for others to recreate through clear visual examples.
Budget or Time Planning
Most cut shirt DIY projects require only inexpensive tools that many households already own, making them excellent budget ideas for creative fashion updates. Basic cotton shirts purchased secondhand or repurposed from existing wardrobes help reduce overall costs while supporting sustainable clothing practices. Simple projects such as fringe hems or off-shoulder necklines can often be completed within thirty to forty-five minutes, while woven or braided patterns may require additional time for careful alignment. Planning measurements before beginning reduces wasted fabric and prevents costly mistakes. Preparing multiple shirts during one crafting session also improves efficiency because tools and materials remain organized throughout the process. Careful scheduling allows beginners to complete projects without rushing, leading to cleaner results and greater satisfaction with the finished designs.
Creative Expansion and Advanced Inspiration
After mastering basic cut shirt techniques, creators can combine multiple methods into one customized garment for a more distinctive appearance. A shirt may include braided back details together with ladder sleeves or a knotted front paired with side lace-up accents. Experimenting with symmetrical geometric layouts introduces more advanced planning while maintaining clean design principles. Layering contrasting fabrics beneath cut openings also creates visual depth without increasing construction difficulty. Seasonal color coordination and thoughtful decoration can further personalize each project while preserving comfort and practicality. Keeping a notebook of successful measurements and design sketches helps improve future DIY tutorials and encourages continued creativity. These advanced approaches demonstrate how simple techniques can evolve into highly personalized handmade fashion inspired by modern Pinterest trends and individual artistic vision.